Oh okay, sorry I misread that.
Can’t see how that would hurt anything. Might give a little more support to those shelves.
what kind of flexible tubing are you referring to? I think the biggest challenge with something flexible is keep everything at the proper pitch when set horizontally.
If you are only referring to the overflow portion of tub, I would recommend installing the drain assembly before setting the tub. this way you can make the connection having the tub at eye level than trying to connect in a cramped space.
If you haven’t already check out this tutorial and around the 8 minute mark in video I go over installing the drain assembly before setting tub
I have pulled up many tubs & shower pans where that was used, and I don’t think it really did much for support. Some of the pans I pulled needed replaced because of a crack (great stuff used instead of mortar)
I also have never seen a recommendation from a manufacture to do that.
This tub can be set with a mortar bed. I would mix the mortar fairly loose if you are not needing to overcome an unlevel floor. This way you can easily get the tub to set in place.
That being said, this tub is not requiring mortar unless its unlevel. So this may be a fairly solid tub to begin with and may not feel the need to mortar it in place
Hey Melissa
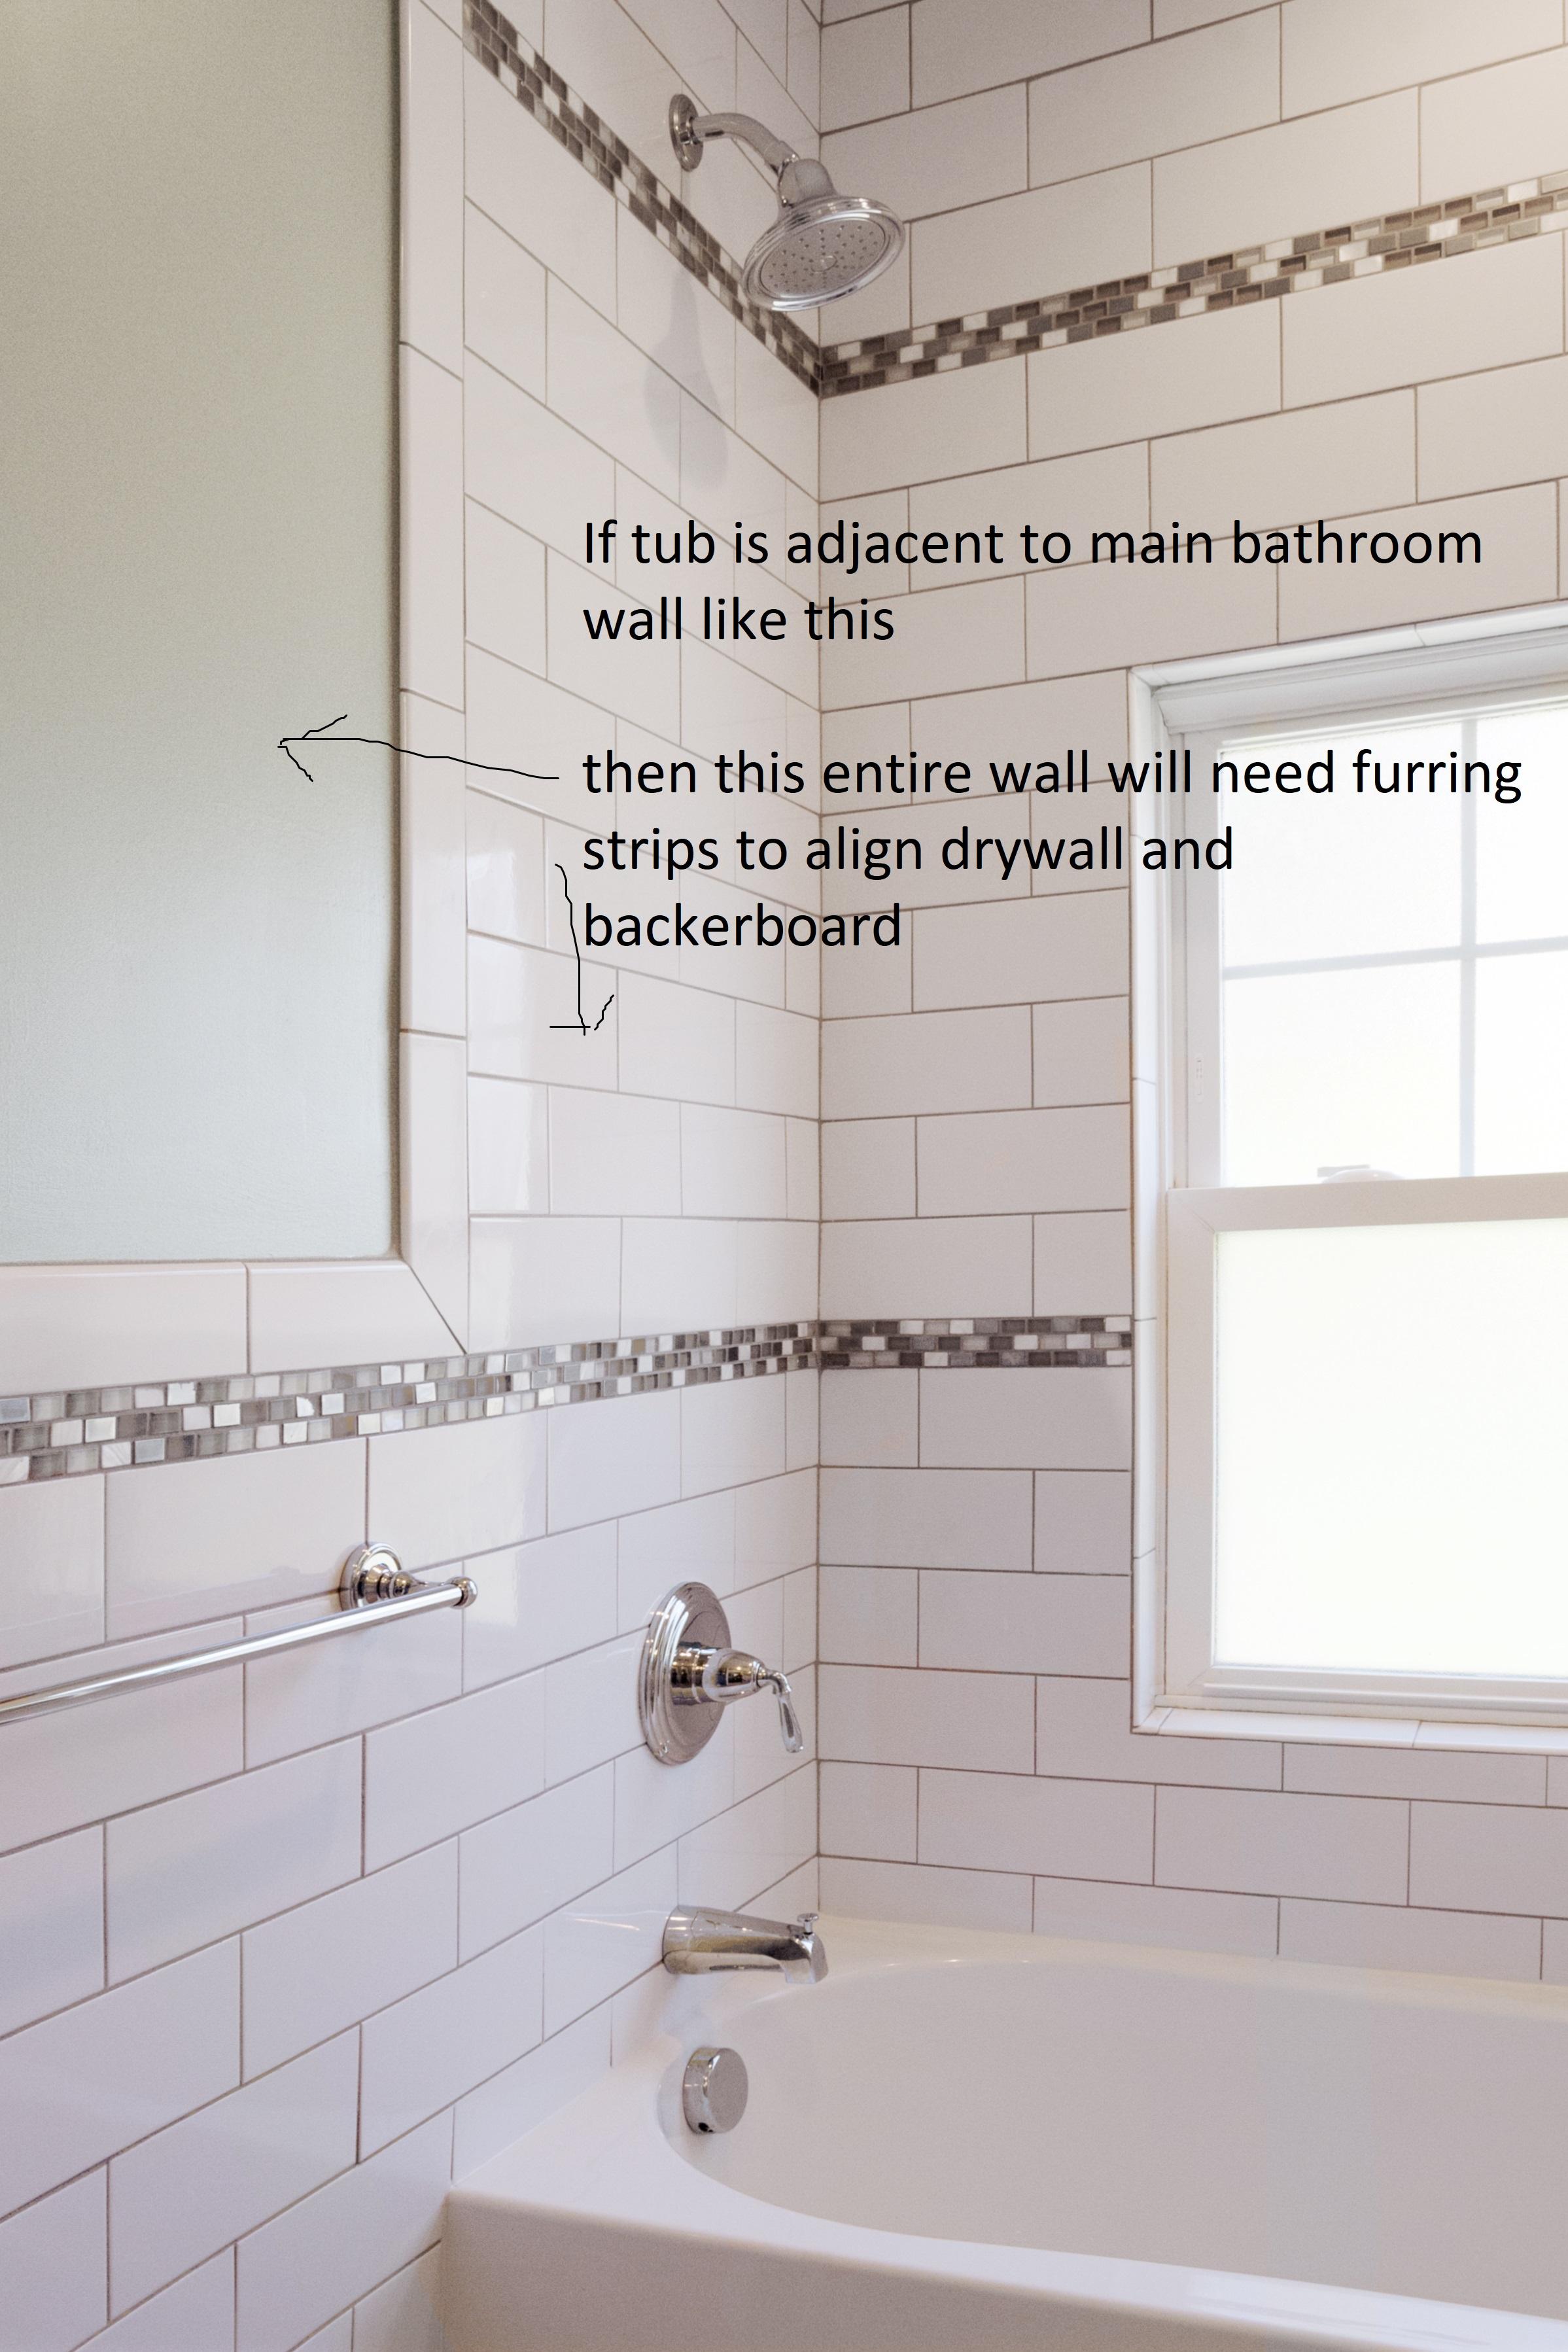
I think most furring strips are indeed 5/8″ or 3/4″
You could possibly find something in the trim aisle that would work
Like a pine standard base trim or something. Really won’t matter that if the trim over hangs the studs width wise. Just more area to screw in backerboard
Otherwise, a sheet of 1/2″ plywood and ripping down with a circular saw would be the cheapest route
How is your tub configured? Are both main walls on either side of bath enclosing the tub? If so you will need to fur out the entire wall that you are making up that 1/2″, in order to keep the drywall and backboard aligned
Hey Steve,
Great question.
In my experience, most metal tubs that are NOT caste iron, are usually at a cheaper price point and have a very thin layer of porcelain coating. This thin layer can be easily chipped if not careful during installation….Drop a pair of channel locks on the tub rim and you can easily have a chip (personal experience, lol). They almost always have a very course traction surface on the bottom of tub that is tough to keep clean too.
Caste iron tubs have a very thick porcelain coating that really will outlast anything else in a bathroom remodel. They are very cumbersome to install though
I think fiberglass and Acrylic tubs are the best tubs in most situations and particularly yours since you are wanting a complete kit and not tiling walls.
I’m fairly limited on experience on all the brands when it comes to tubs with shower surrounds, but I tend to like the fiberglass surrounds and tub kits verses the fairly thin acrylic ones that Sterling will most likely be made of.
Not sure of your location, but I was impressed with this company when I installed a few of their tubs and surrounds:
http://www.clarionbathware.com/
They are fiberglass constructed with what I think is an acrylic finish (or it seemed to be just like acrylic material)
You have to be careful on some of these acrylic tub & shower kits. Some are getting really, really cheap in their construction. I picked up a kohler acrylic tub last year from home depot that I was absolutely surprised how thin the tub was constructed. If I stood on the tub rim, it would flex to the point that I thought it would break from just my weight.
I like that American standard has a lifetime warranty….And I have not yet installed the Ovation model, but every other american standard Item always seems to made well
One other point to consider, is how the tub is to be installed. I personally like the tubs where I have the option to used mortar to set the tub verses tubs that have a foam bottom that prohibit you from doing that. Using mortar gives a very solid feel to the tub and is a better installation in my opinion.
The american standard Ovation calls for a mortar bed installation!
hope this helps
Great Question!
I think the best method and order to tile a shower is to:
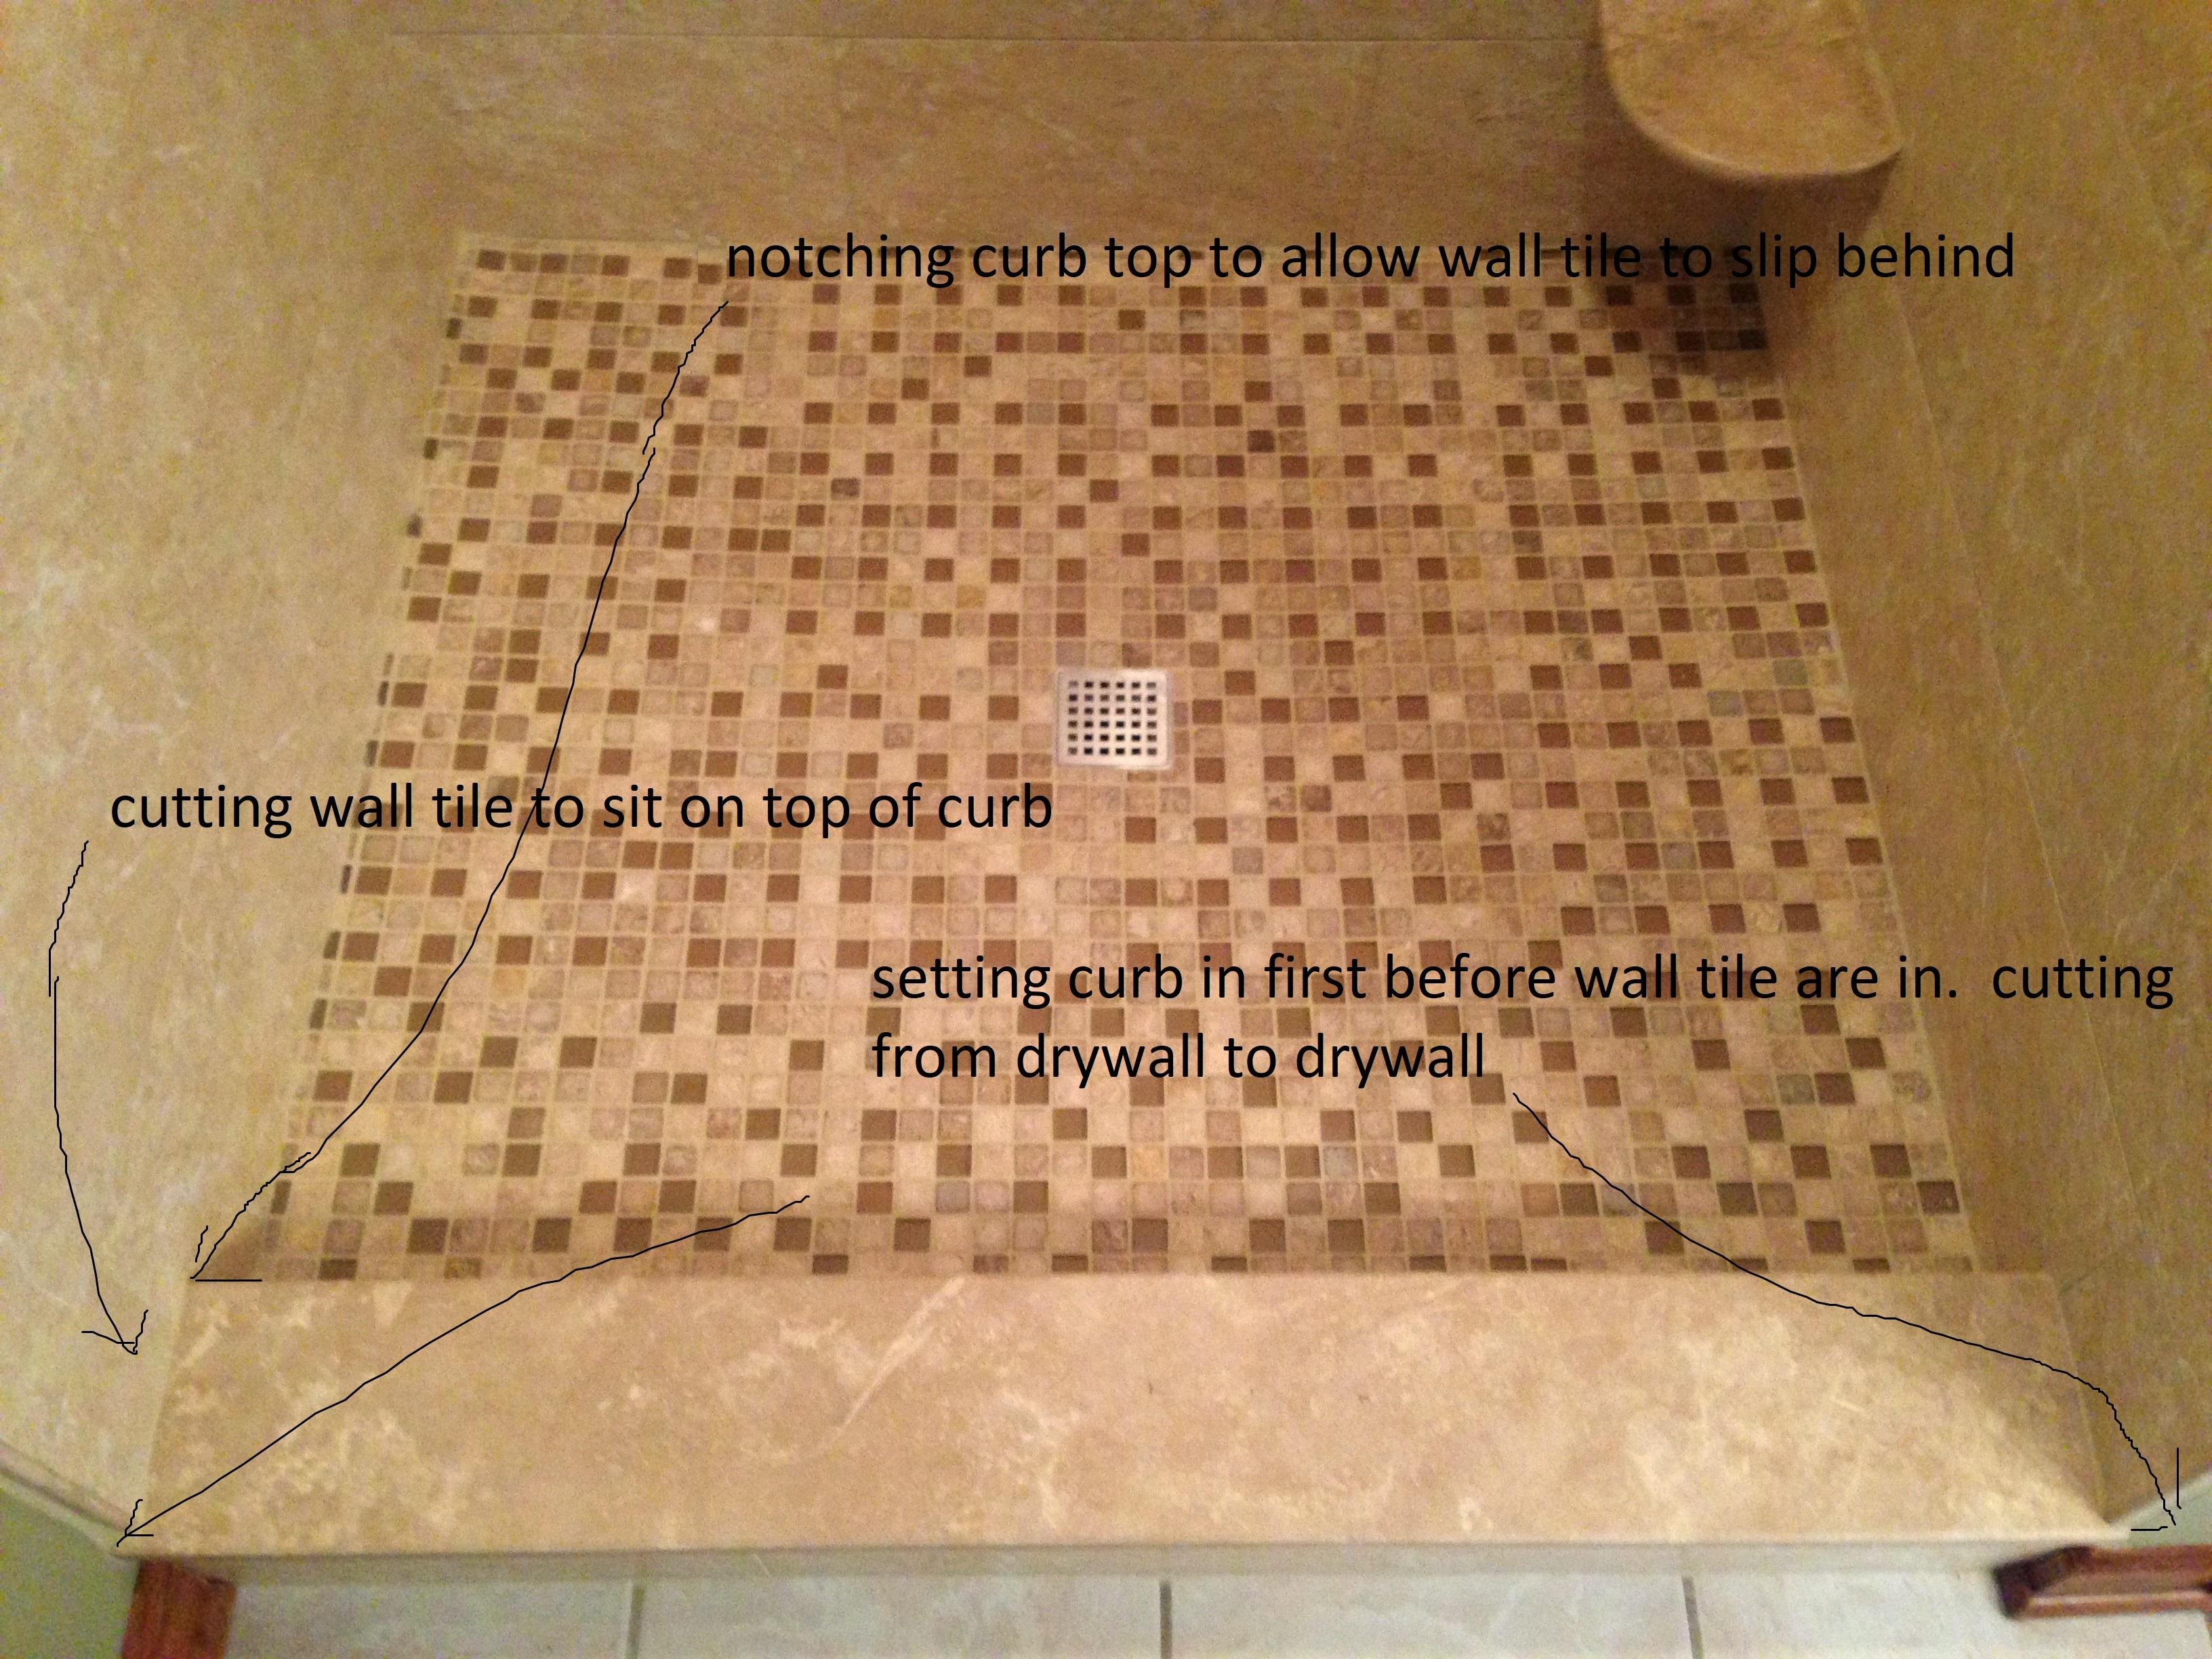
4. Main floor tile (can be done really anytime if installing a shower with a curb; with a curbless entry, start with installing main floor tile)
5. Finish side of curb to main floor
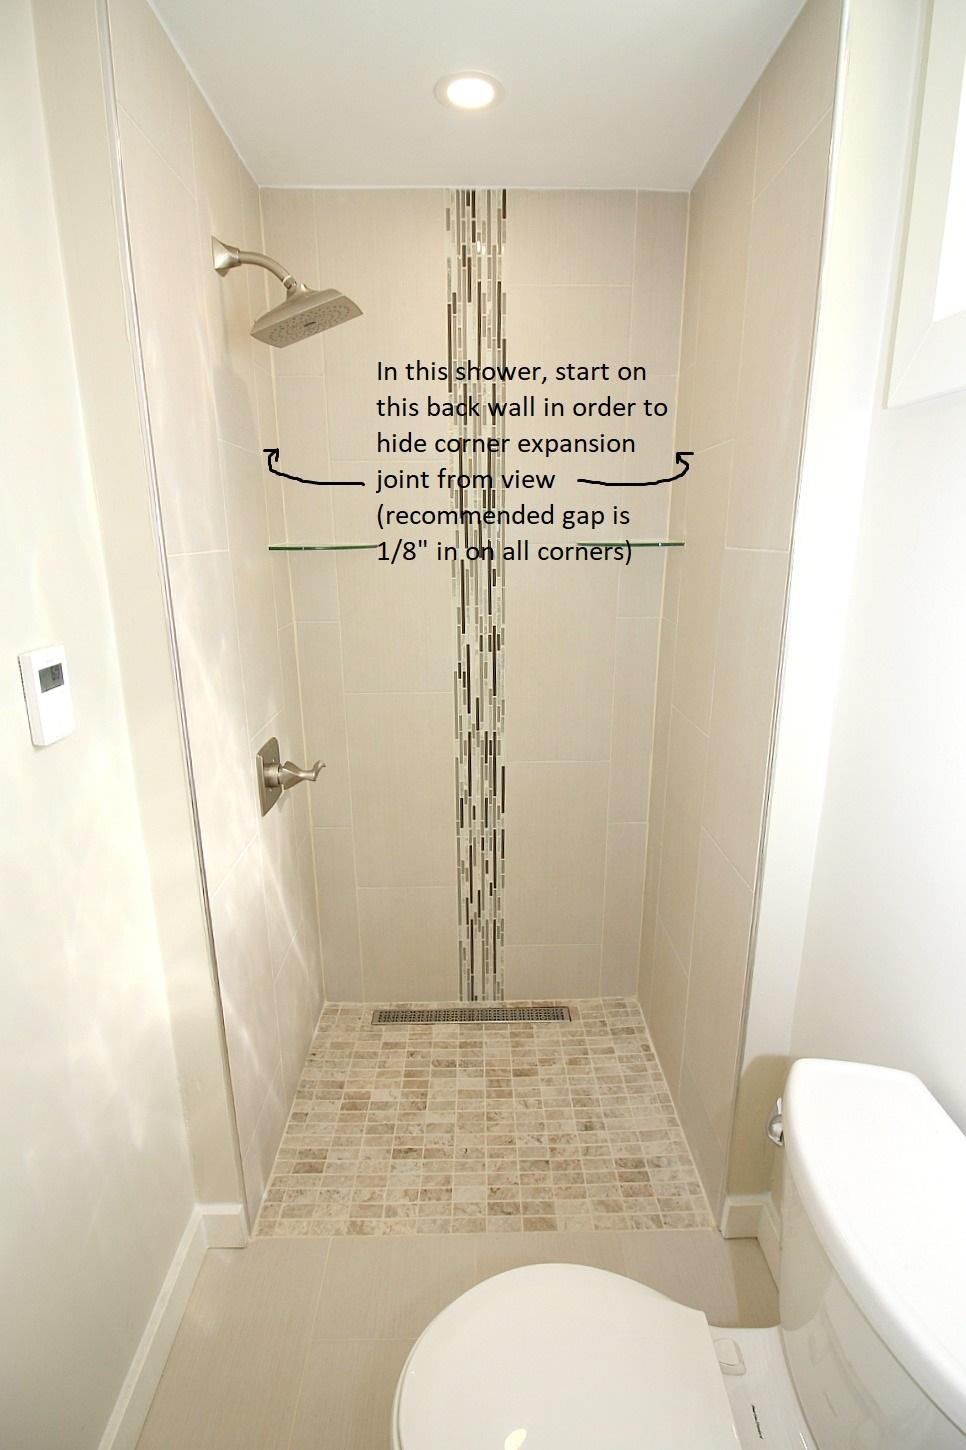
And with your Neo- angle configuration. It will be easiest to install the curb after the wall tile is set and then simply butt the solid curb top to the tile. keeping the angle cuts to fit closely is more important than trying to cut the wall tile over the curb top. And in this circumstance, it would be best to have the wall tile extend a 1/2″ or so past where you curb will end, so that the curb will look nicely butted to it.
What was the kind of tile you plan to install? Does it have a bullnose?
Any clarifications let me know
Hey Kayse,
Great question
Trowel size depends on a few factors
Smaller tile require less thinset to achieve full coverage and makes things eaiser, and if the thickness of thinset doesn’t exceed the thickness of tile it help prevent too much thinset from oozing out of joints when setting (mostly pertains to smaller mosaic tiles on a sheet)
For installing membranes, the size trowel will be specified by manufacture
Generally, I like using these trowels for installing these sized tiles:
I typically use a bigger trowel on a floor so that you have a better ability to eliminate lippage and compensate for any uneven floor areas
A bathroom does typically require a few trowel sizes to accomplish things
If you use too large sized trowel for the membranes…you will end up with a lot of build up making it tough to flatten out, so I would suggest sticking with the manufactures recommendation
Hope this helps
Hey Kayse,
Thanks for posting.
So the best tool to flatten out the leftover thinset is to use a grinder wheel like this dewalt one:
This is a fairly dusty thing to use…..so have a shop vac near by and/or purchase a dust guard for it. https://amzn.to/2GS3kf7
Minor low spots. I would recommend using a floor patch like this:
https://www.homedepot.com/p/Henry-547-25-lb-Universal-Patch-and-Skimcoat-12158/100189852
If its really bad and you don’t think simply patching areas will work, you could floor level the entire bath if you can afford the space.
Normally you want to have a minimum 1/4″ when floating the floor with leveler, anything thinner will make it tough to spread.
I really like leveler from ARDEX, but most levelers at the box stores work great if mixed to specifications.
It sounds like grinding and patching might be all you need though And if the low spots are under a 1/4″ I would simply fill with thinset when installing schluter ditra. (if that’s what you plan to use for under tile)
Any pictures could help to evaluate the situation.
thanks
Hey Tony,
Looks like a great plan and layout there.
Wedi is a great and easy system for that configuration. The pan itself will be 36″ x 48″ so you will need to cut it down if your looking to have the end of curbs be at that dimension, otherwise it will come out 37 1/2″ x 49 1/2″ with the 2″ lean curb and 40″ x 52″ with the full 4 1/2″ wide curb
So weight of the glass will have no effect on either curb. Once the tile is installed with thinset…the curbs will be super solid.
I would suggest cutting the curbs on a chop saw and cut them at a 45 degree angle and then use the wedi sealant to join them together into the rabbit joint (sealant fully in rabbit joint too)
I personally like the thinner curb. If you use a solid surface top like marble or travertine, you can use a 4″ wide pieces rather than a wider 6 1/2″ piece with the full curb. So it really up to you on how you plan to finish it
Lately, I have been using schluter edging and tile. Hopefully you can see this one in the picture attached.
As for tiling it, it would be easier to cut the tile on a 45 and start at corner and work back to wall.
Easiest is a solid top though, but that is more of a style decision. This one is a full wedi curb with 6 1/2″ travertine solid curb tops
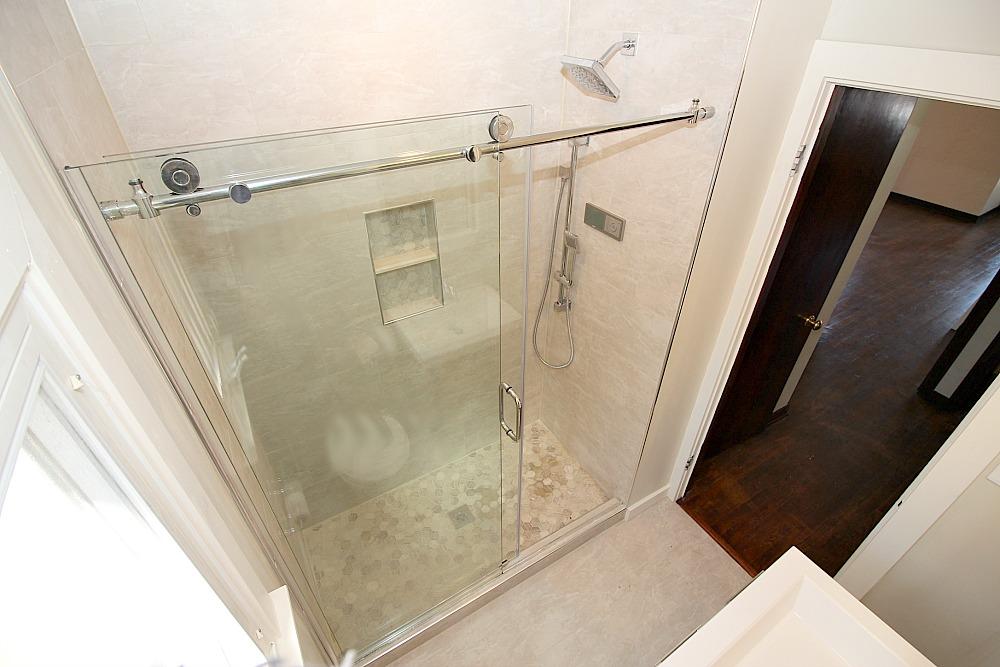
If you are not getting the glass custom ordered, I would recommend finding the glass enclosure you are going to install and make sure you configure the pan and curb placement to fit the enclosure properly.
A site a think has a lot of great options is http://www.faucetdirect.com
Hope this helps
Looking rock solid Ward!
Sharkbites are awesome! But at least here in PA code does not allow them to be buried in a wall or anywhere you do not have access to it.
I personally have never had an issue with any sharkbite (other then when I reused a cap dozens of times and wore out the “shark” part of the fitting)
and I have used them in many areas that you can see them…..but may never be able to replace or doing anything with them without redoing a lot
So its really up to you, code, and really how comfortable you are with them
I agree the crimping tool is an expense…..but with as much of what you are redoing, I’m not sure how much cheaper it’ll be? most of those sharkbite fittings are $5-8
This pex crimper won’t make this decision any easier, but is my favorite one. https://amzn.to/2GISjwh
The ones you get at the box stores are okay…..but kind of cheaply made and sometimes harder to square up and crimp correctly. Probably the more economical choice if not planning to do a lot more pex projects
On the back burner? they must not have it in stock I guess?
Wedi is the easiest curbless system that I have used. I am not sure of another curbless system that would be able to be cut down to the shape of your shower….. Other ones that I have used could only be cut down a few inches, plus required many more steps to get waterproofed
Hopefully they can get that in for you!
Hey Ward
you are very detailed with your layout! Doing a great job with that
So:
1. Definitely adapt to pex if you can. I usually solder on pex adapters where they enter the bathroom and install all new pex to all of the fixtures. Much easier this way
2. Bench depths vary, but I’d say for a corner bench, if you can make it 16″ deep from corner to front of bench that would be something you can actually sit on. I would also suggest framing the bench and waterproofing with 1/2″ wedi, unless you want to spend the extra $$ on 2″ wedi or the wedi corner seat. https://amzn.to/2GH57Dp
3. As far as the subfloor. when I’m in that situation I do what jeff is suggesting by installing 2×6’s screwing or toenailing into the joist underneath wall. you will need to notch out the 2 x 6’s to go over your pipe and buffer the existing subfloor with another layer of 3/4″ in order to get your new subfloor to the joist height for a wedi curbless shower.
you should be able to grab the 2×6 with a 3″ screw through bottom plate to keep it in place while you toe nail it.
I always apply glue to these framing members so that it glues to the bottom of subfloor too.
I’ve attached notes to attached image
Let me know if there is any confusion on this
thanks
steve