Bathroom Repair Tutor – Revised 120922 › Forums › Showers › Curbless shower
WOOHOO! I get to make the very first post ever in the whole forums. I thought I would get started by backing up to the beginning. I’m getting ready to go to work so I may have to finish writing this from there. It all started with an unhappy wife because we have very hard water and we couldn’t keep the shower door clean. We could make it look better but it doesn’t last. We have a big laundry room that partly just collects things. My idea years ago was to take part of the laundry room and do something with a shower and walk in closet but I wasn’t sure about a plan and after awhile it kind of dies out. Fast forward to this year and my wife is fed up again and wants to use the tax return to get something done. Well I have to go now, hopefully I can finish this at work tonight and start some conversations.
So I’m at work now, I know but I’m in maintenance and when the building is running we are in a holding pattern waiting for something to happen.
So back to the story. My wife finds a guy and we have him stop over and show him what we have in mind. He seems willing and able so we agree to start soon. He has us stop by a business and look at so products. Well when we get there the woman he has us speak to acts like she doesn’t know him, hasn’t heard of us, nothing. So now I have a bad feeling. I mope around a couple days then start looking at videos on YouTube. That’s how I found out about BRT, and WEDI. Well I talk to that contractor again and he is very upset that I’m not going to use him and wants me to meet him at the business, so I do. I really believe after meeting him there and confronting the woman that she was really trying to steer us to another contractor and was in a sense screwing this guy over. But by this time I’ve decided to do most of it myself. I’m going to hire him to do some other jobs and possibly do the tile, we’ll see.
I wish I had better before pics but I’ll share what I have and my ideas. I’m not scared if you have idea or I’m doing something bad wrong speak up. I have a video but I don’t know if I can upload it that shows a walk through with ideas, I’ll try to post it here.
So I’m starting with basically a 14’x14’ area. Half was the laundry room and half was my bathroom. We had a 5’x8’ walk-in closet that is going to be a curbless/doorless shower and where the fiberglass stand up shower was I’ll be adding a door and going trough into the laundry room and taking about half for the new walk-in closet.
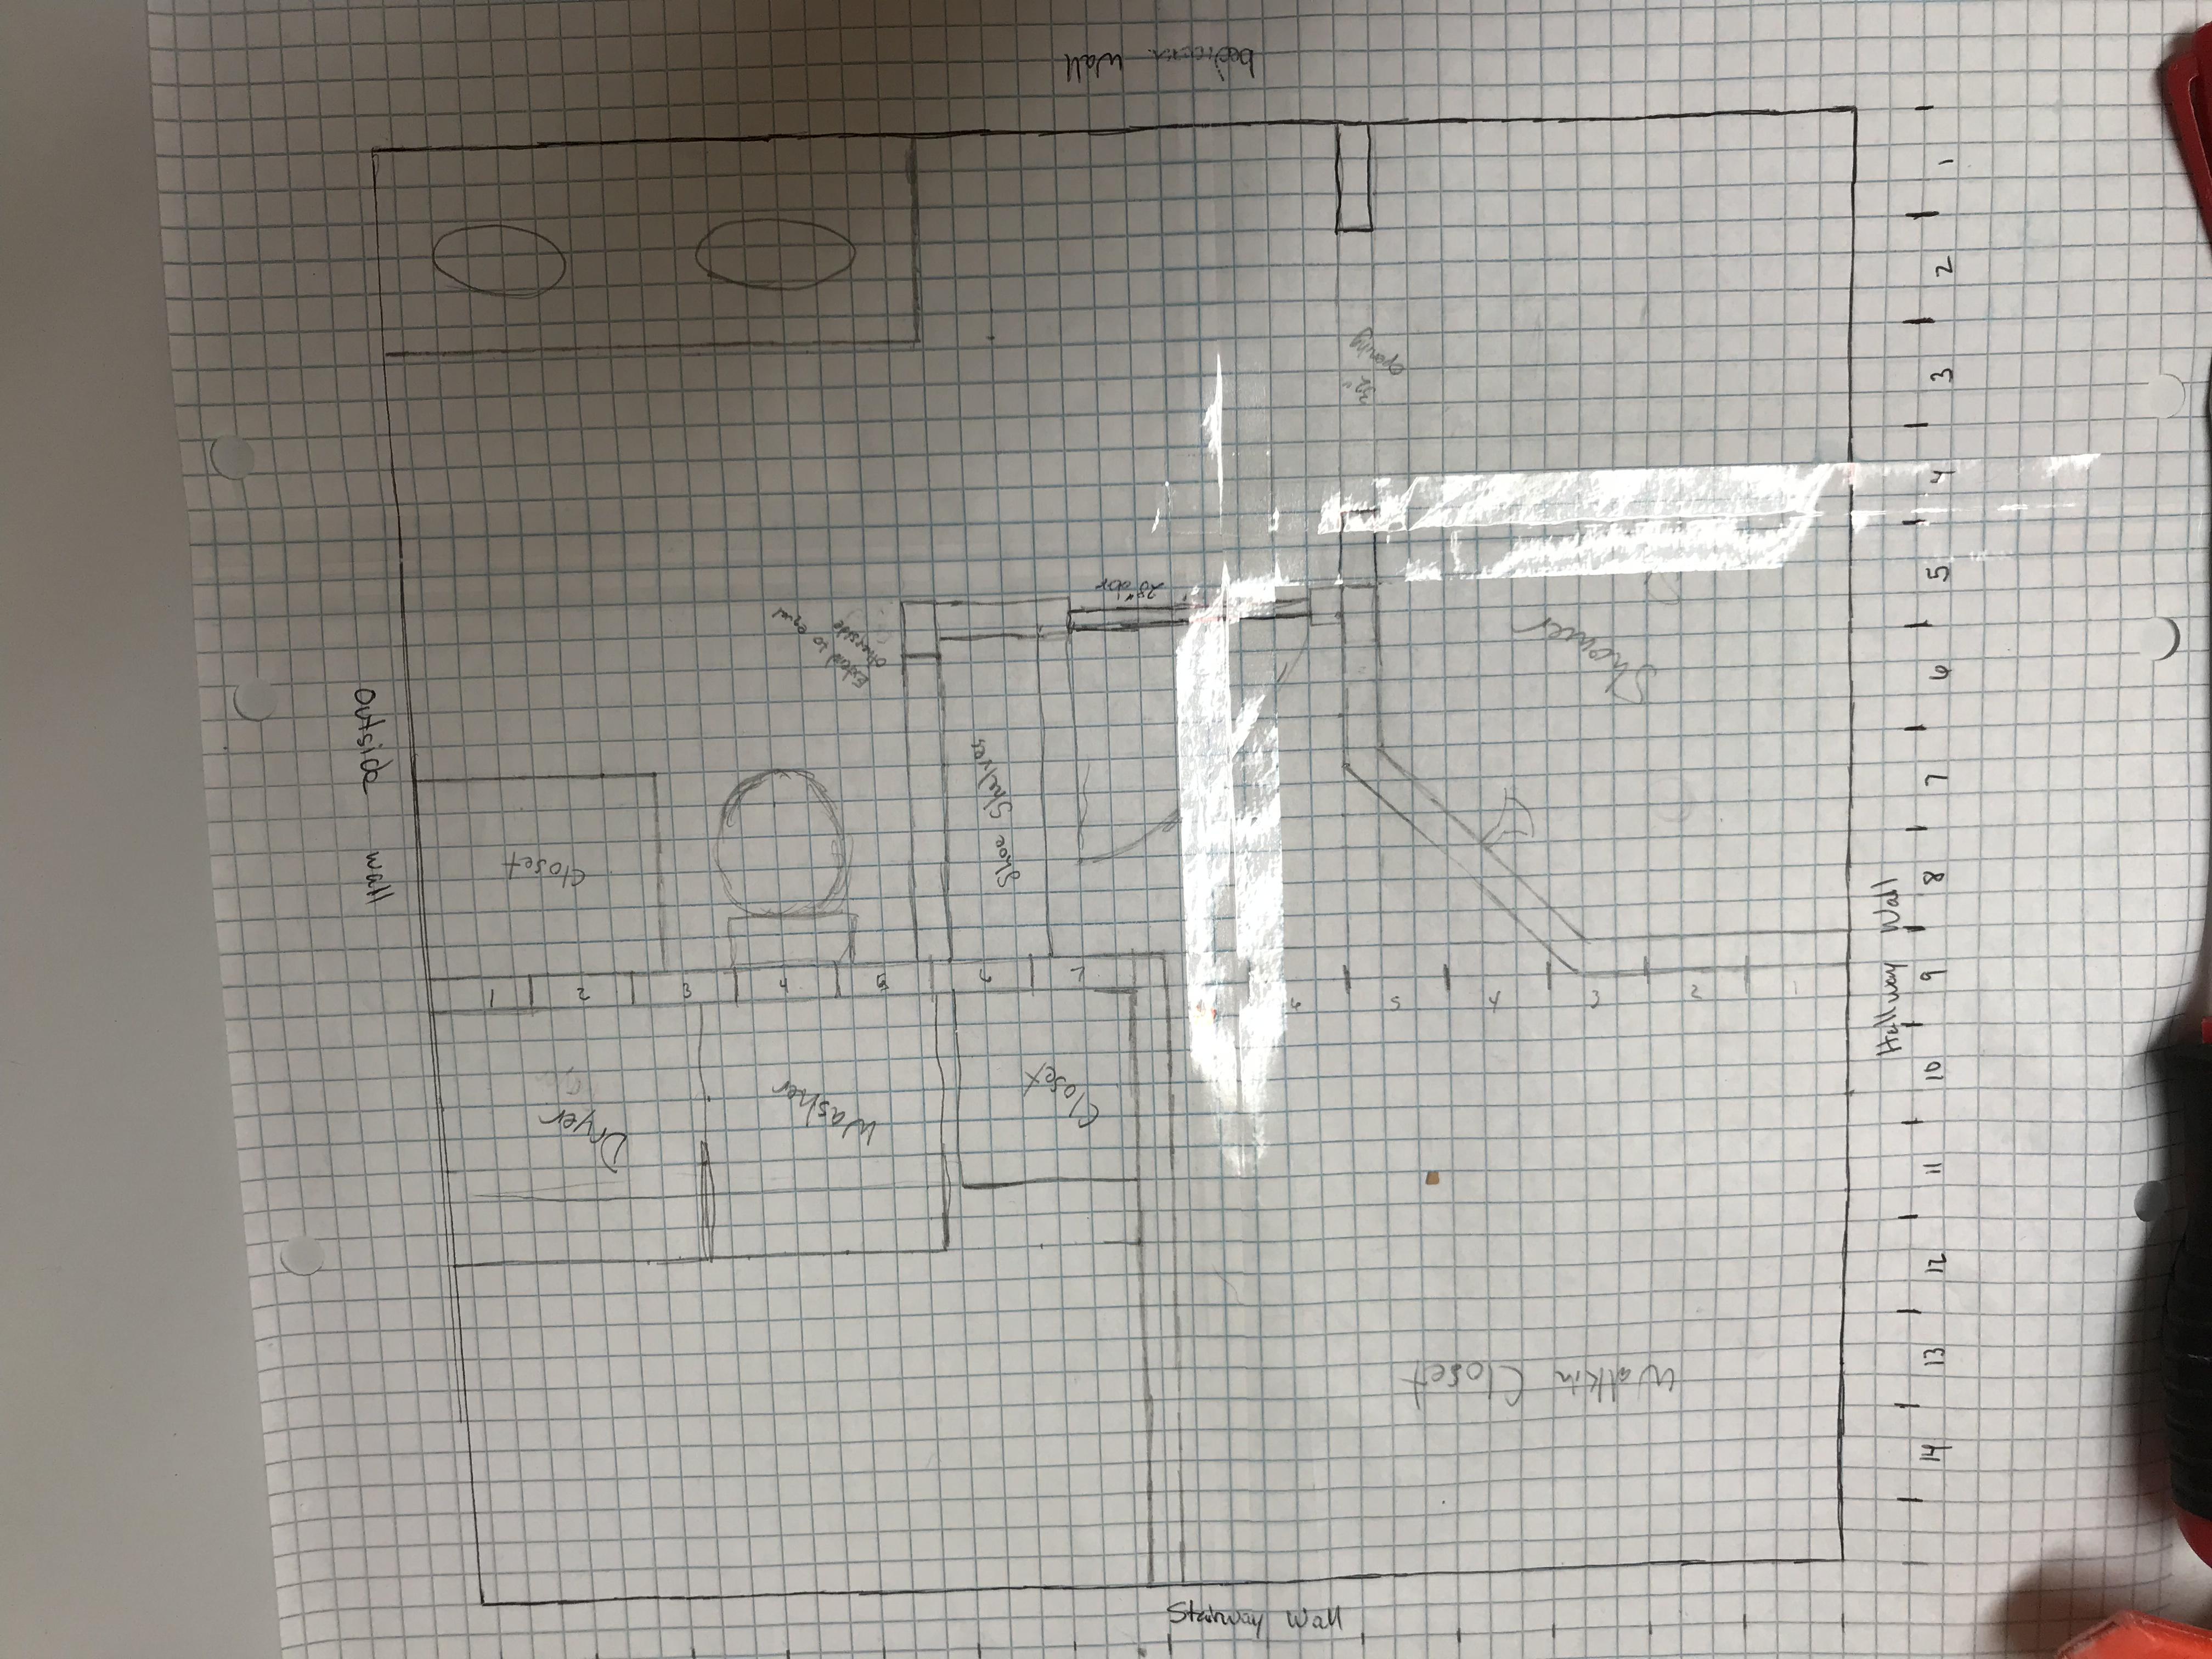
These are my crude plans drawn to scale as best I could. Sorry for the glare, had to tape 4 sheets together to make it up.
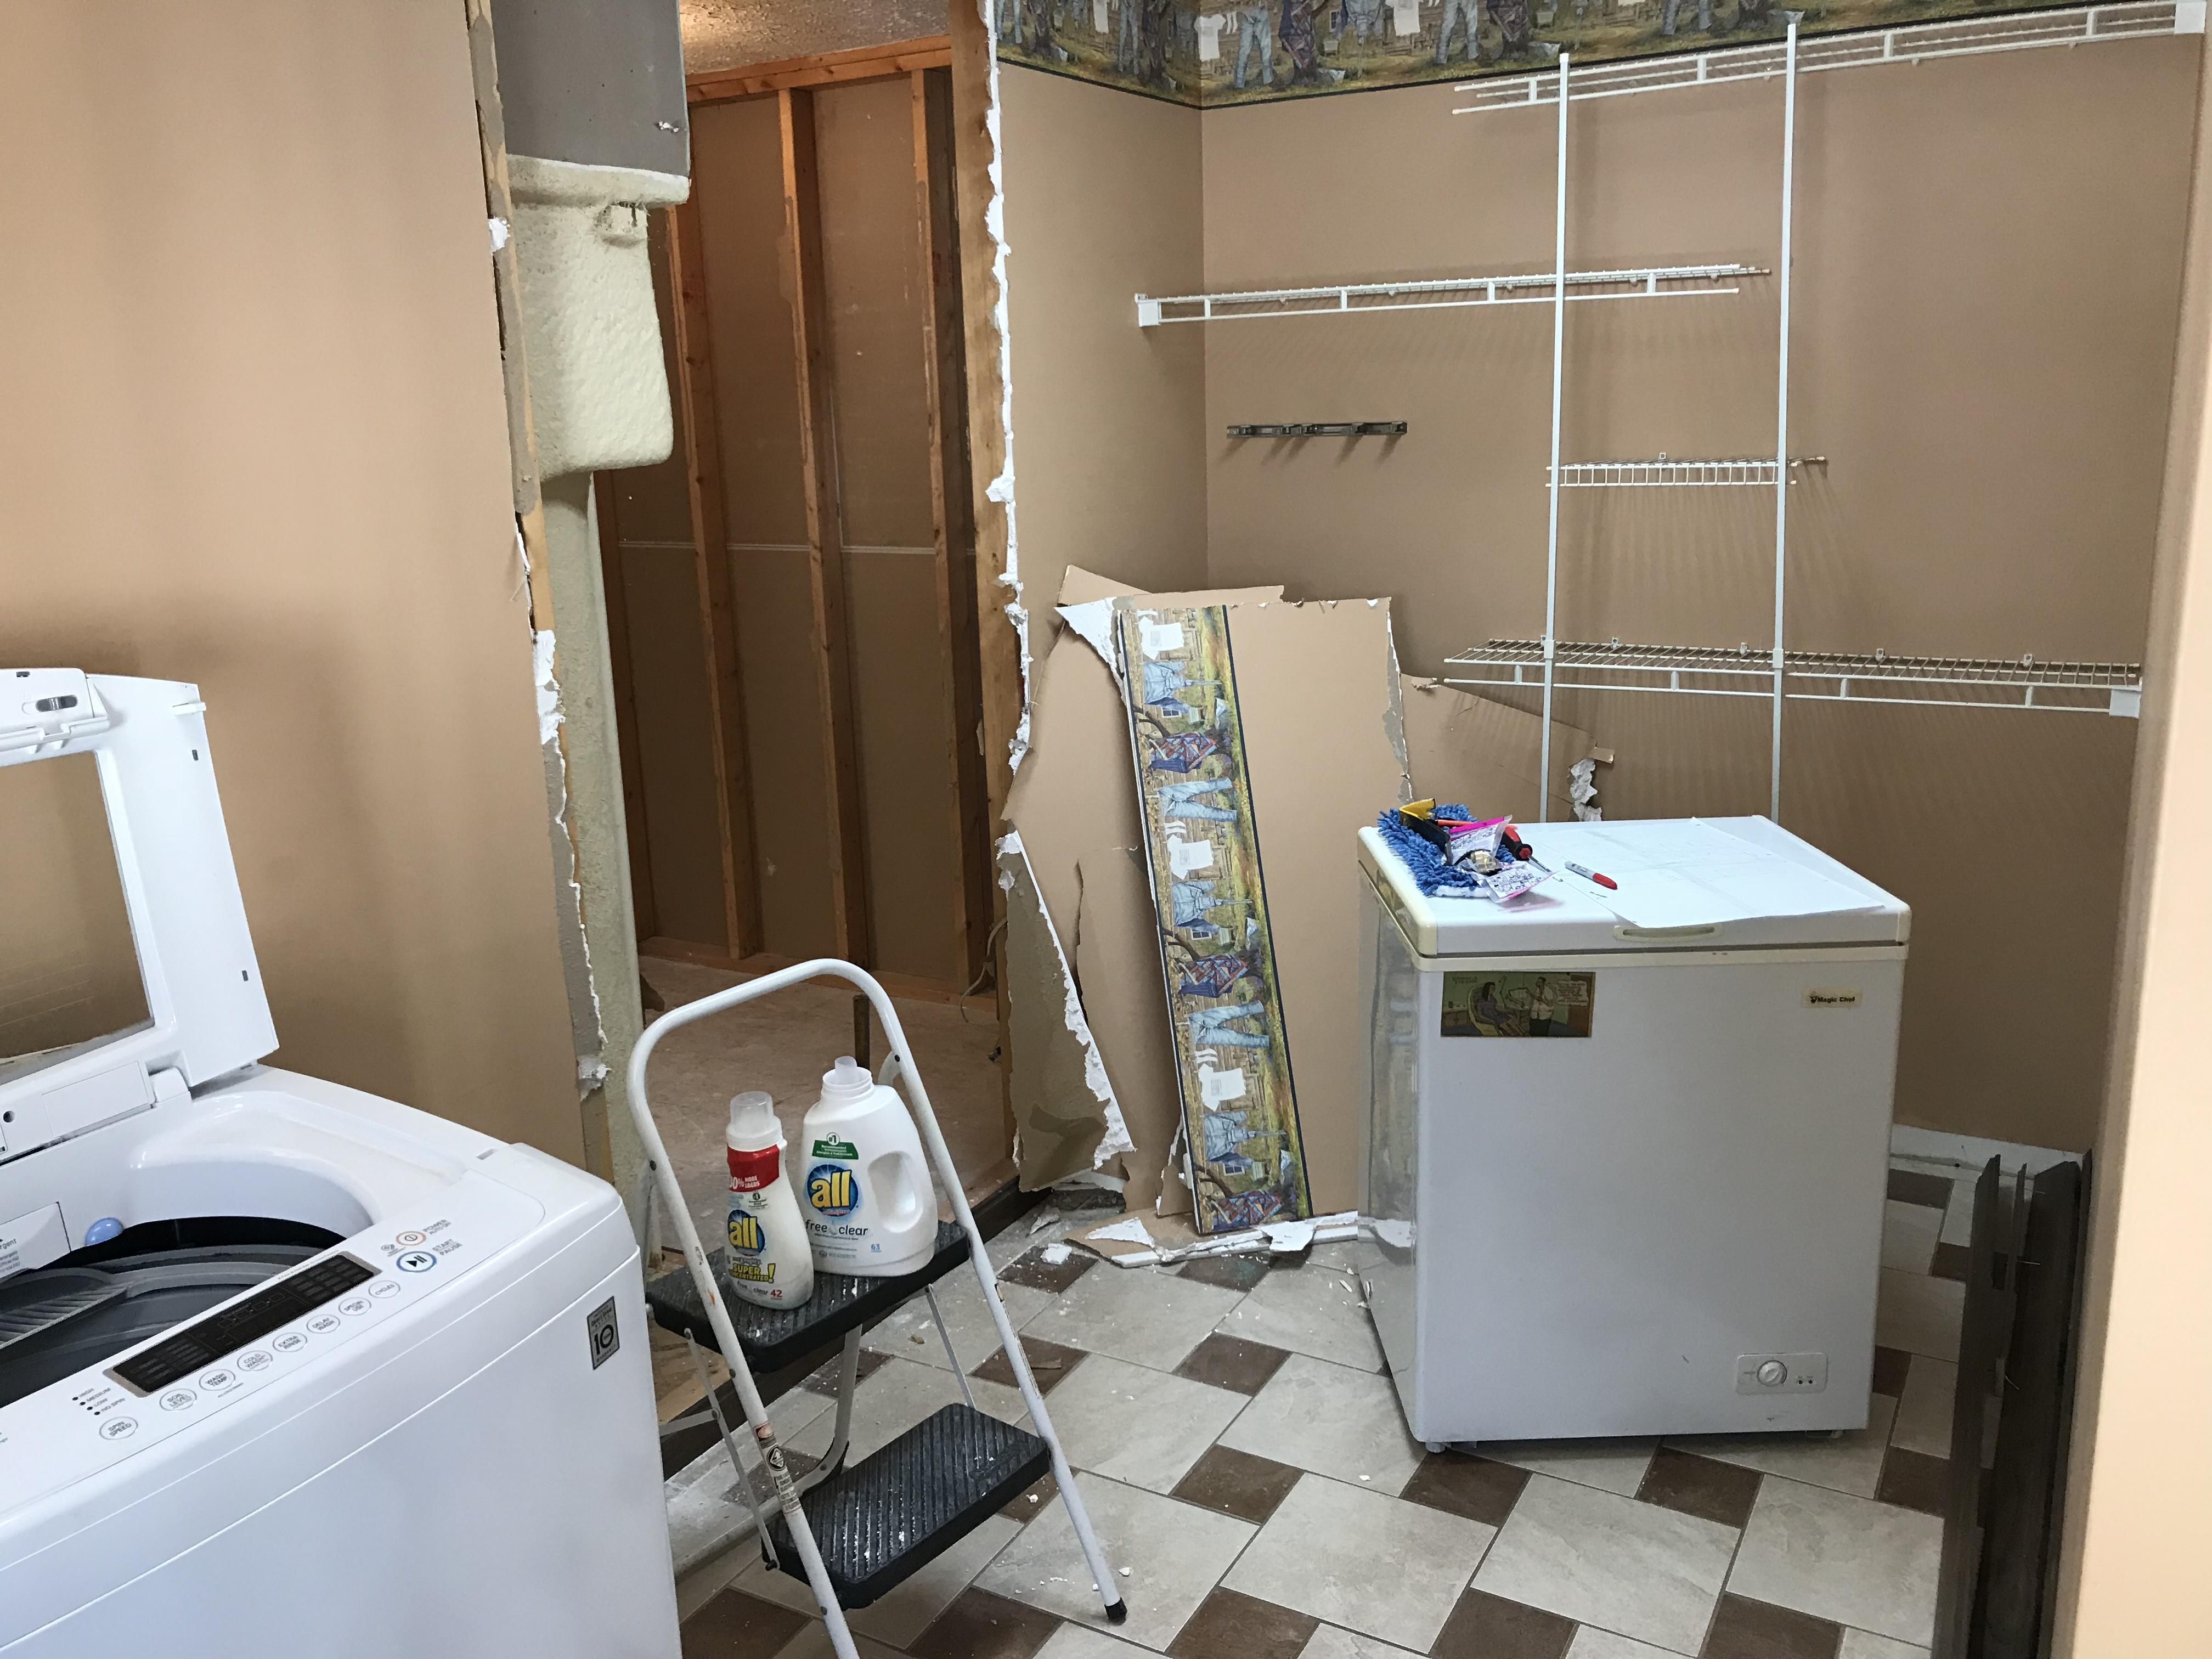
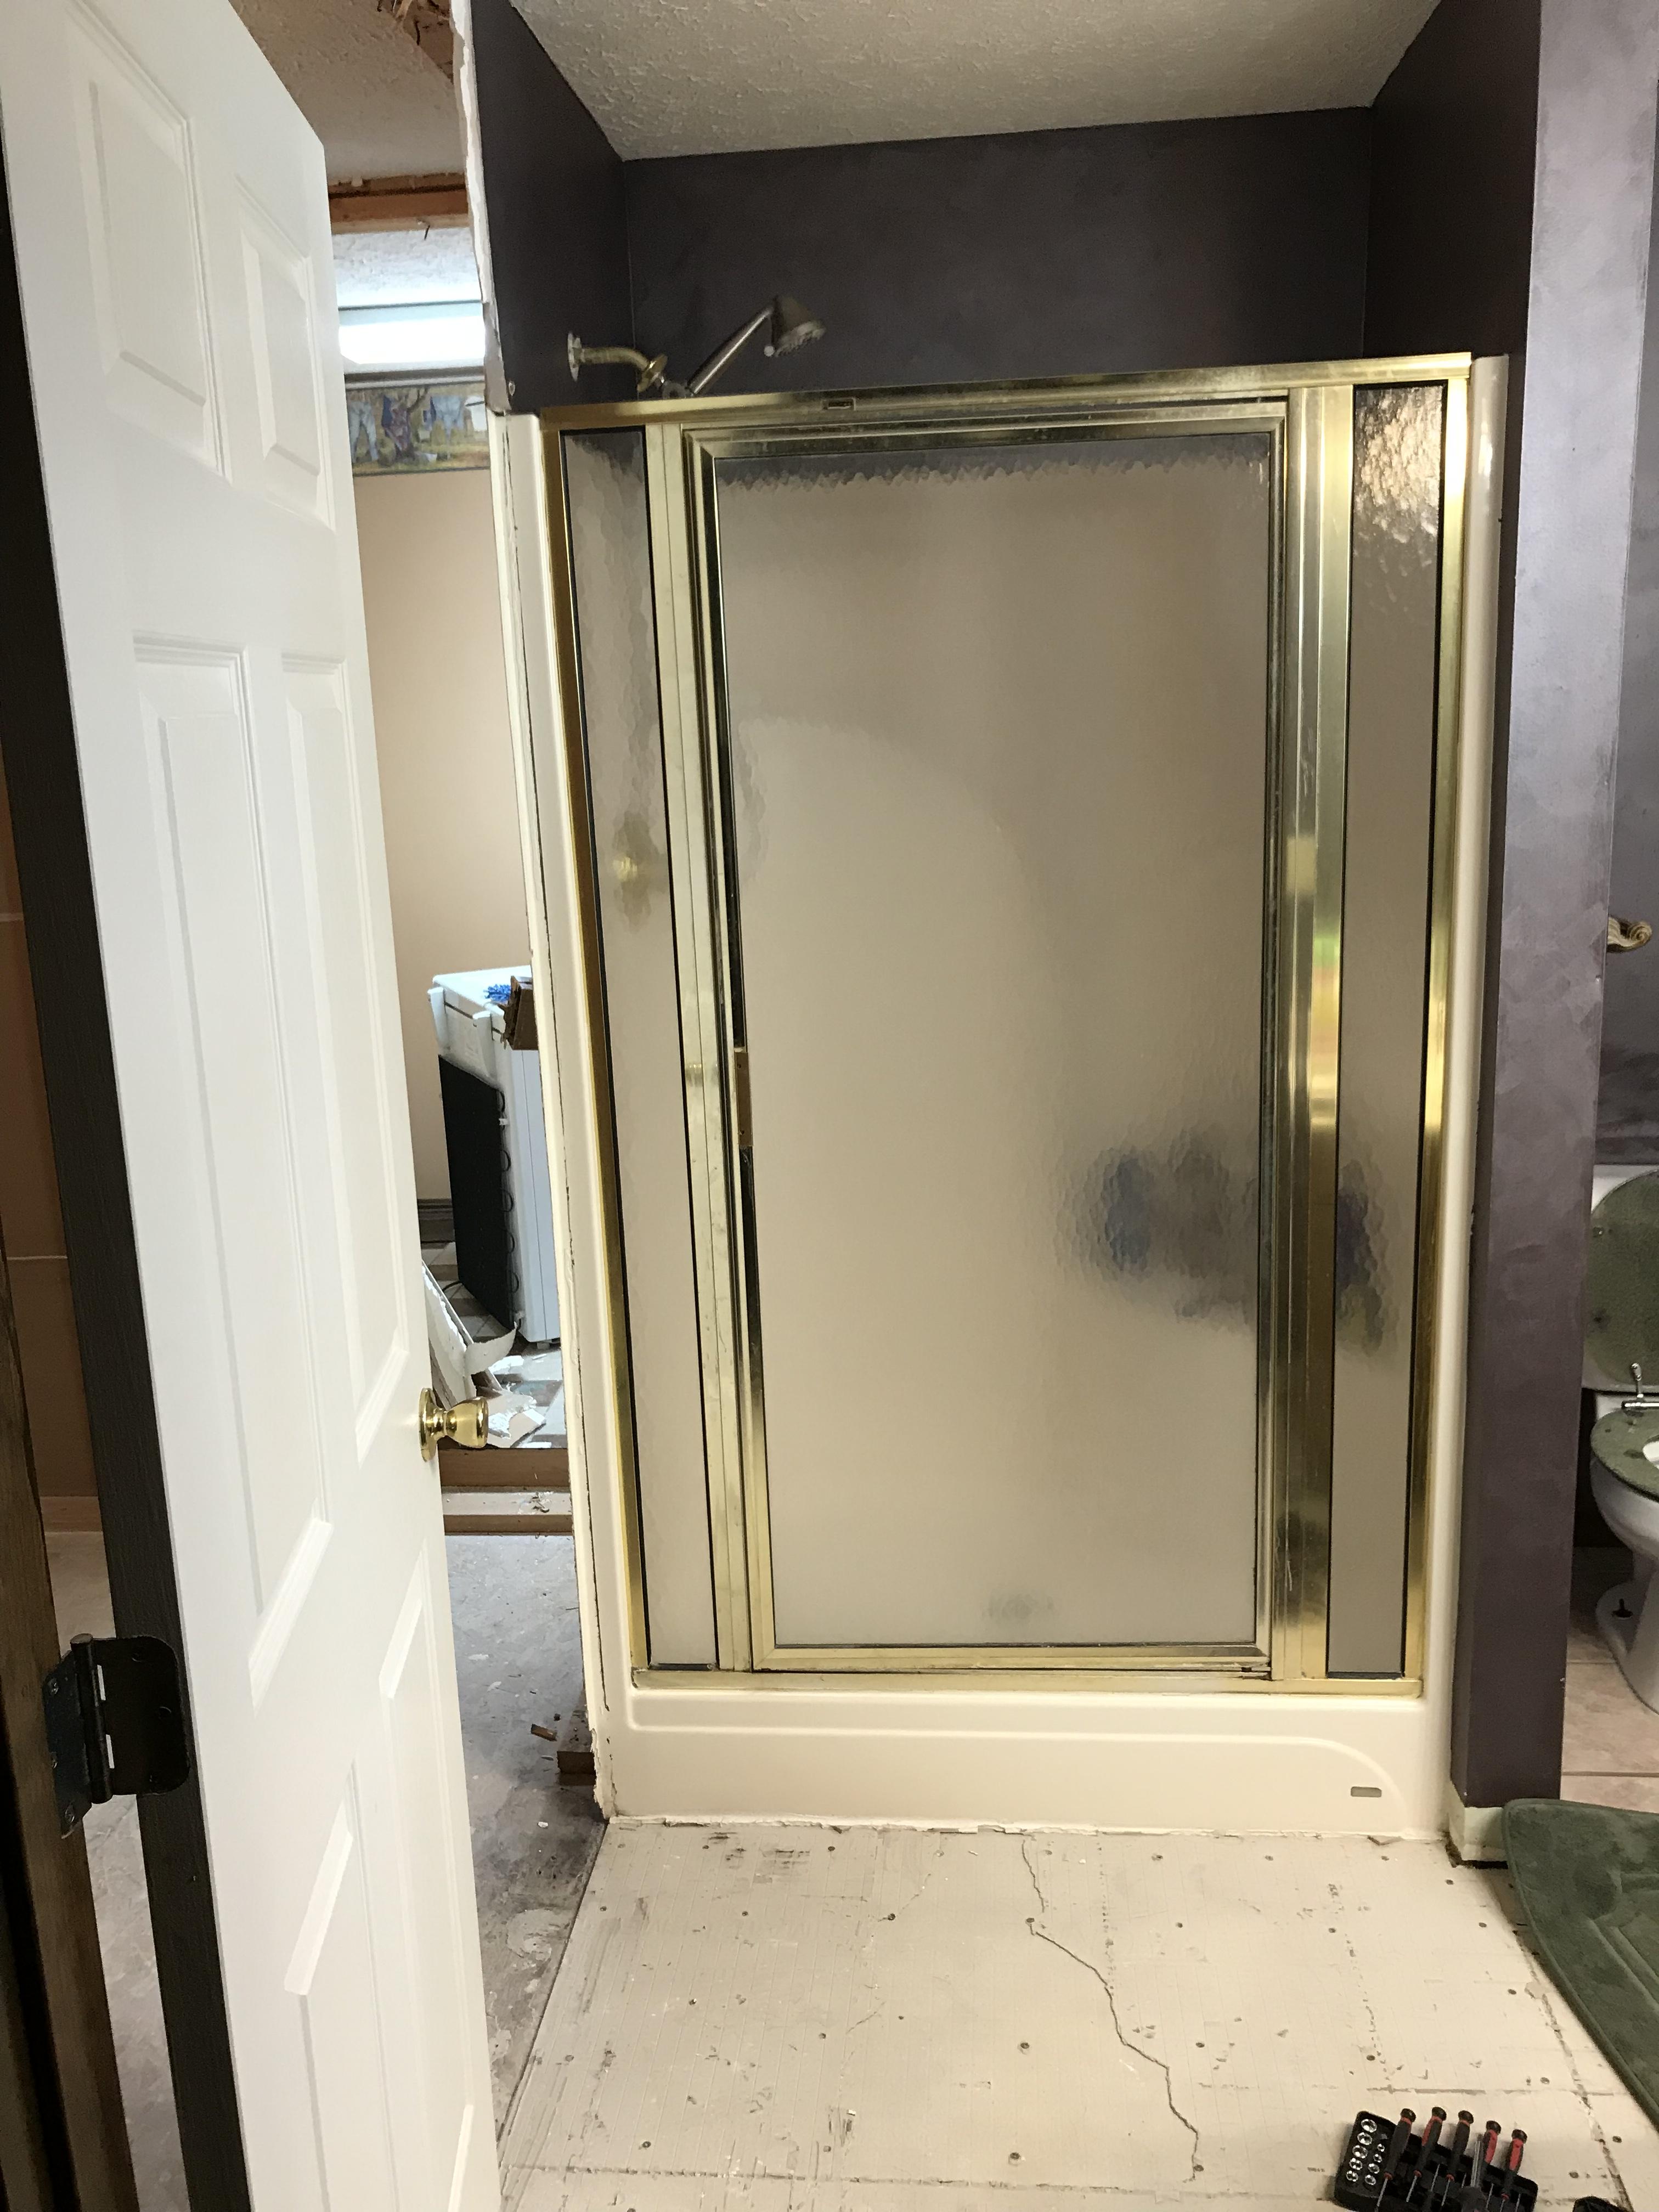
So this is standing in the old laundry room/new closet looking to the new shower area (right) and the old shower/closet entry (left).
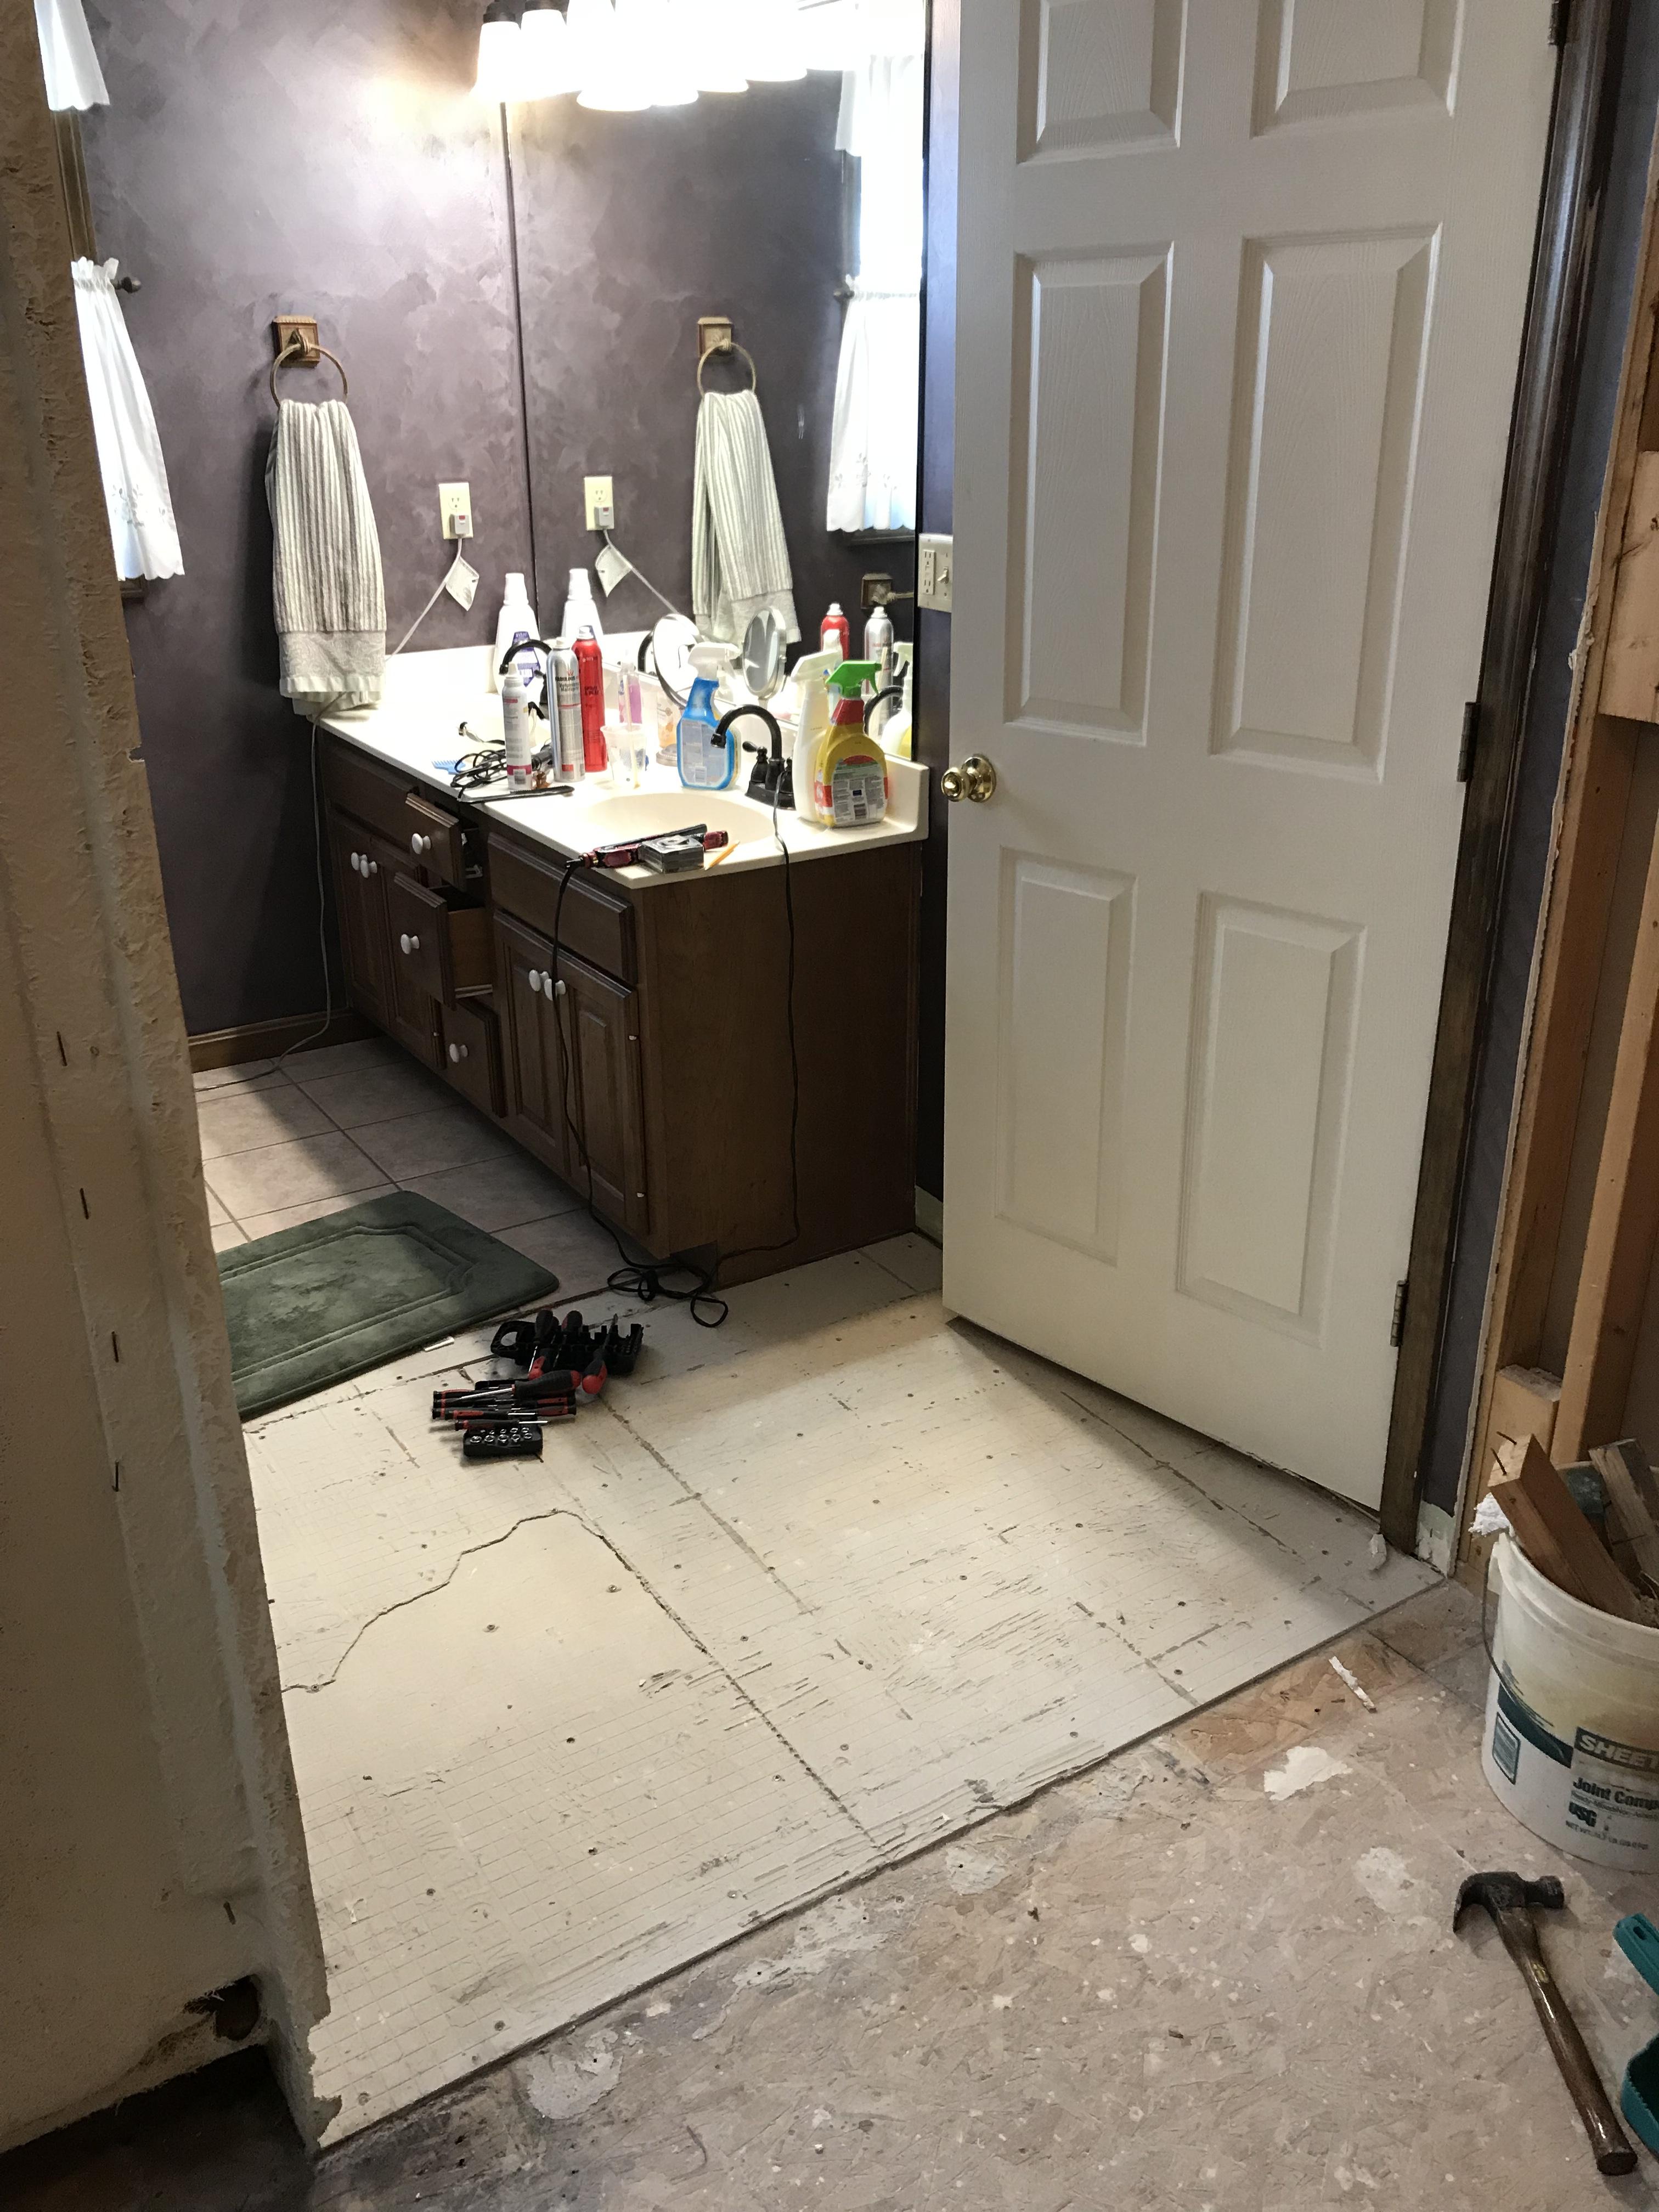
Looking from new shower area to bathroom.
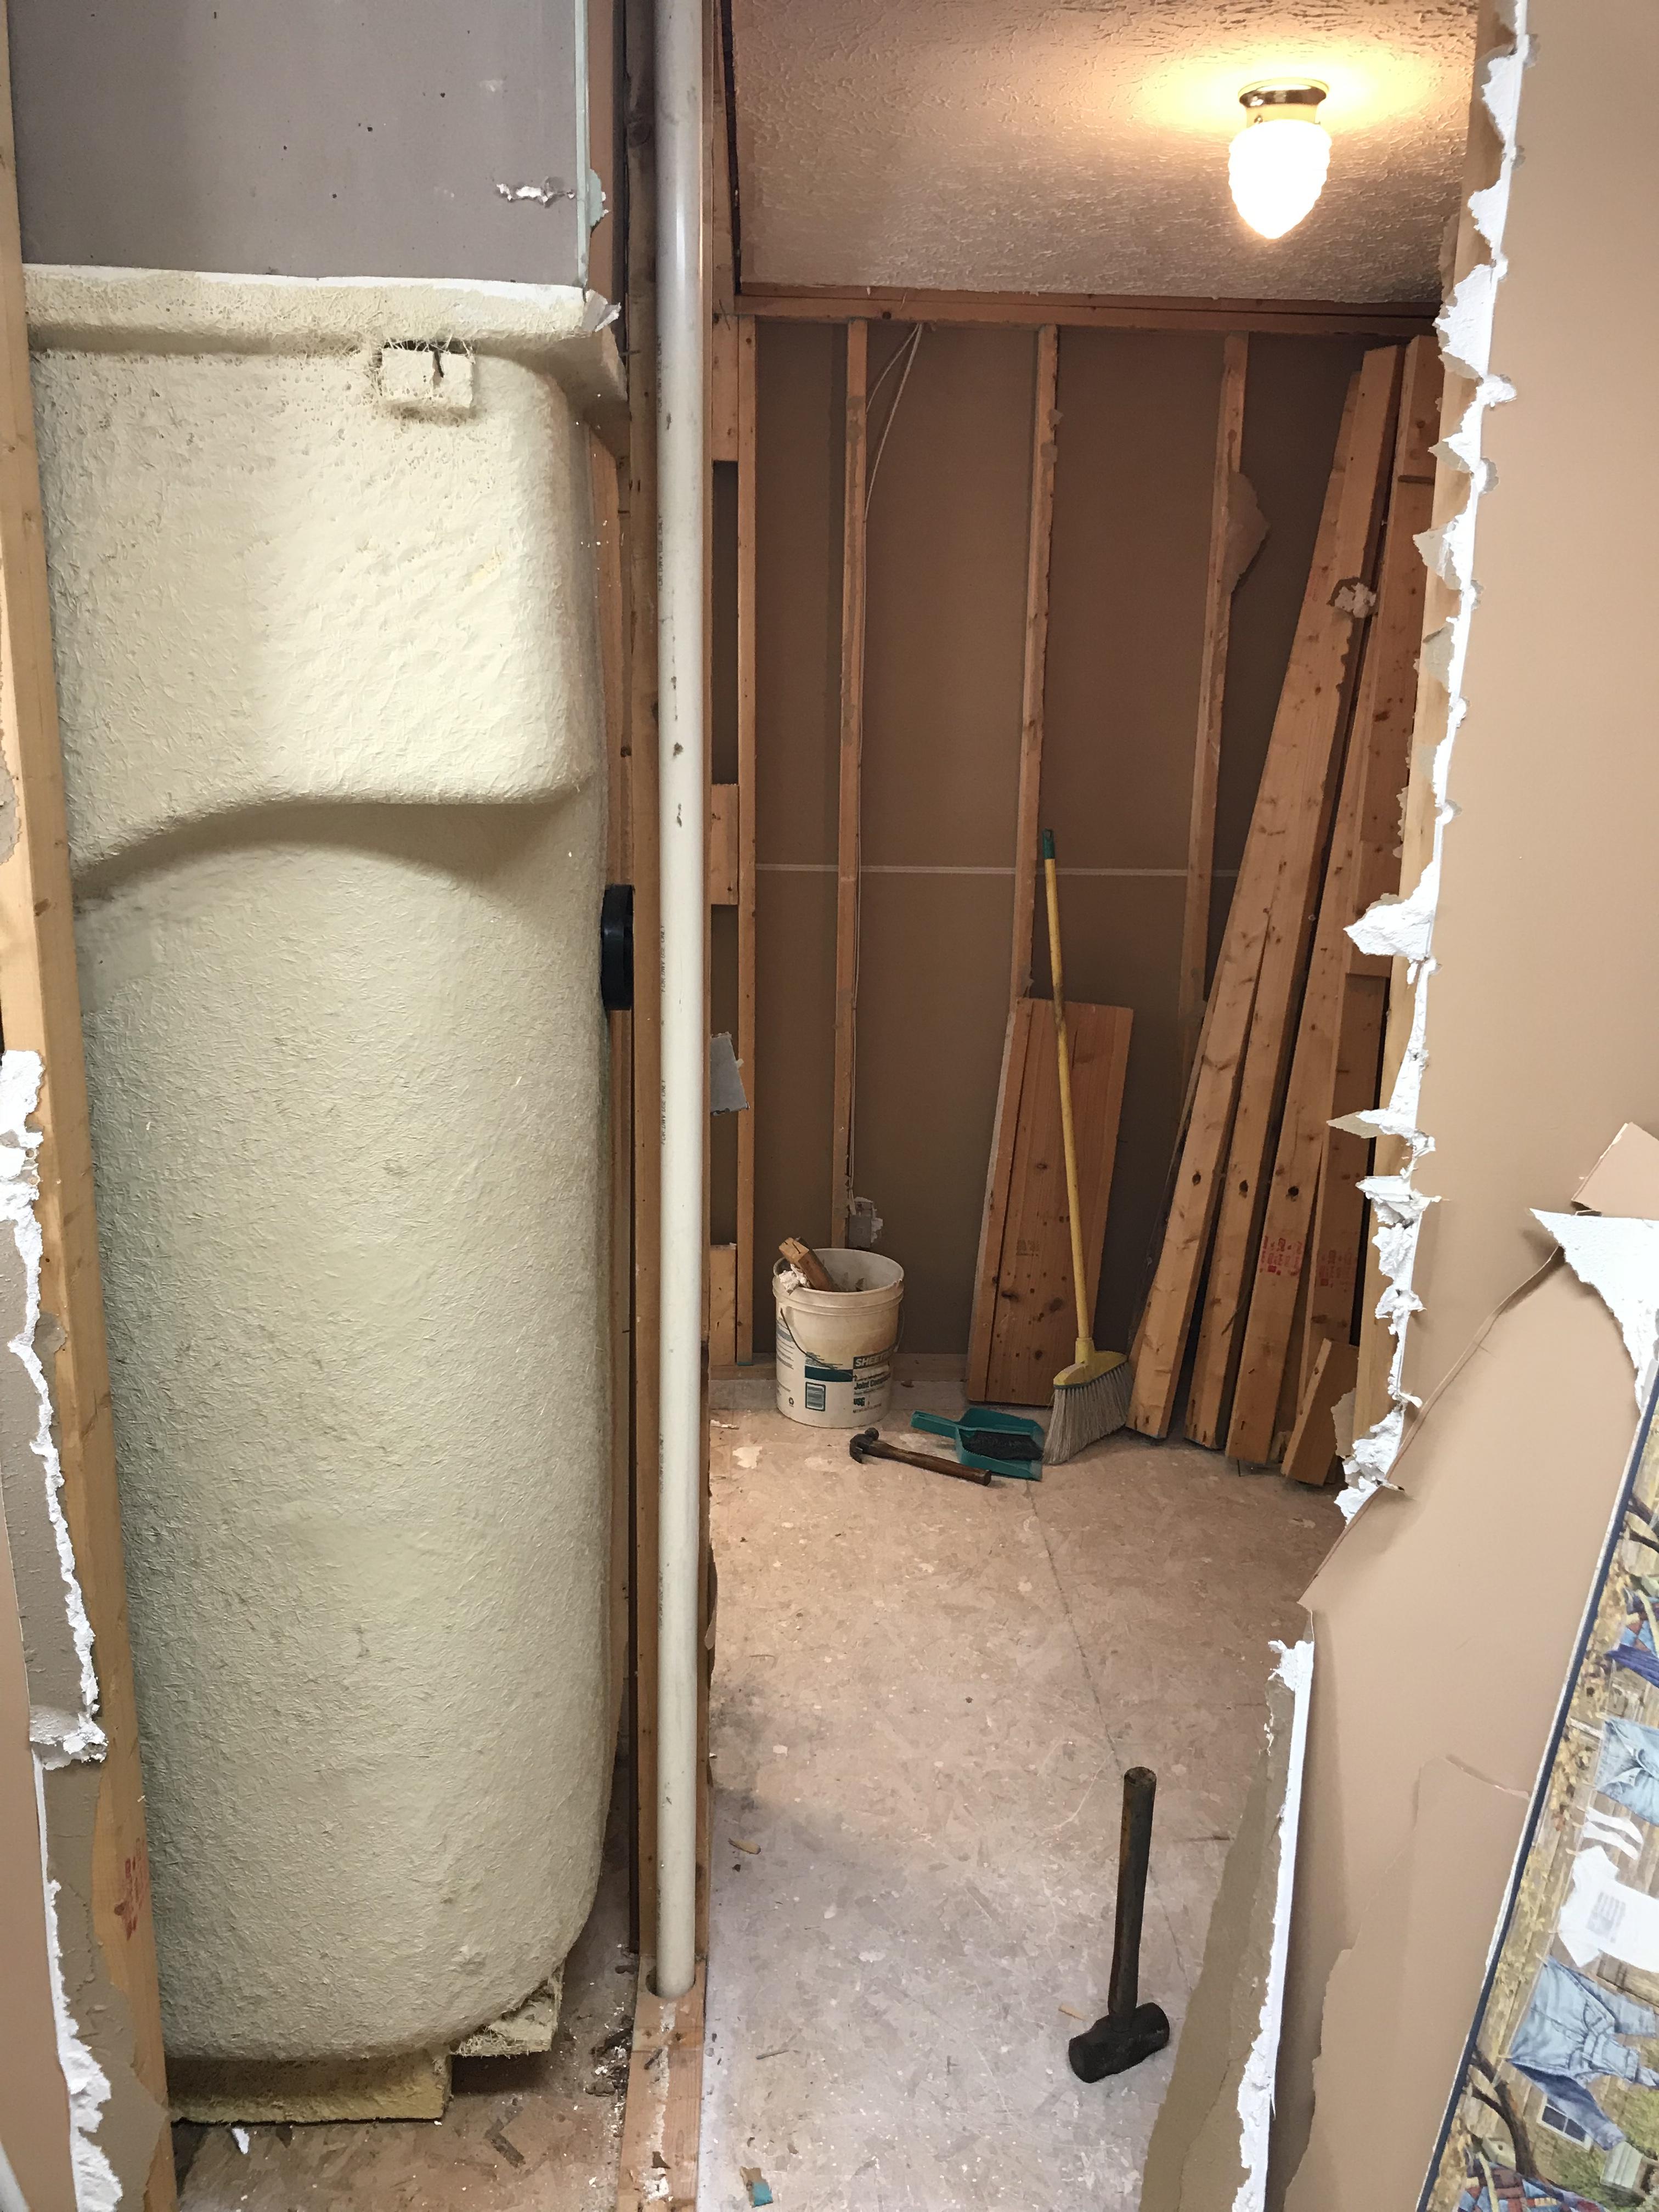
This is looking from bedroom straight at the old shower/new closet entry. The new shower is to the left.

These next pics I color coded my plans so that I could convey my ideas better to Jeff and Steve. This will be a 14”x 15”x 36” tall pillar that my wife wants to have a couple nooks facing the bathroom to hold towels. This pillar will be the end of the bench.
The is 14”x40” approximately.
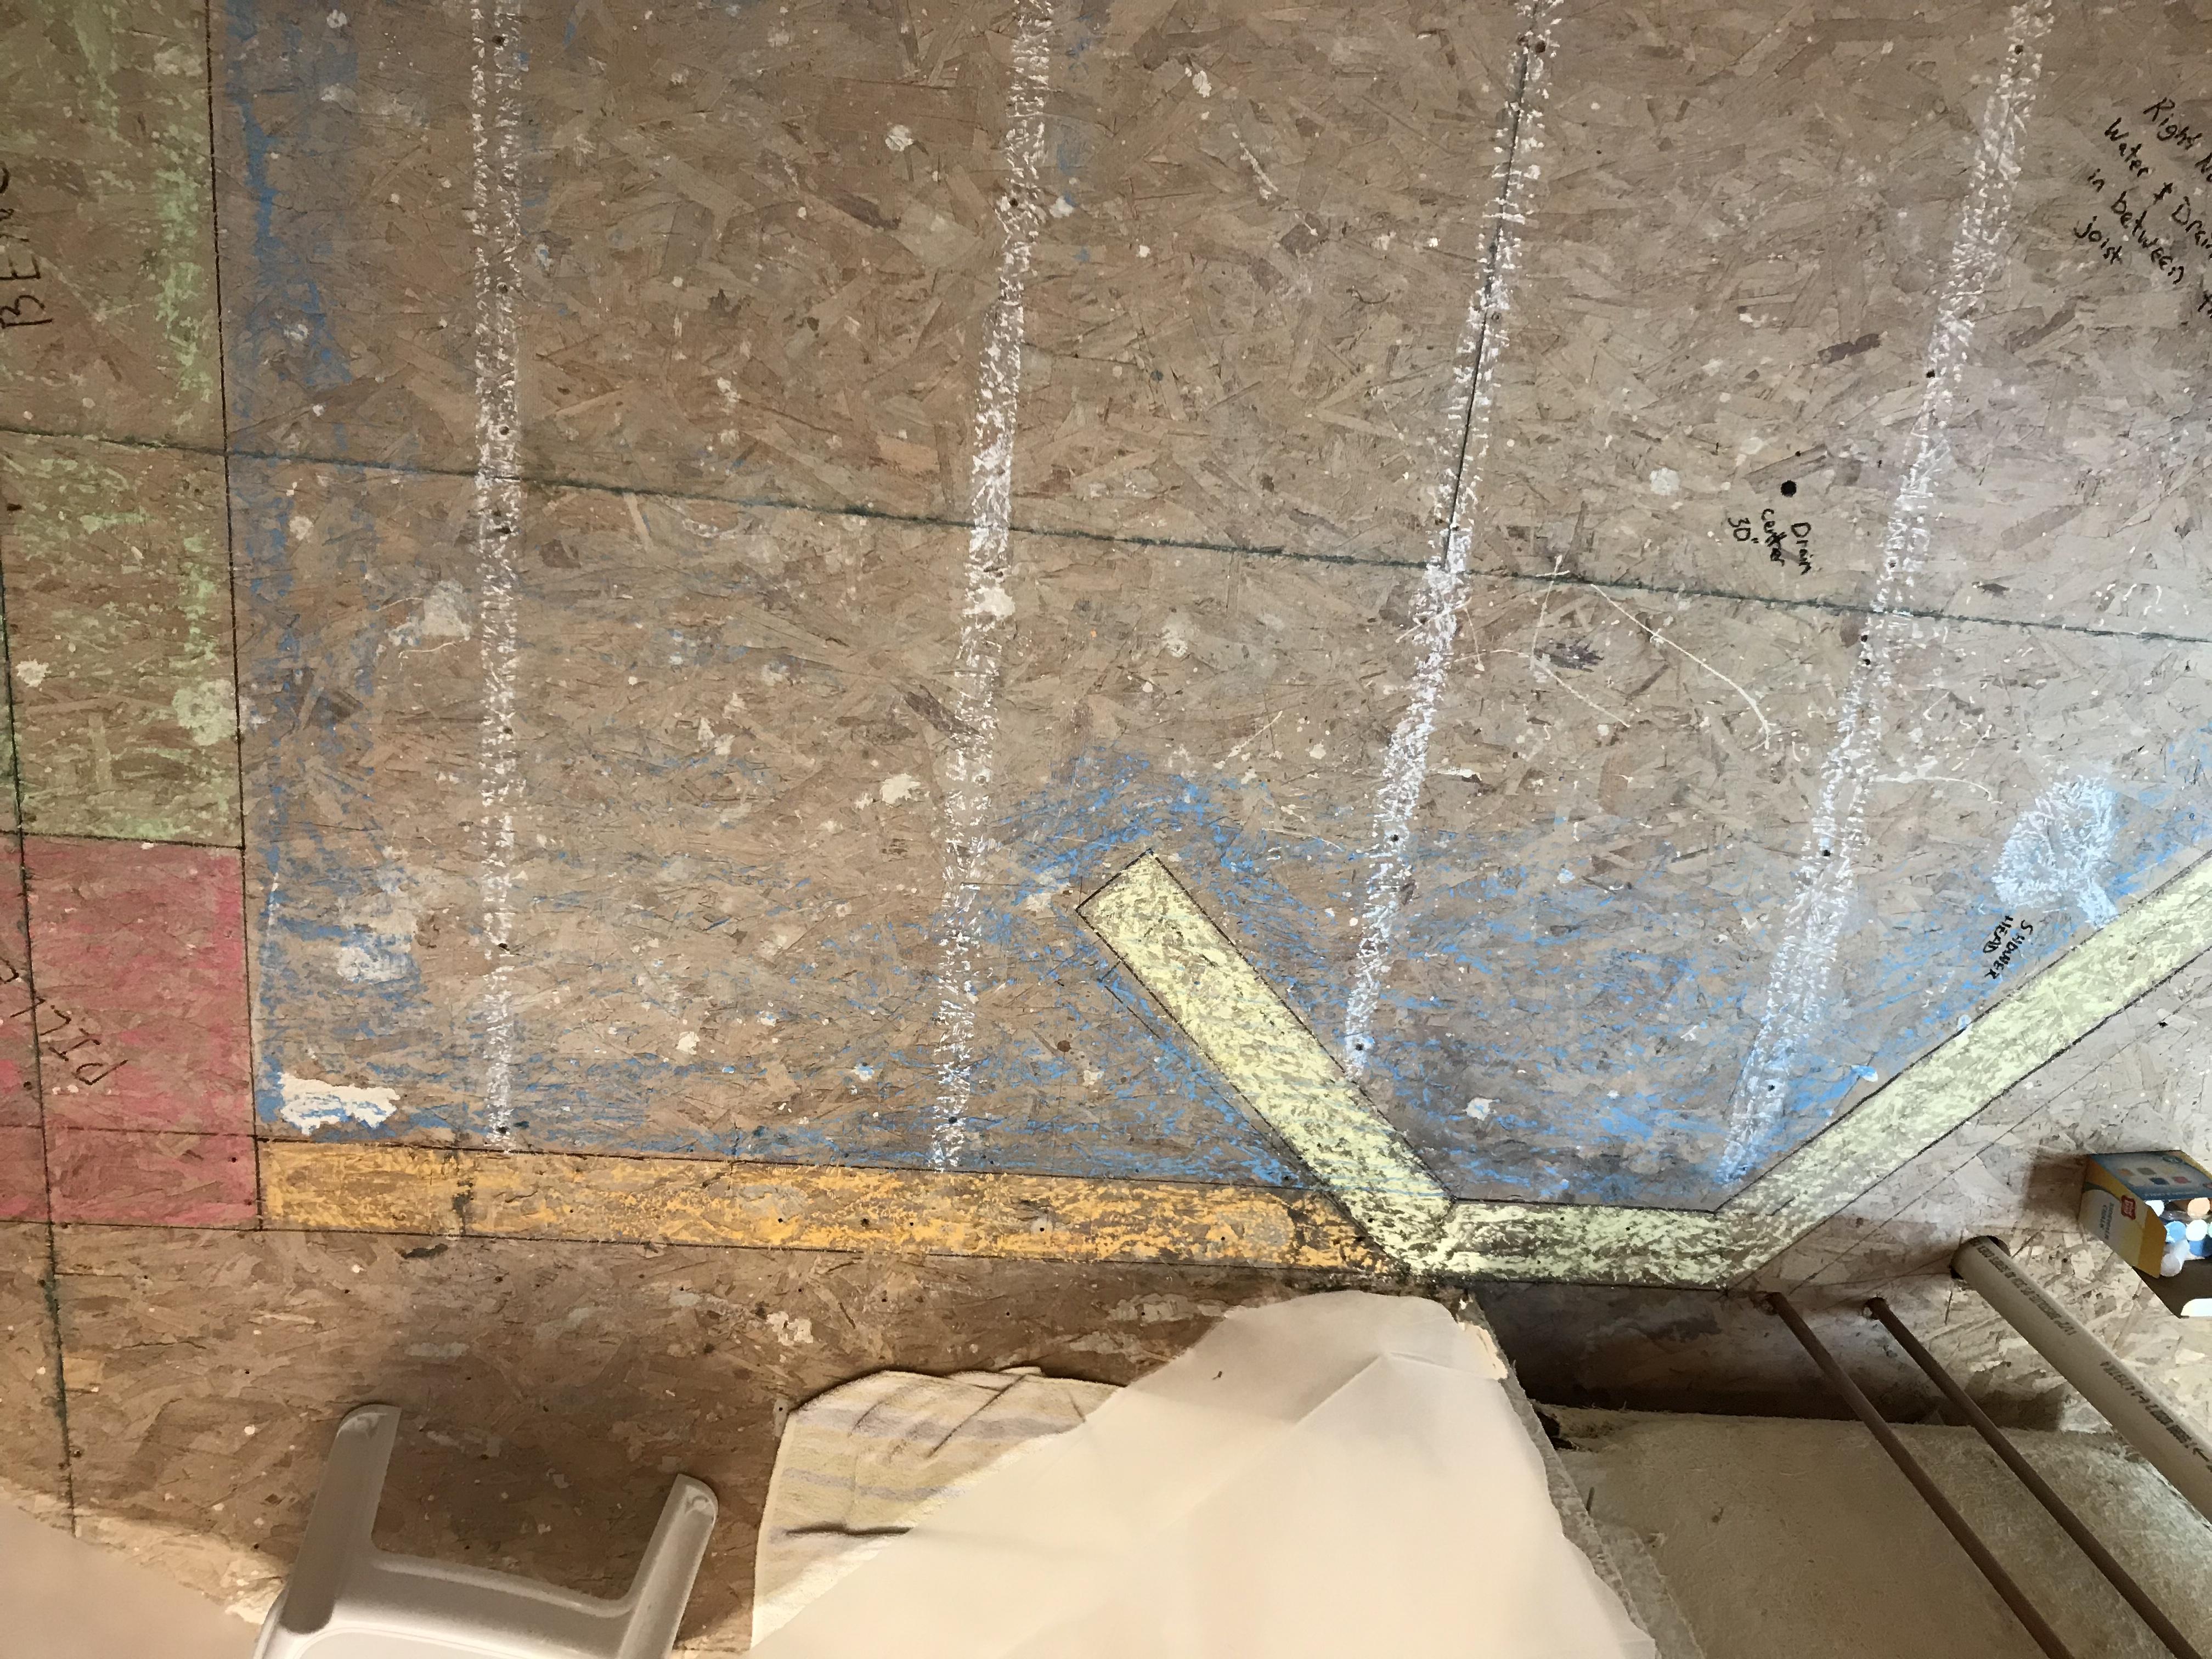
The yellow is where the walls go. The wall that goes out at 45deg is a splash wall to keep water from soaking the bathroom floor. The orange stripe is the area that still gets the shower floor tile but is not recessed for the shower pan. And everything in blue will be recessed to joist level.
So in this pic you can see where I want my shower head. You can also see the plumbing and vent pipe that went up the old wall. I need to move all that to the new wall (yellow). That green in the corner is a seat for my wife to sit and shave, though I’ve been informed that that is not big enough. How deep should the seat be?
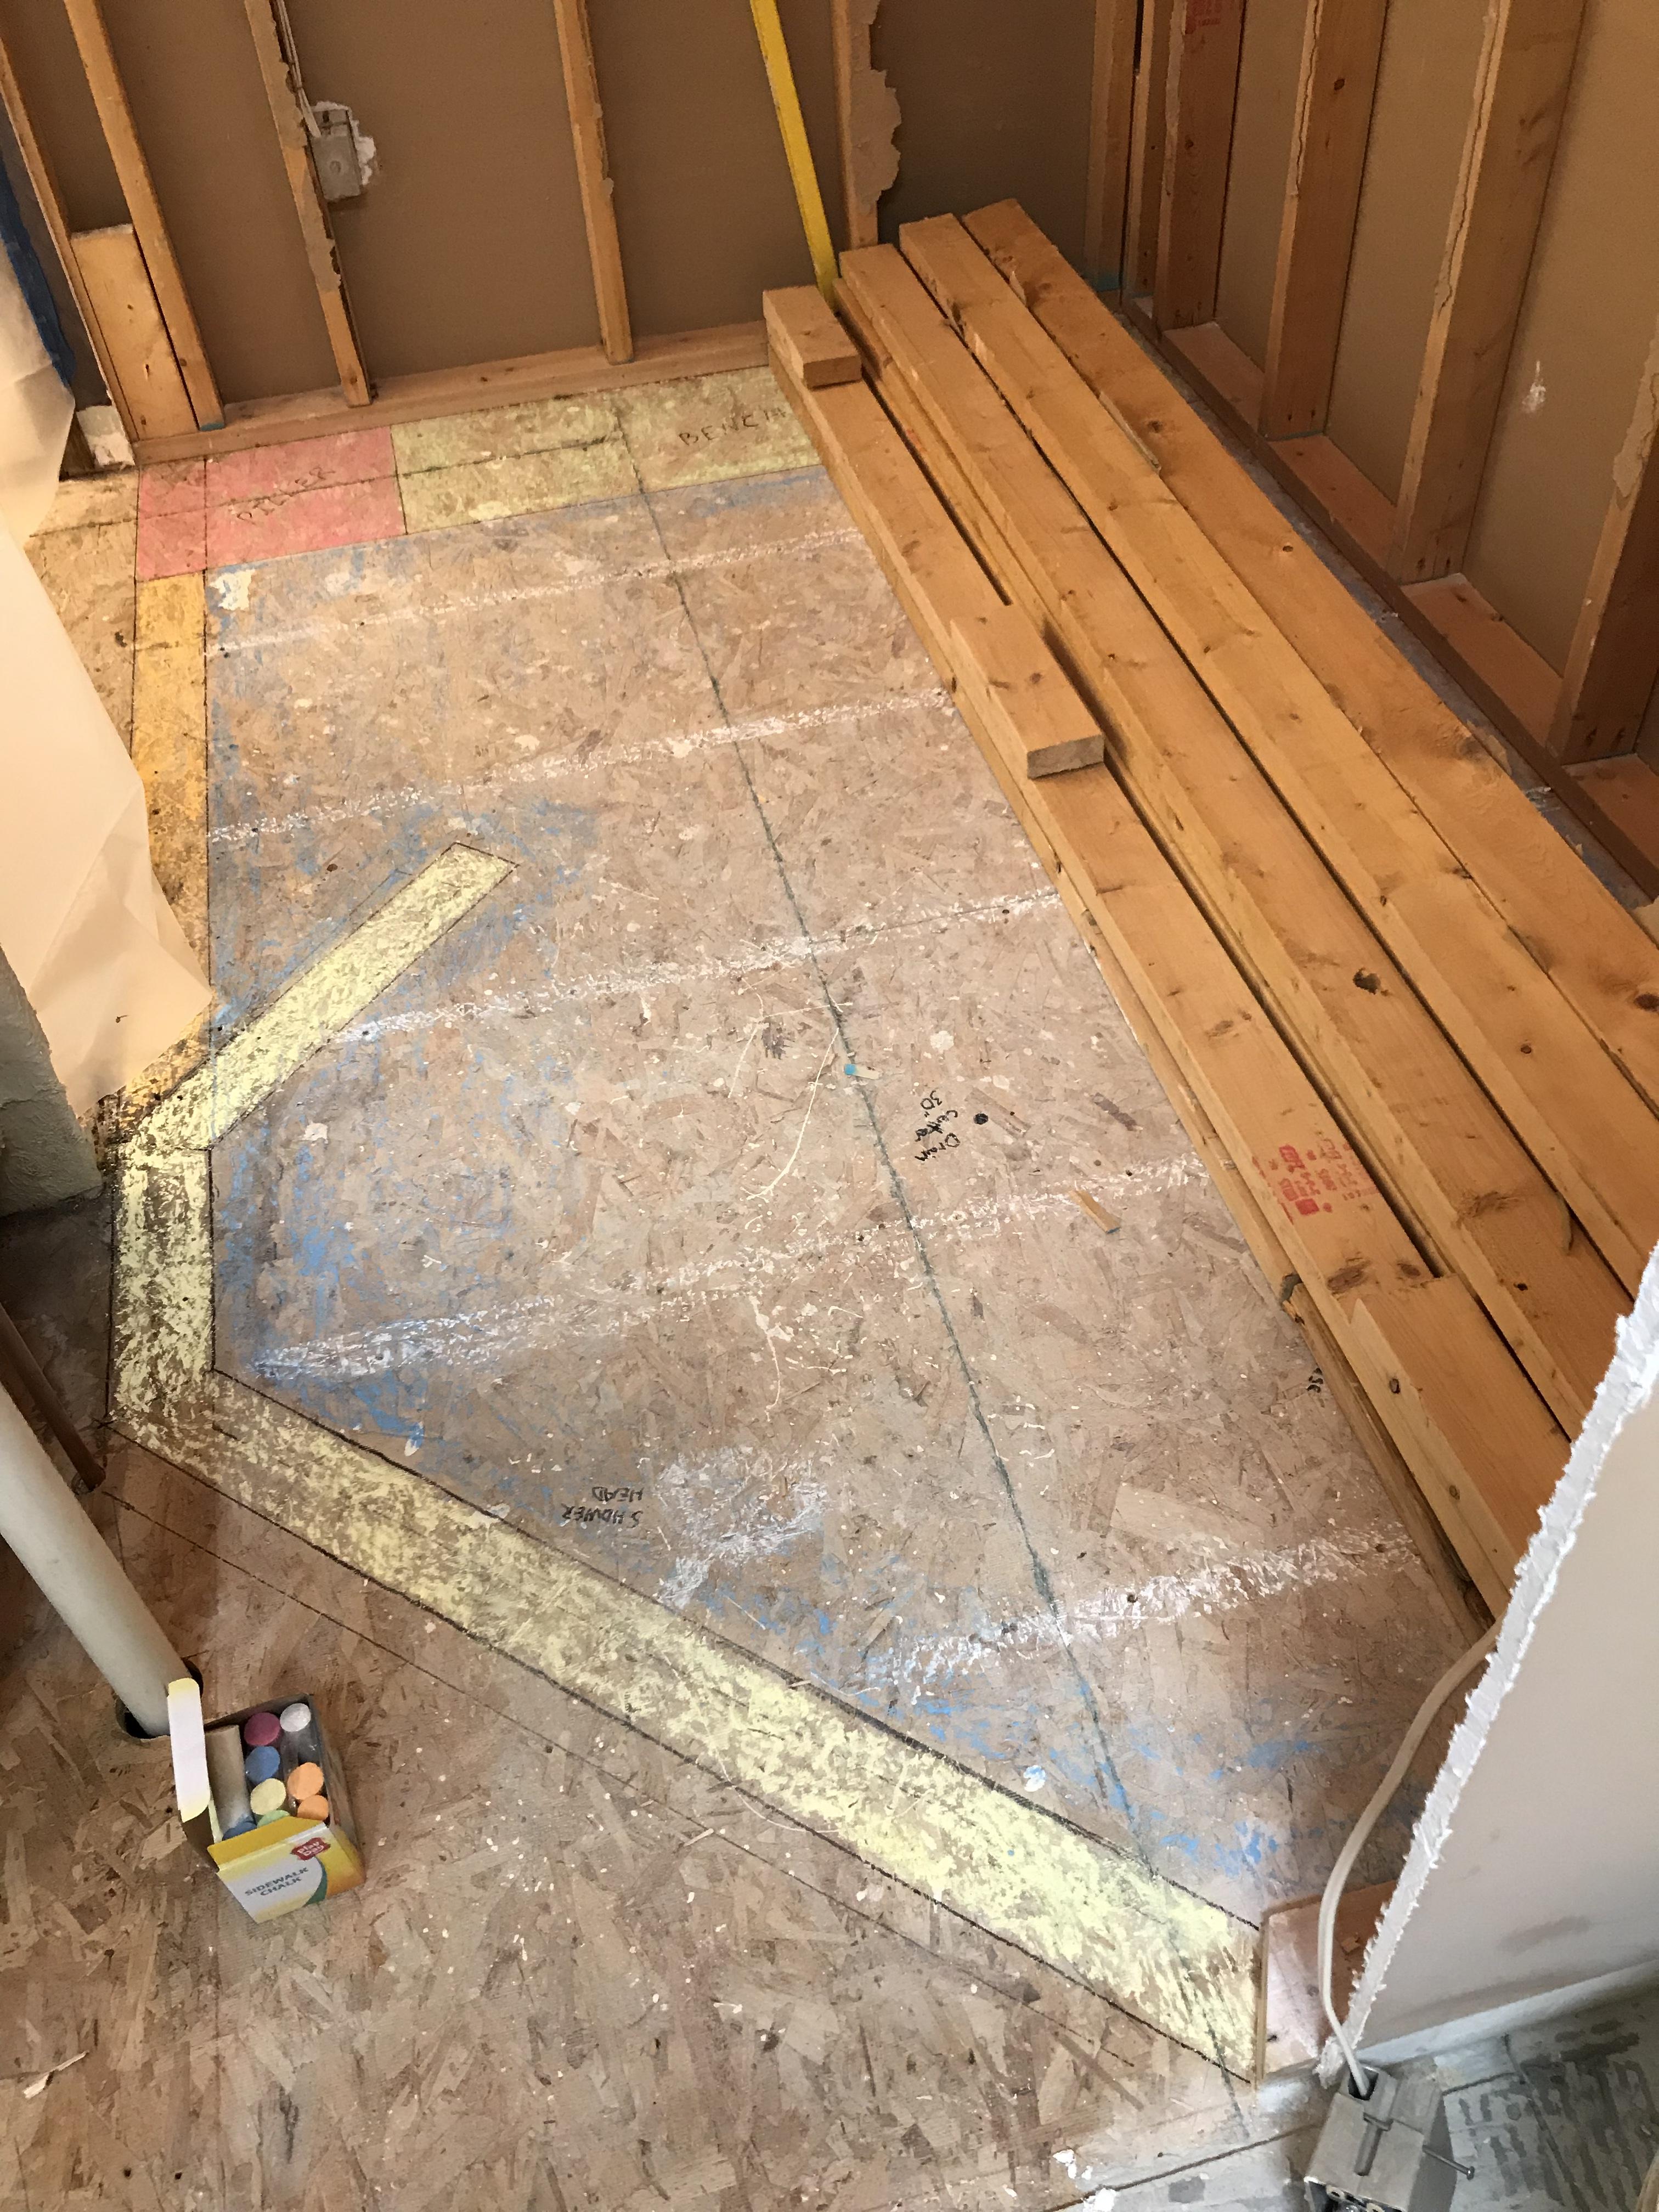
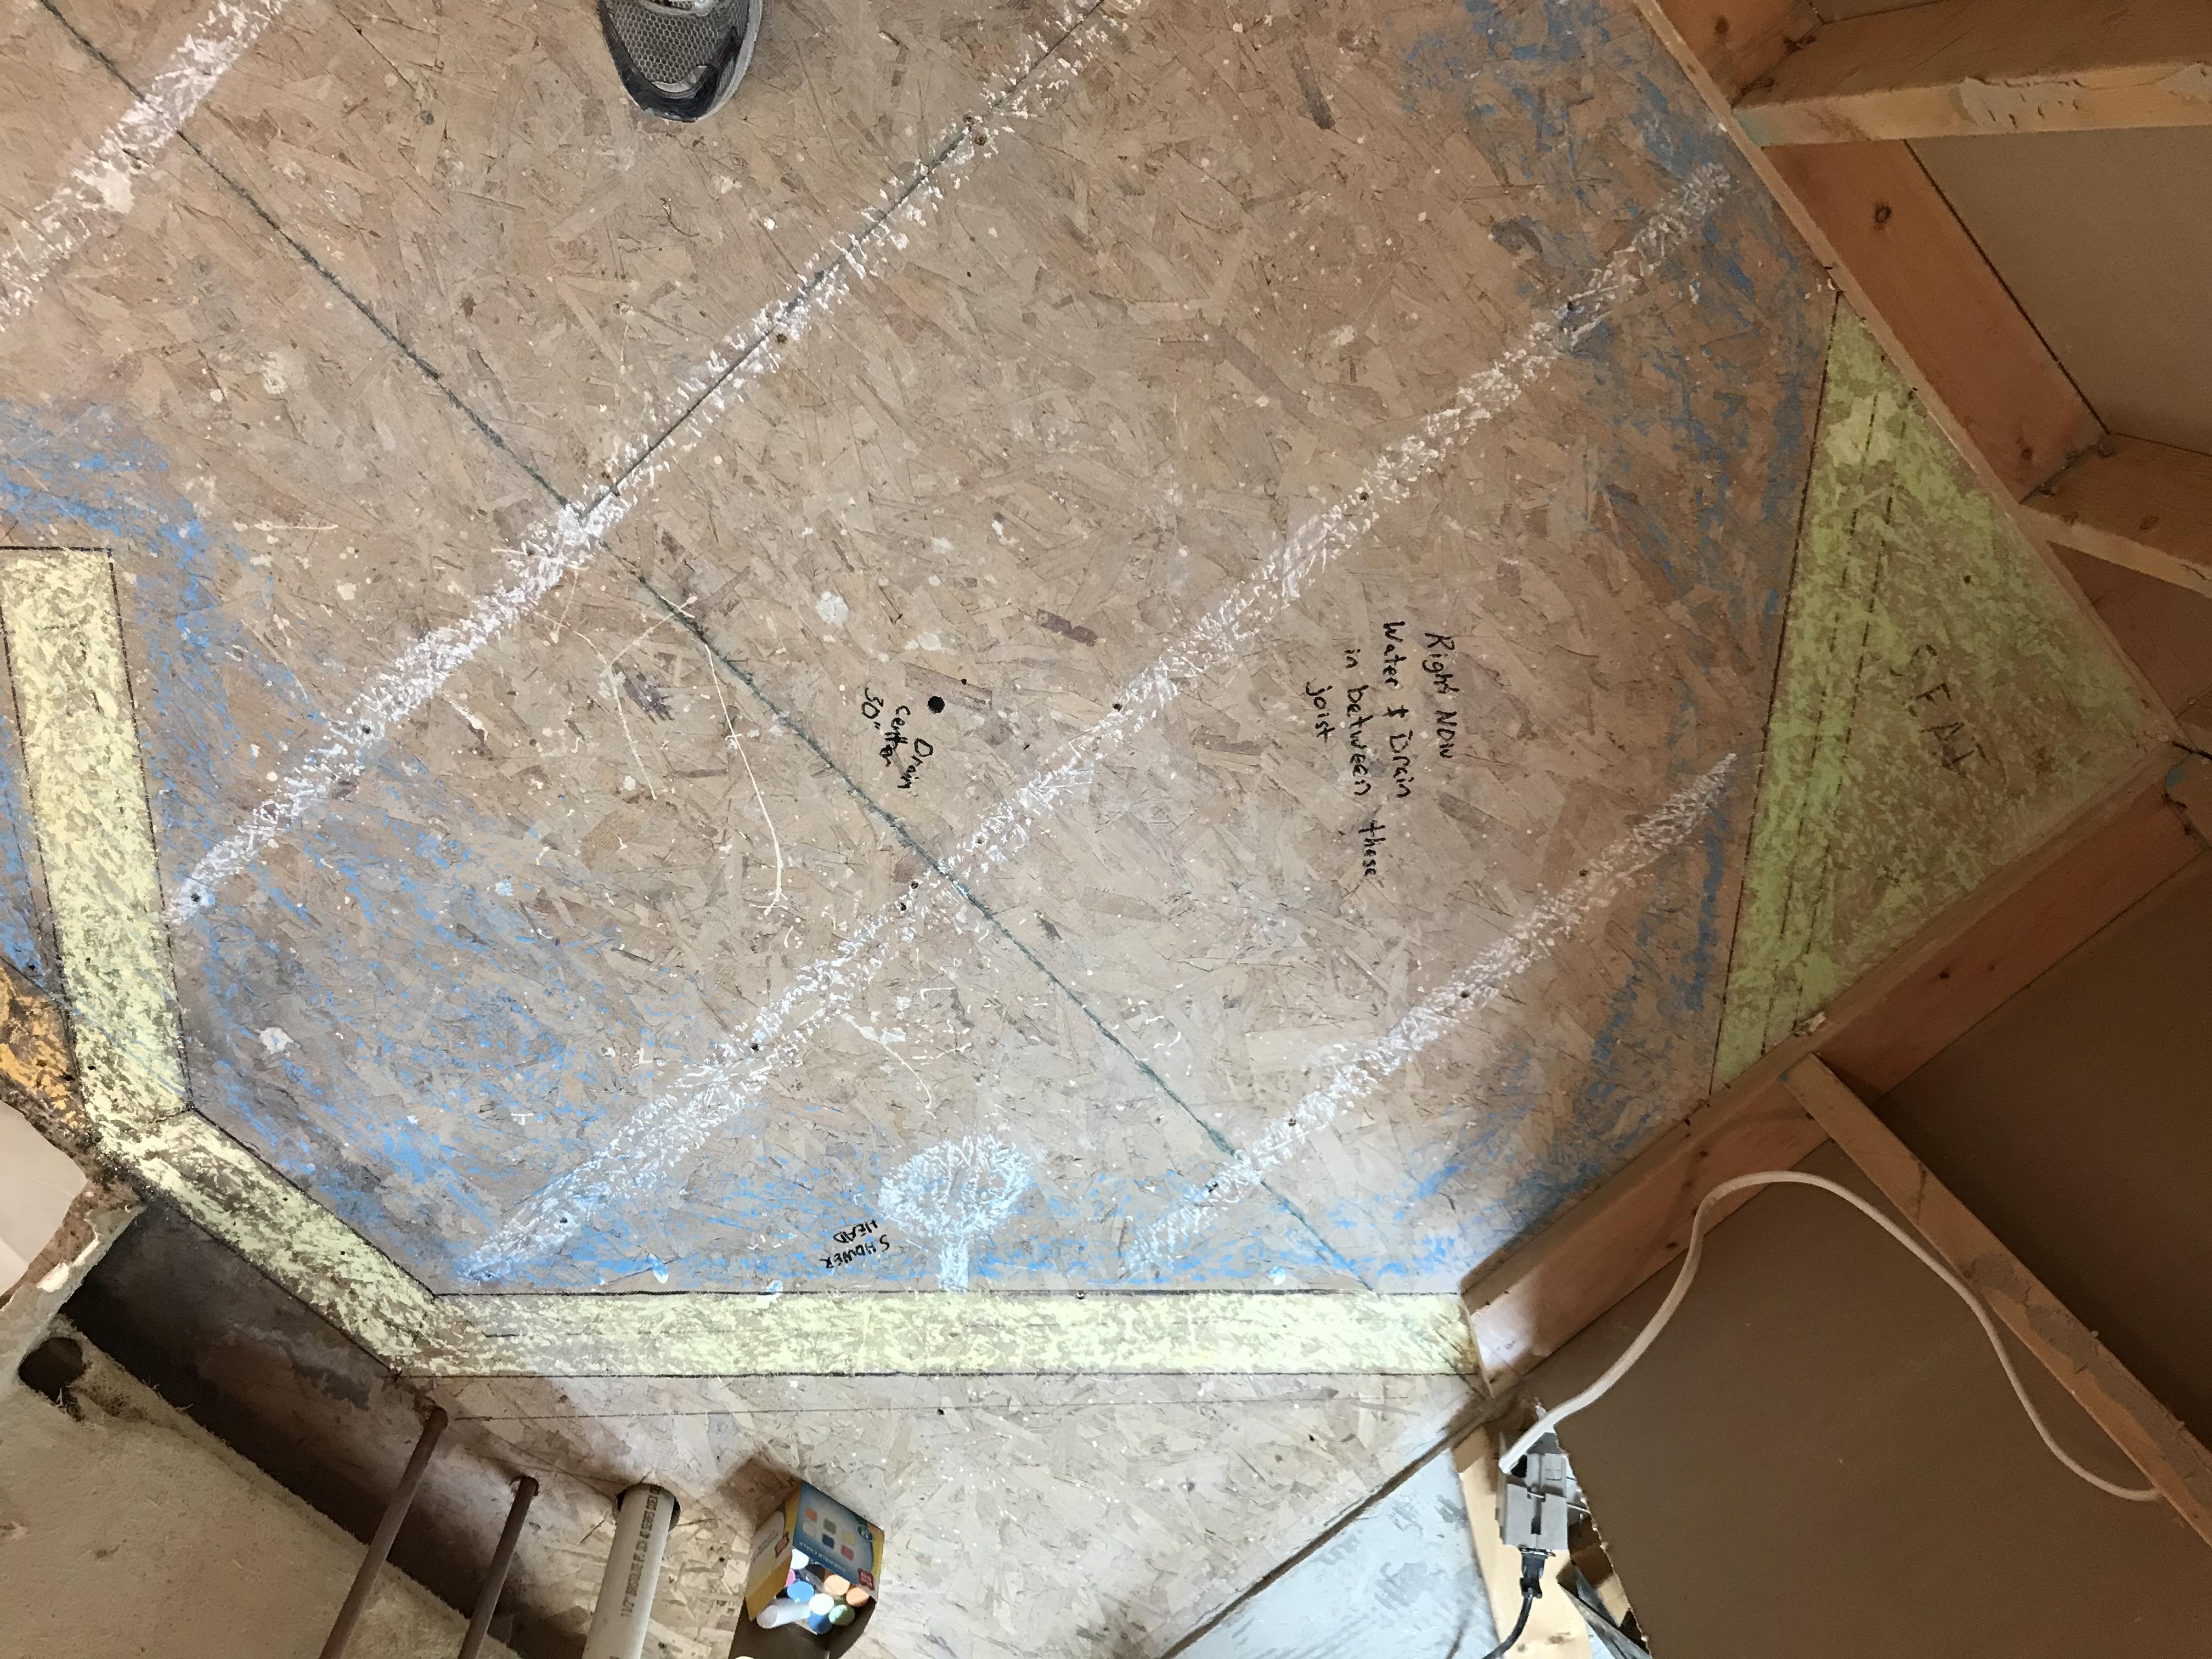
Here is an overall pic. Sorry the boards are covering some of it. The white lines are where the joists are located.
 So my plan is to use a 60”x60” WEDI shower pan and trim to fit. Frame the seat, bench and pillar. Cover the pillar, bench, seat, walls and ceiling in WEDI board. Tile everything.
I have been looking at using LED can lights that also have exhaust fans as part of the can. Good or bad?
I pulled part of the floor, my plumbing doesn’t run the way I anticipated, but I don’t think it will be to bad. I also wanted to go from copper to PEX to ease running the water inside the wall to the mixing valve. Any thoughts on that? Is that even doable?
Awesome pictures Ward and we’re super excited to see your project take shape.
For that size bathroom you might want just a dedicated vent fan that can pull all the steam from the shower outside. We do have a video with Bill White in the Electrical section where he talks about the different vent fans and Pros/Cons. I know he mentions those dual recessed light/fans but can’t remember his opinion, lol.
Converting to PEX is very easy and we do it for many projects. Just check your local plumbing codes to be sure you can use PEX. Many of the mixing valves will easily adapt to PEX as well.
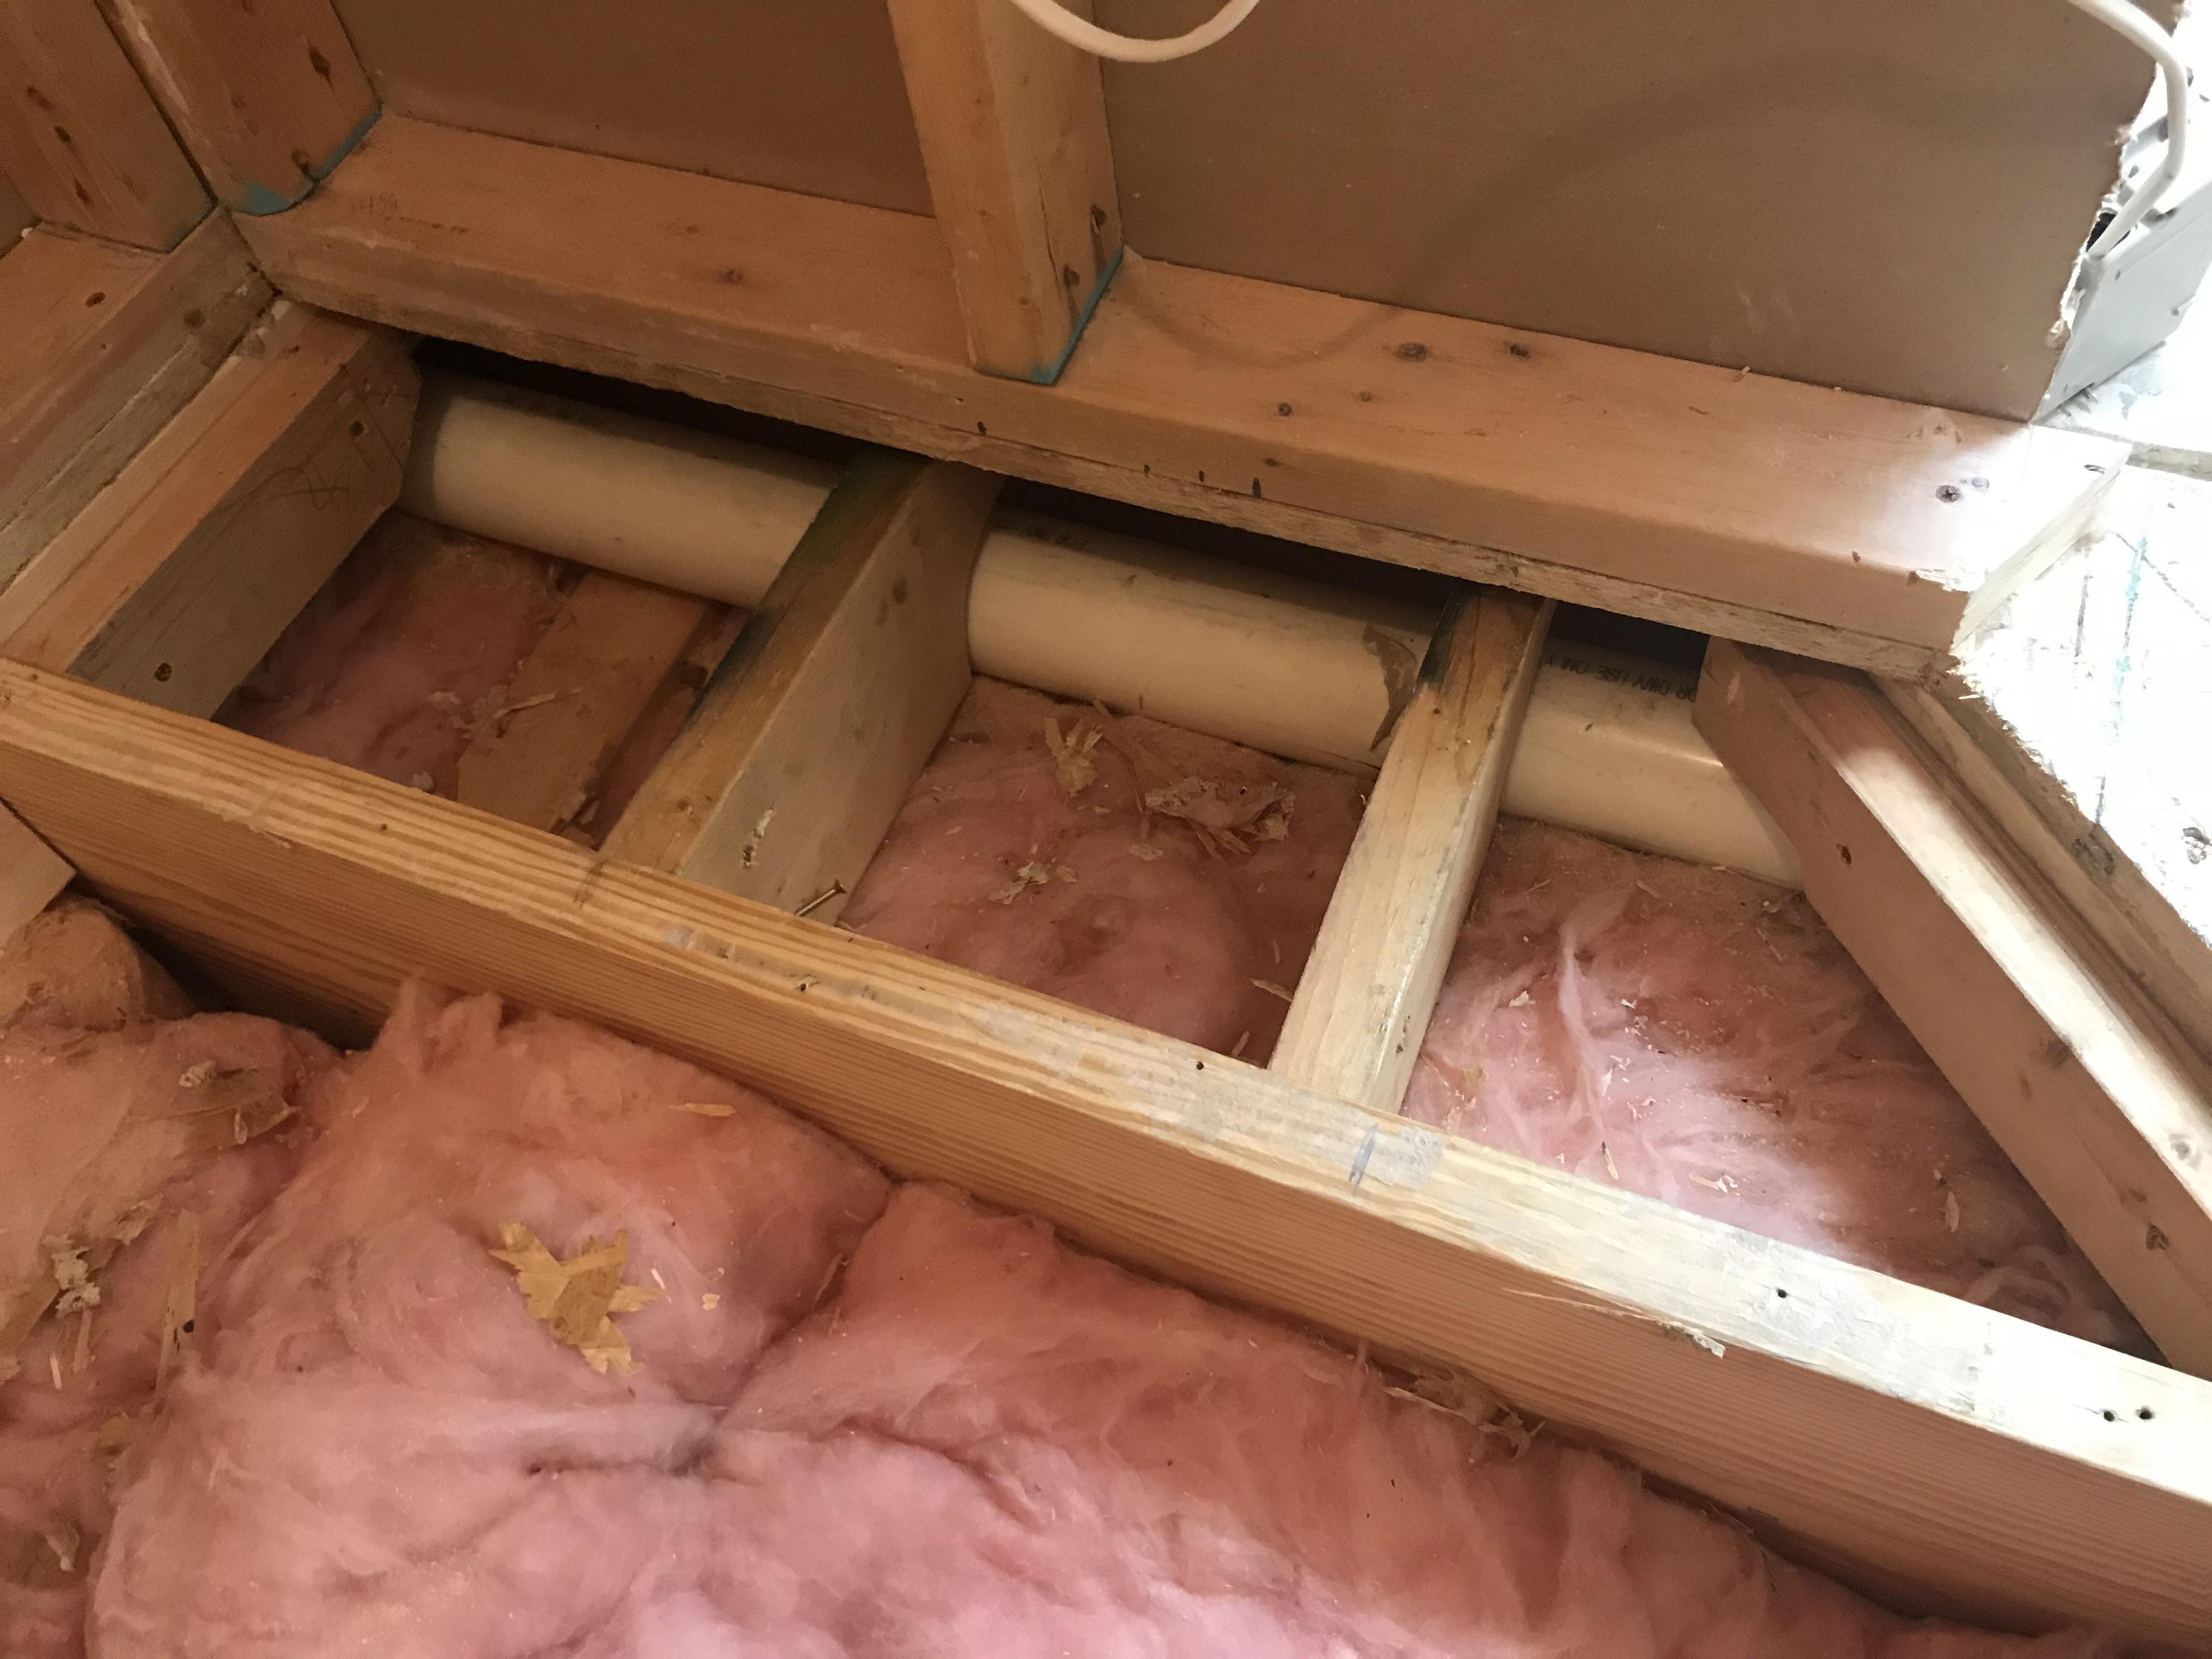
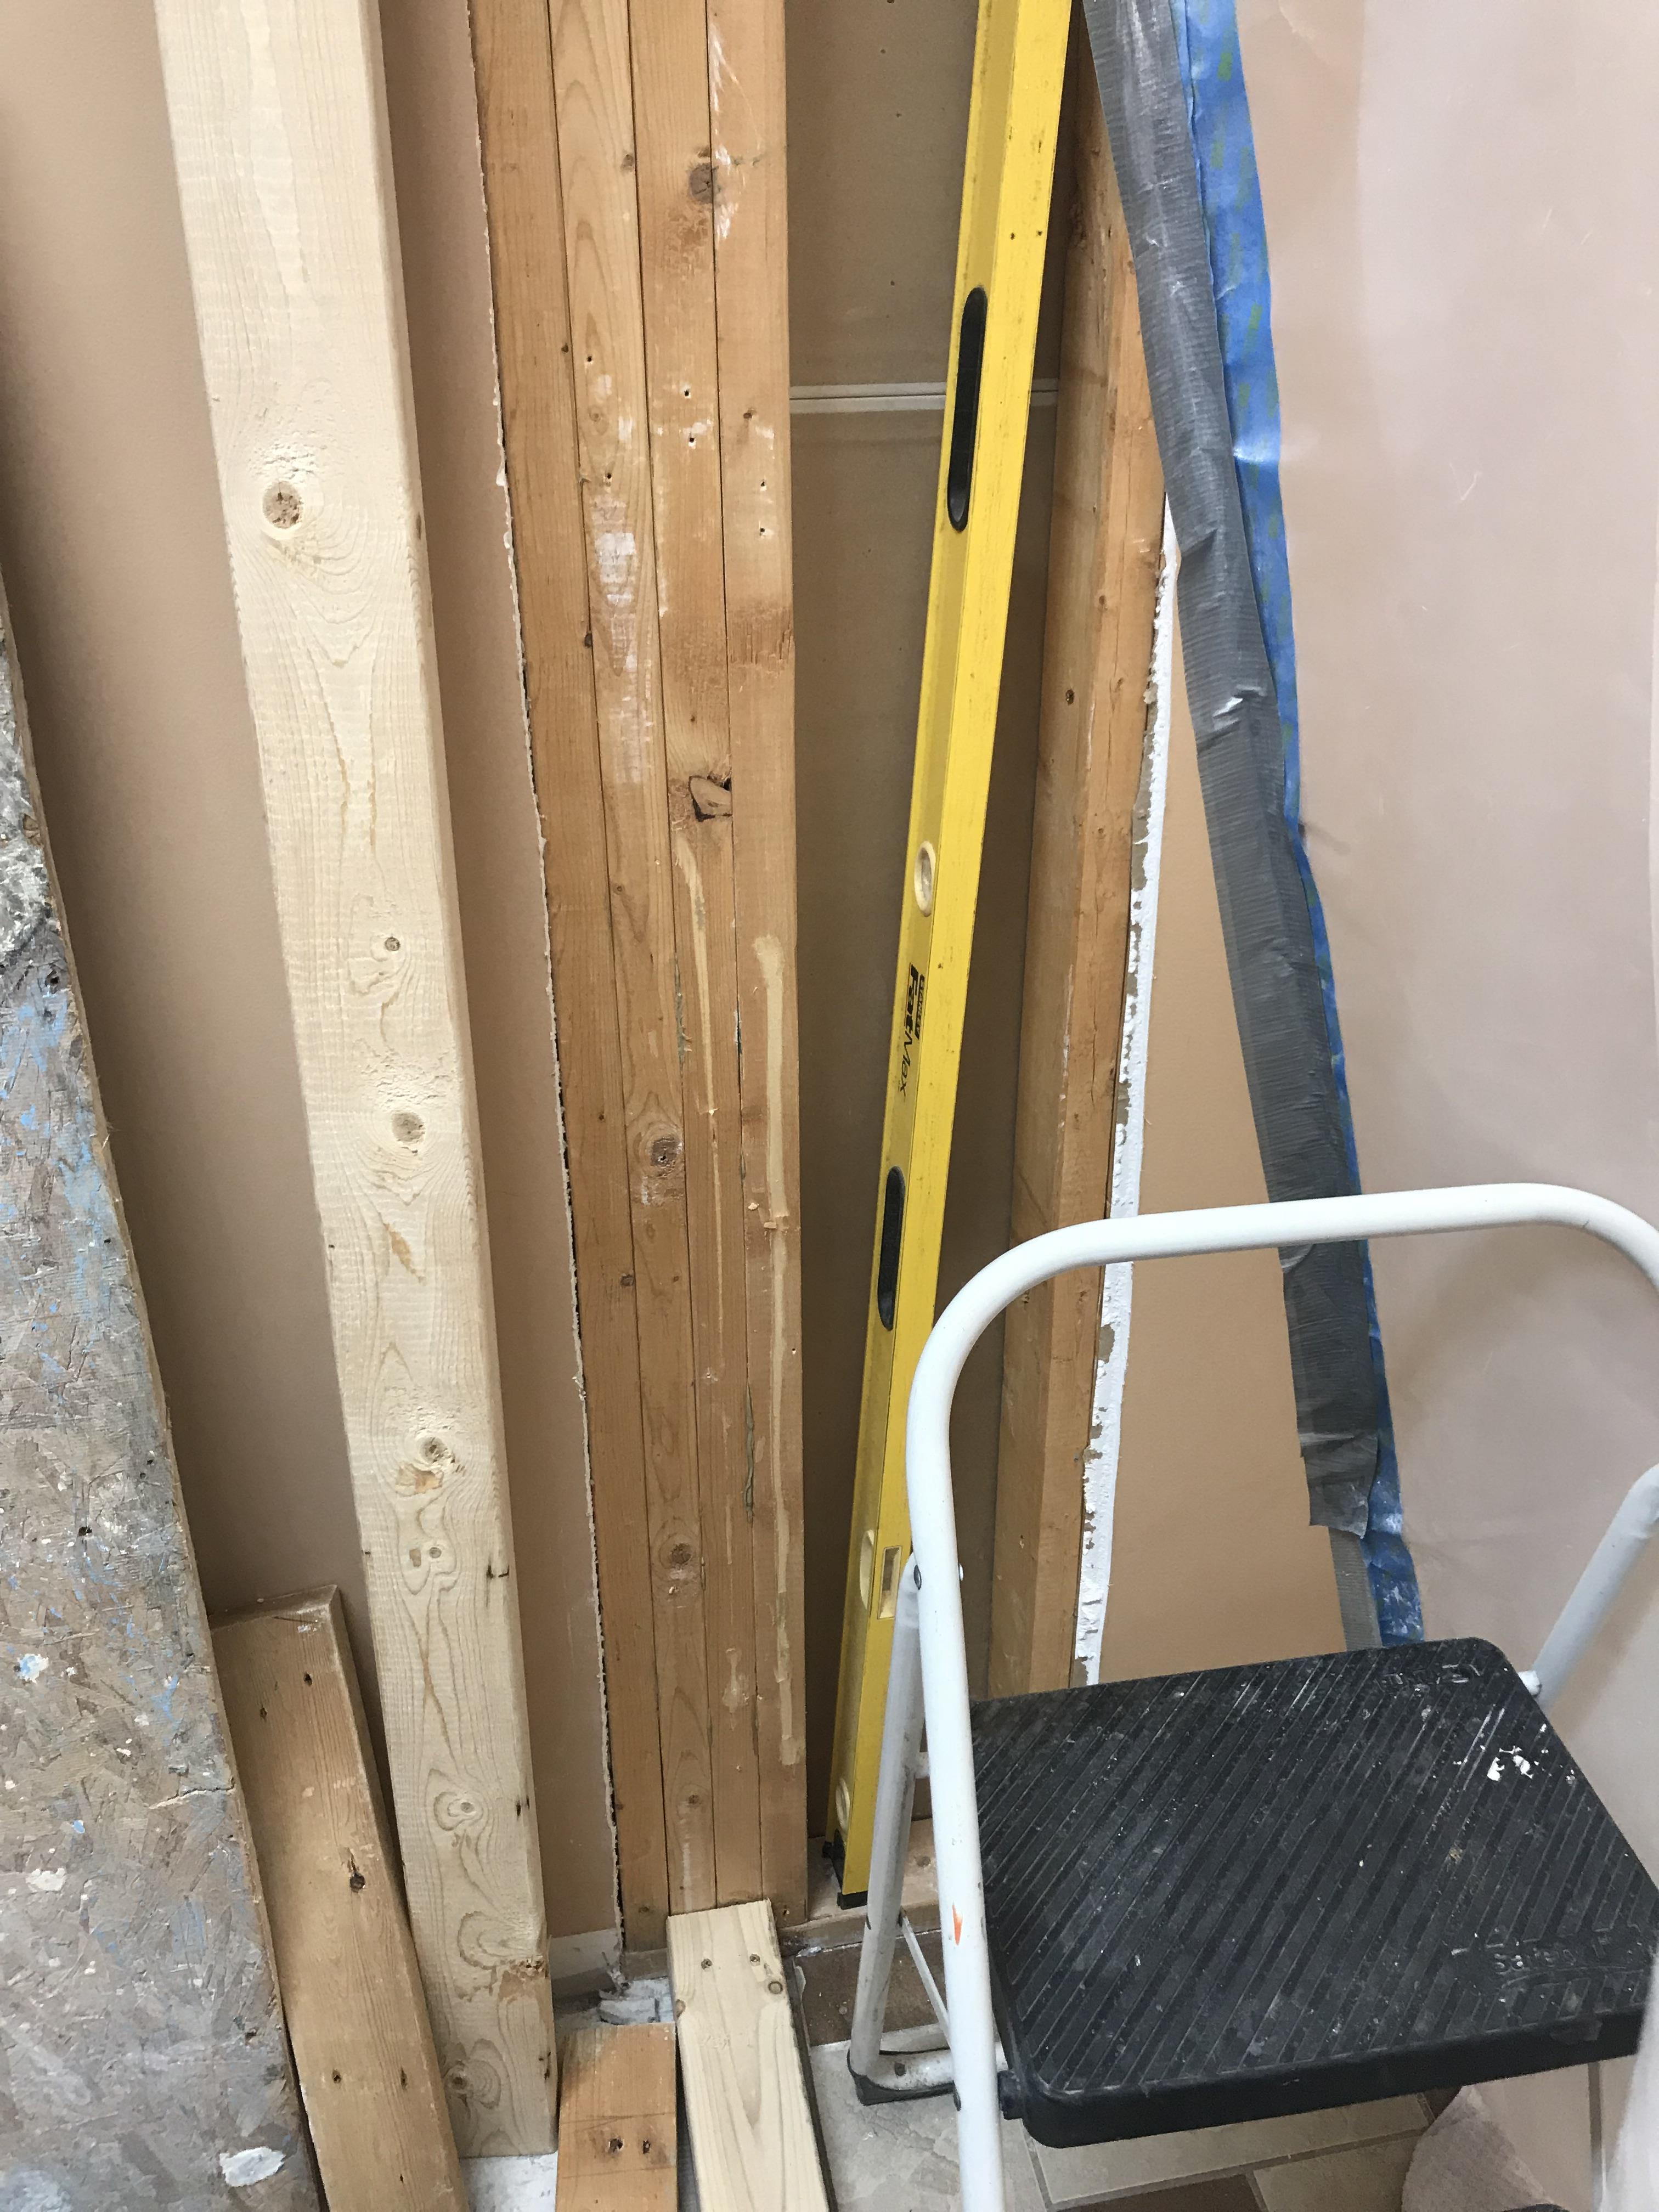
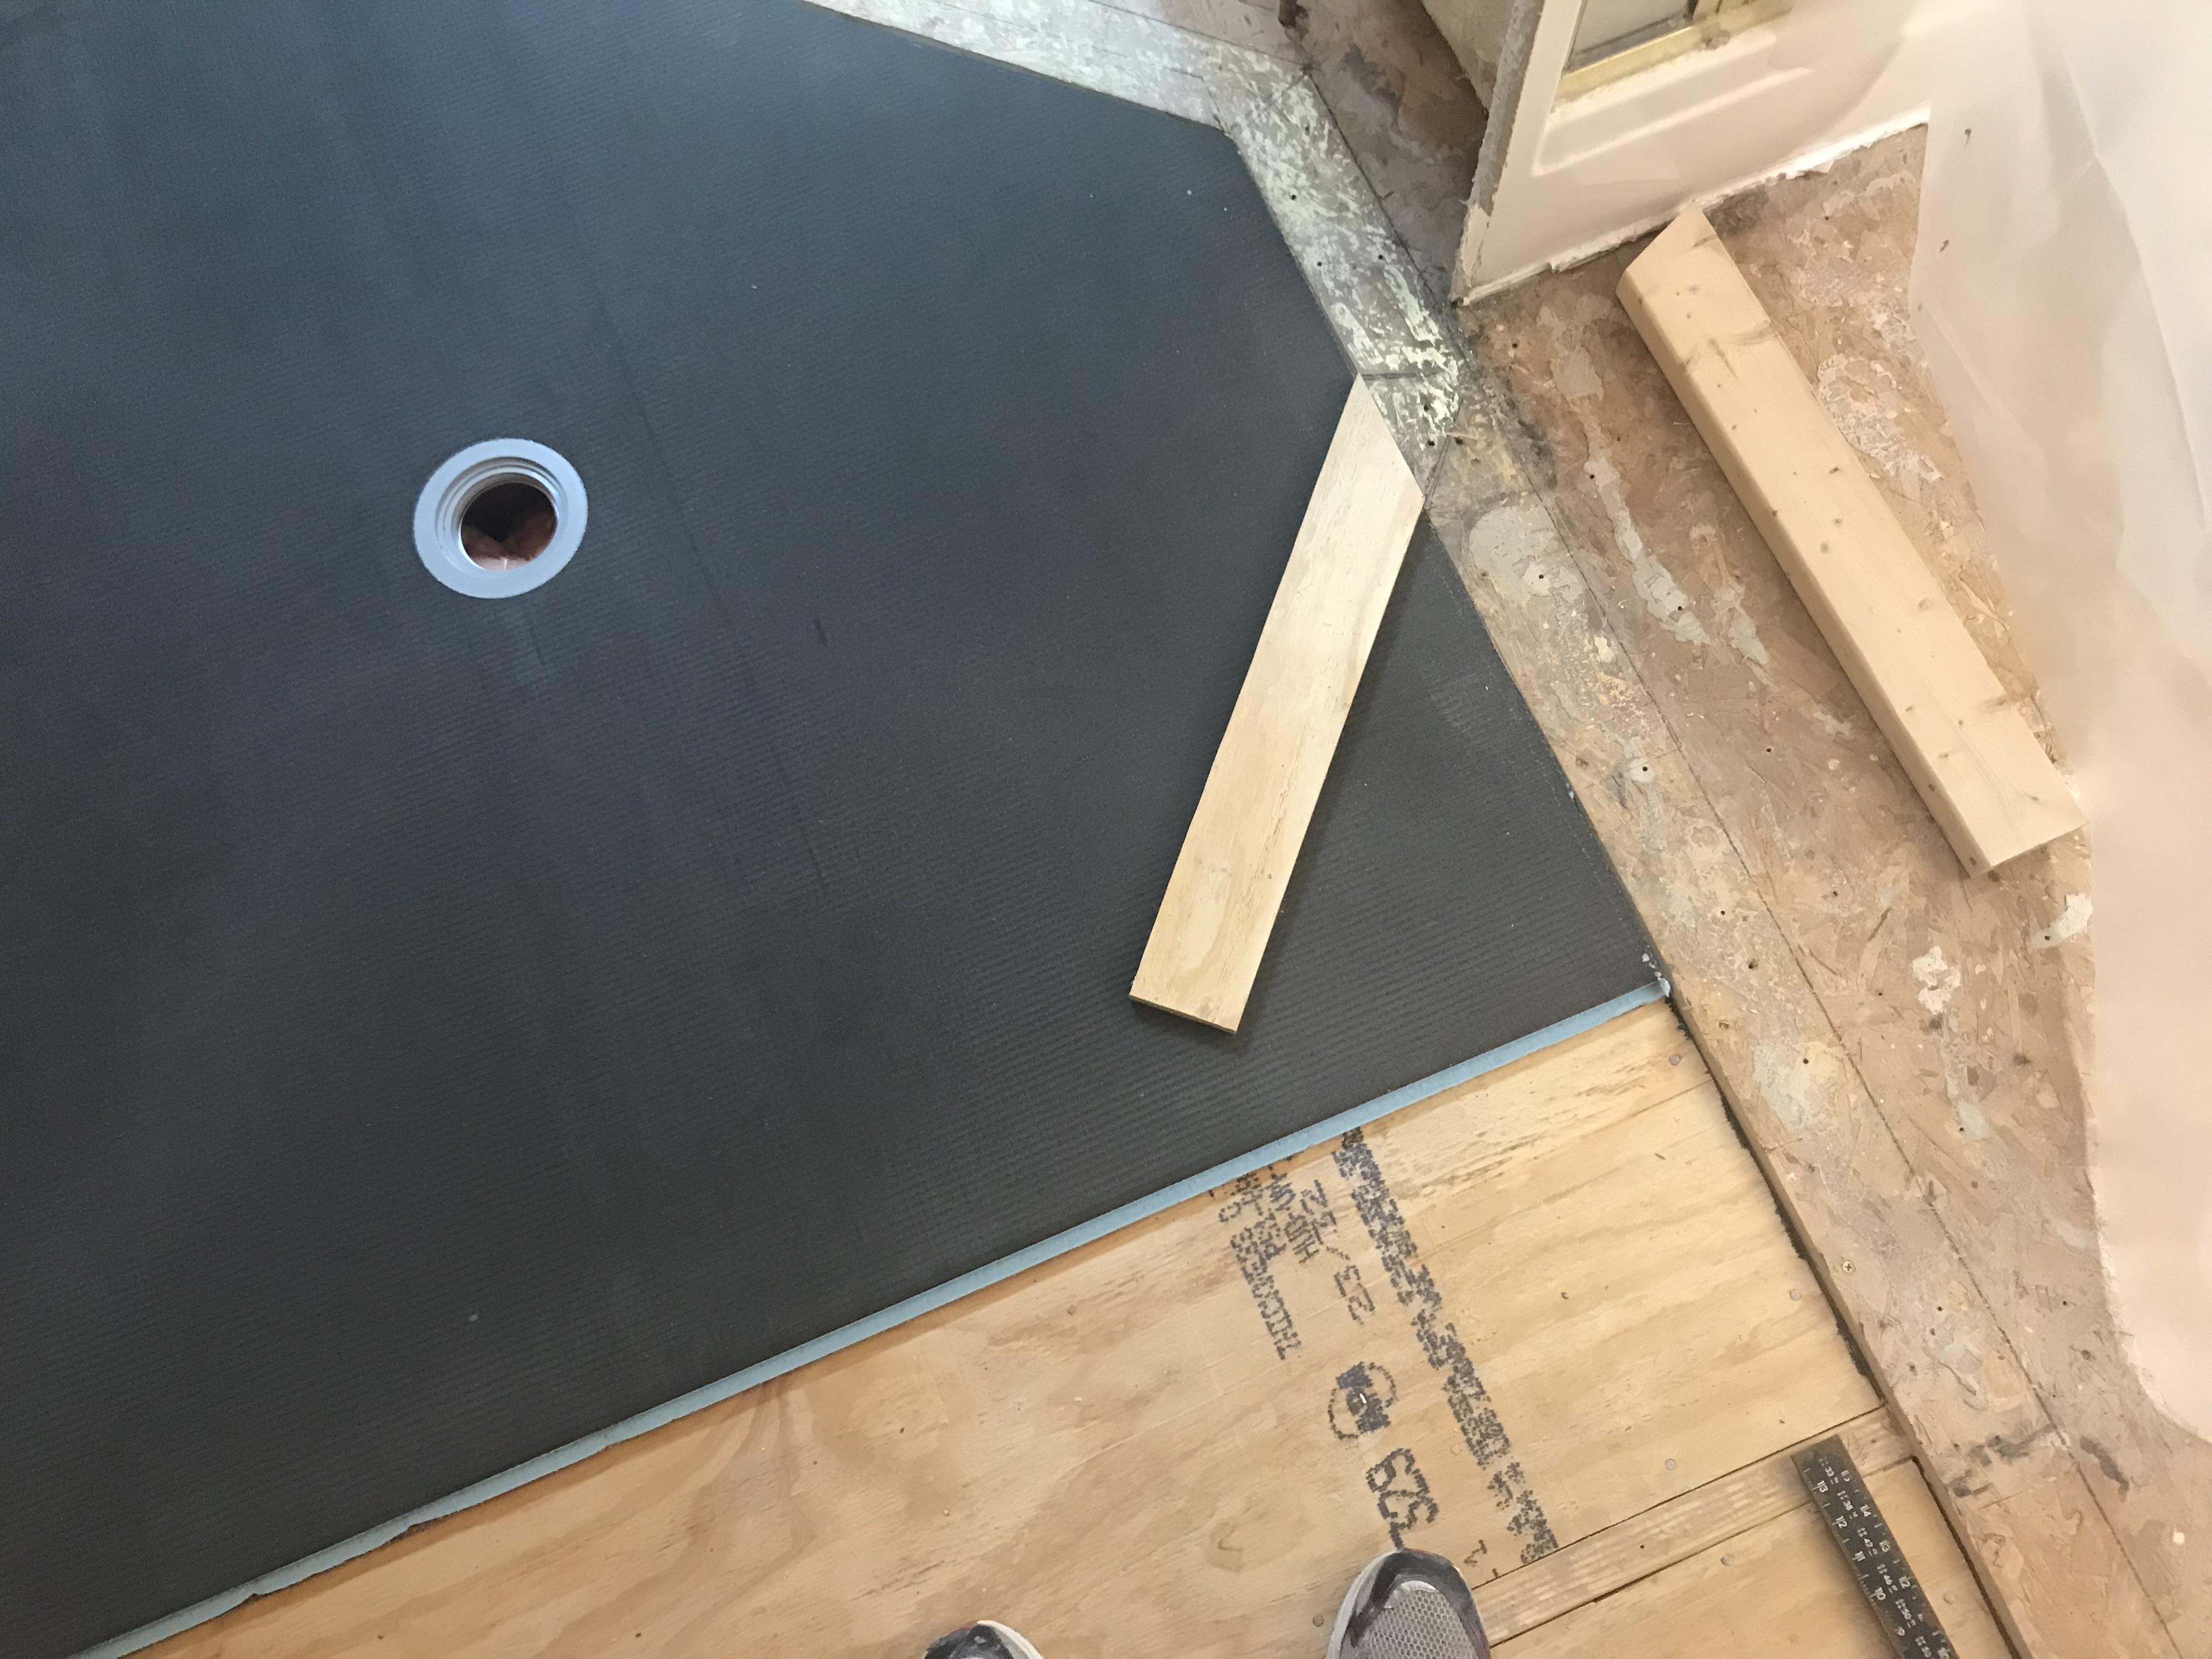
first real questions.Let me post the 3 pics first.
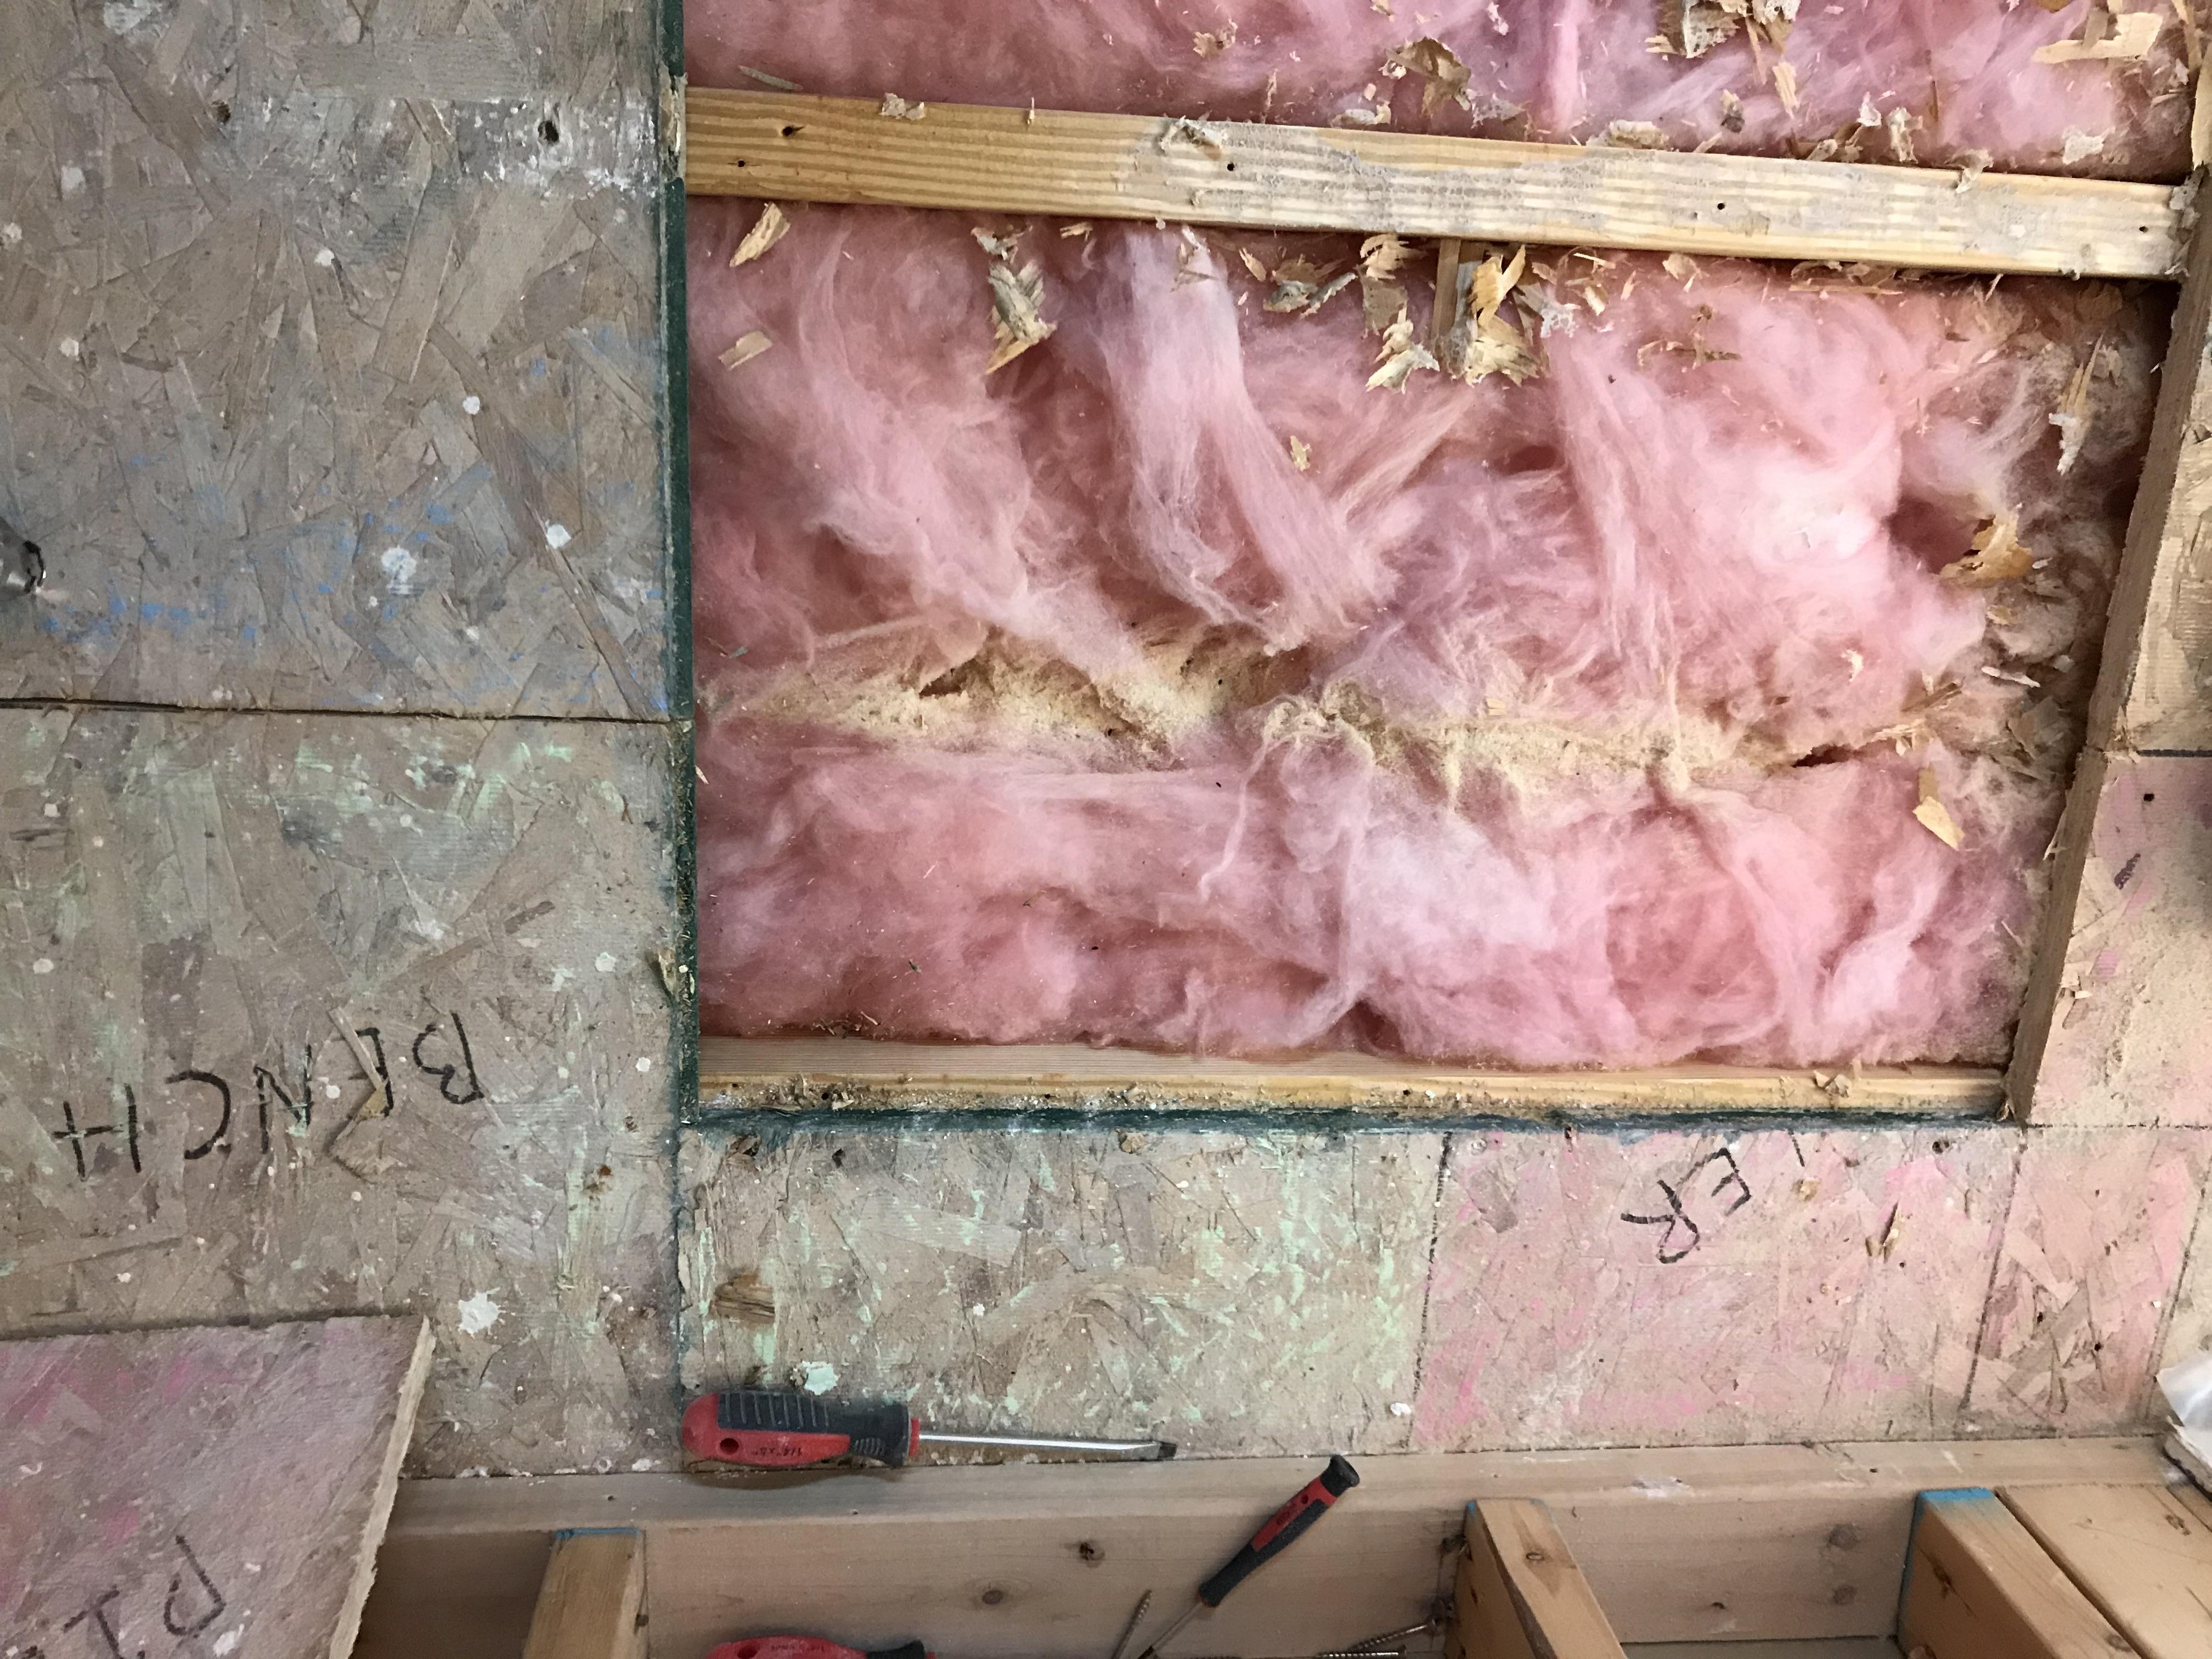
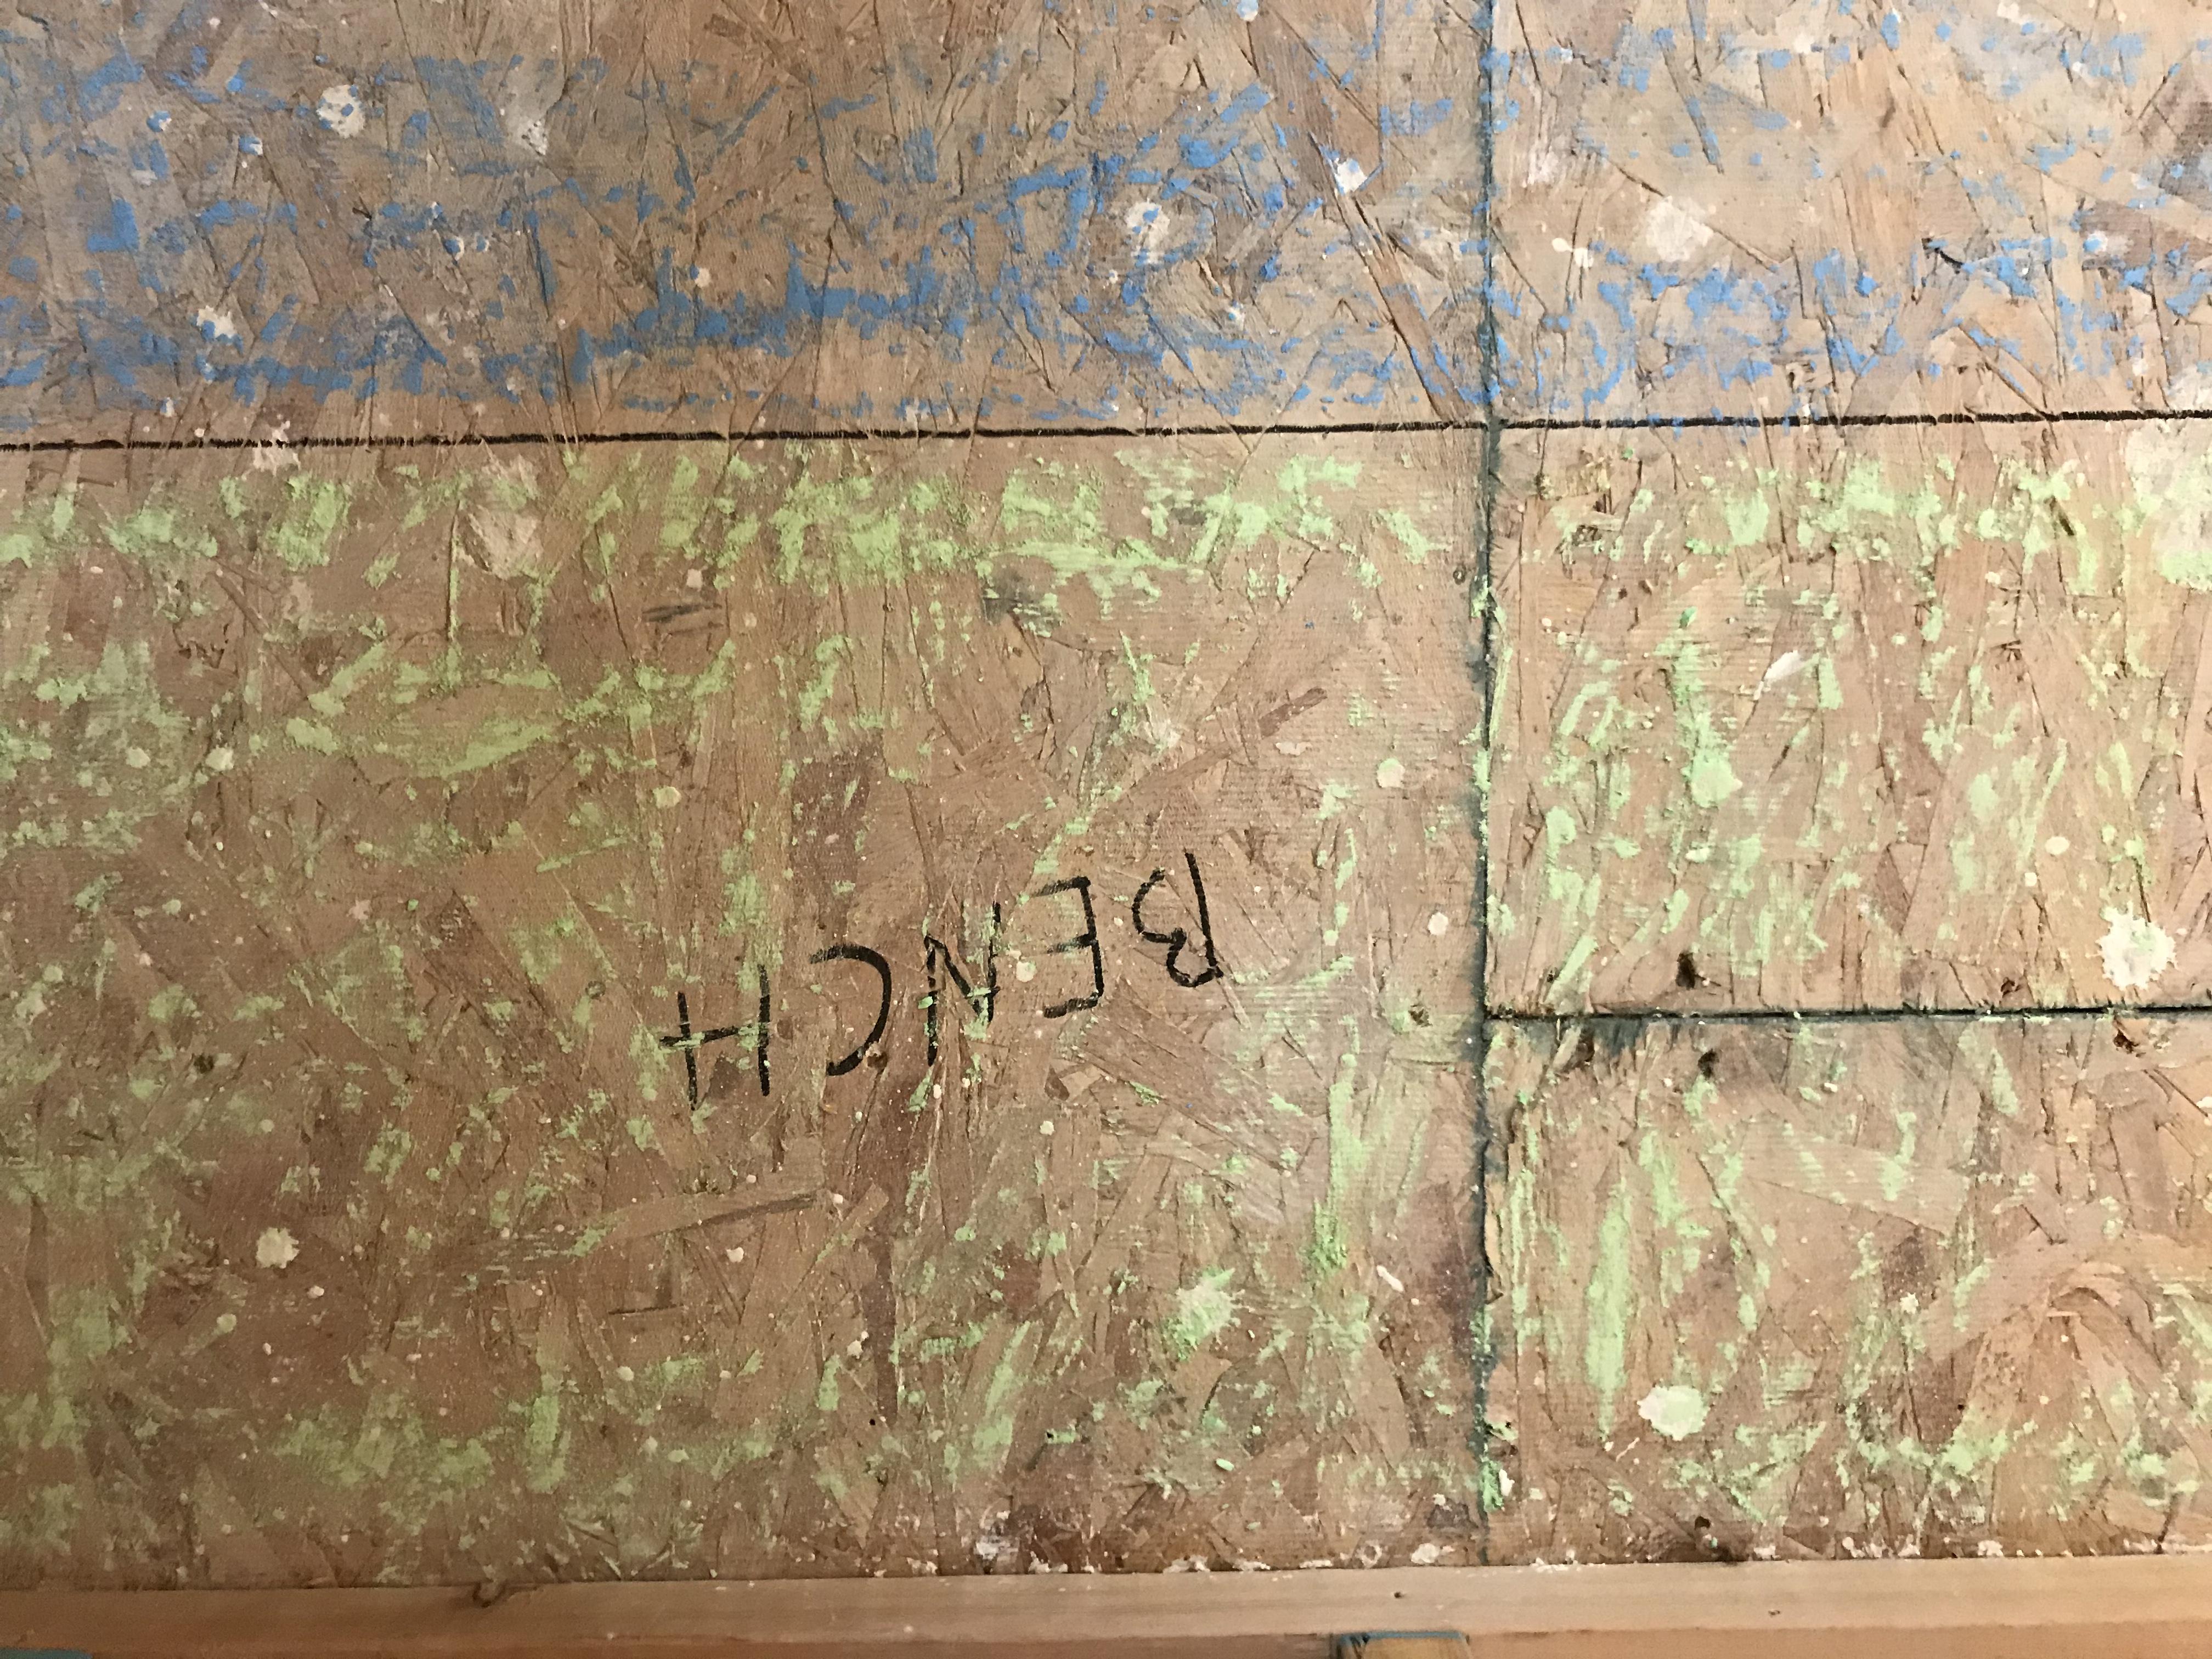
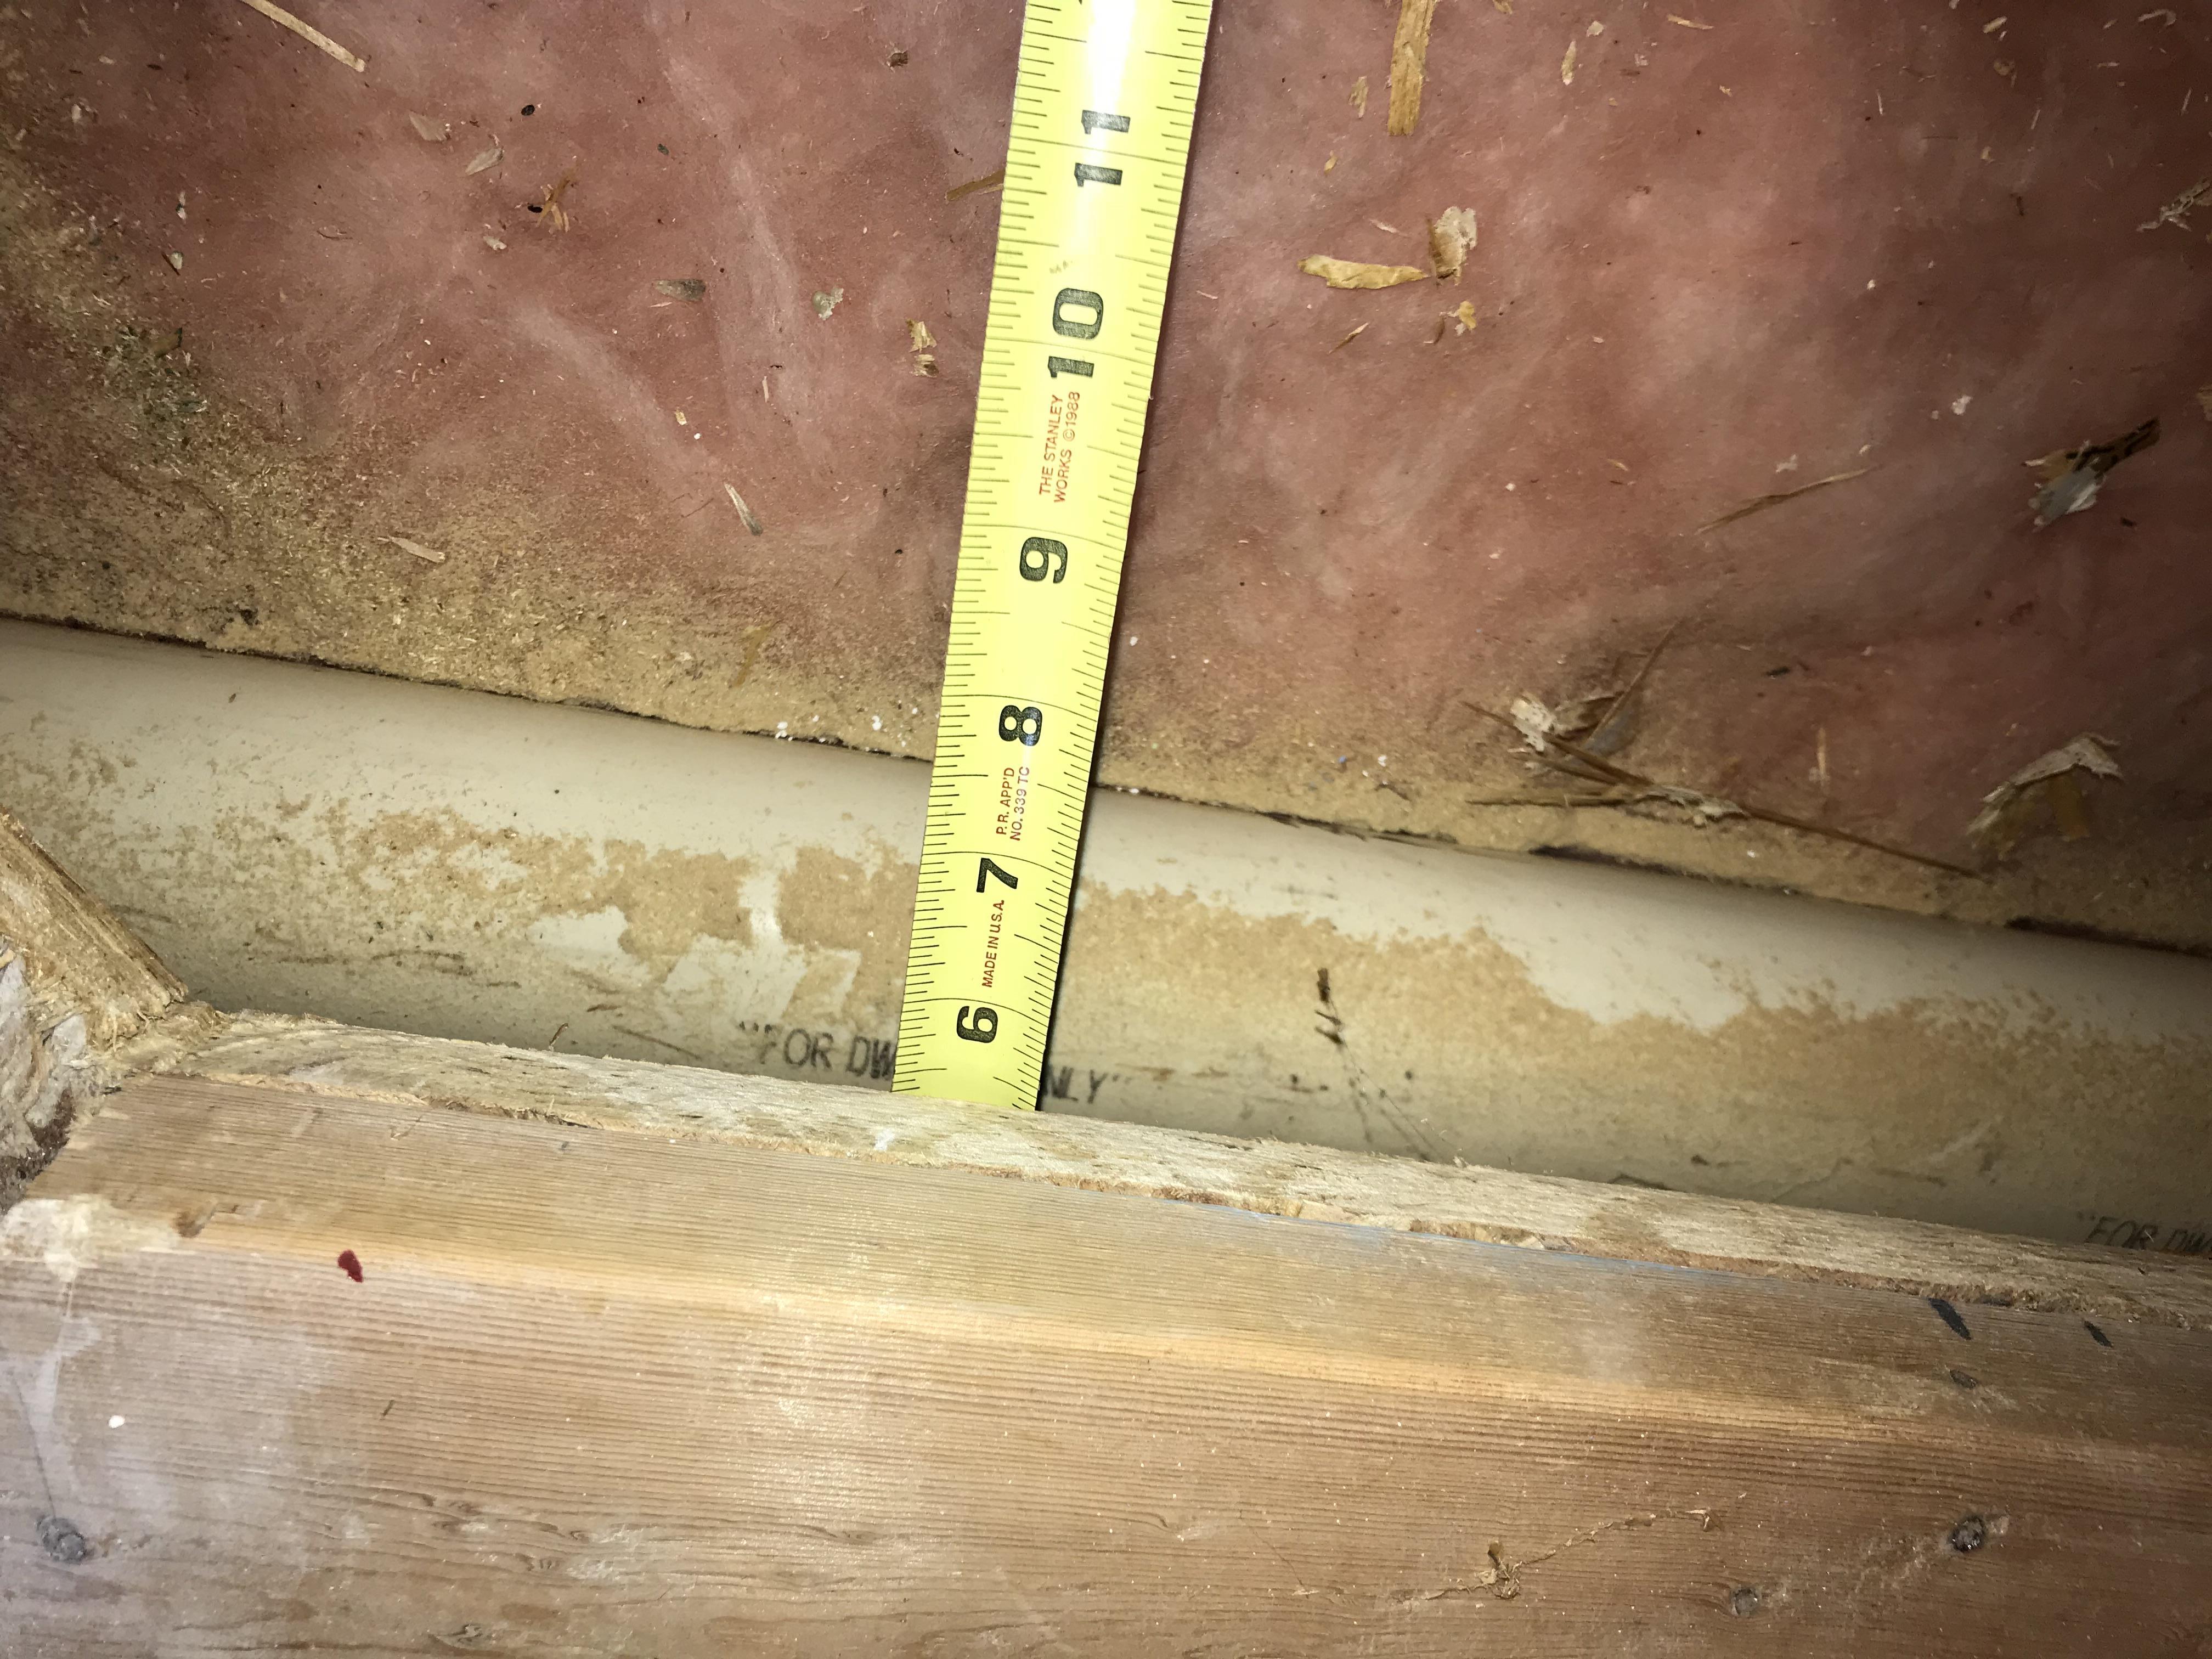
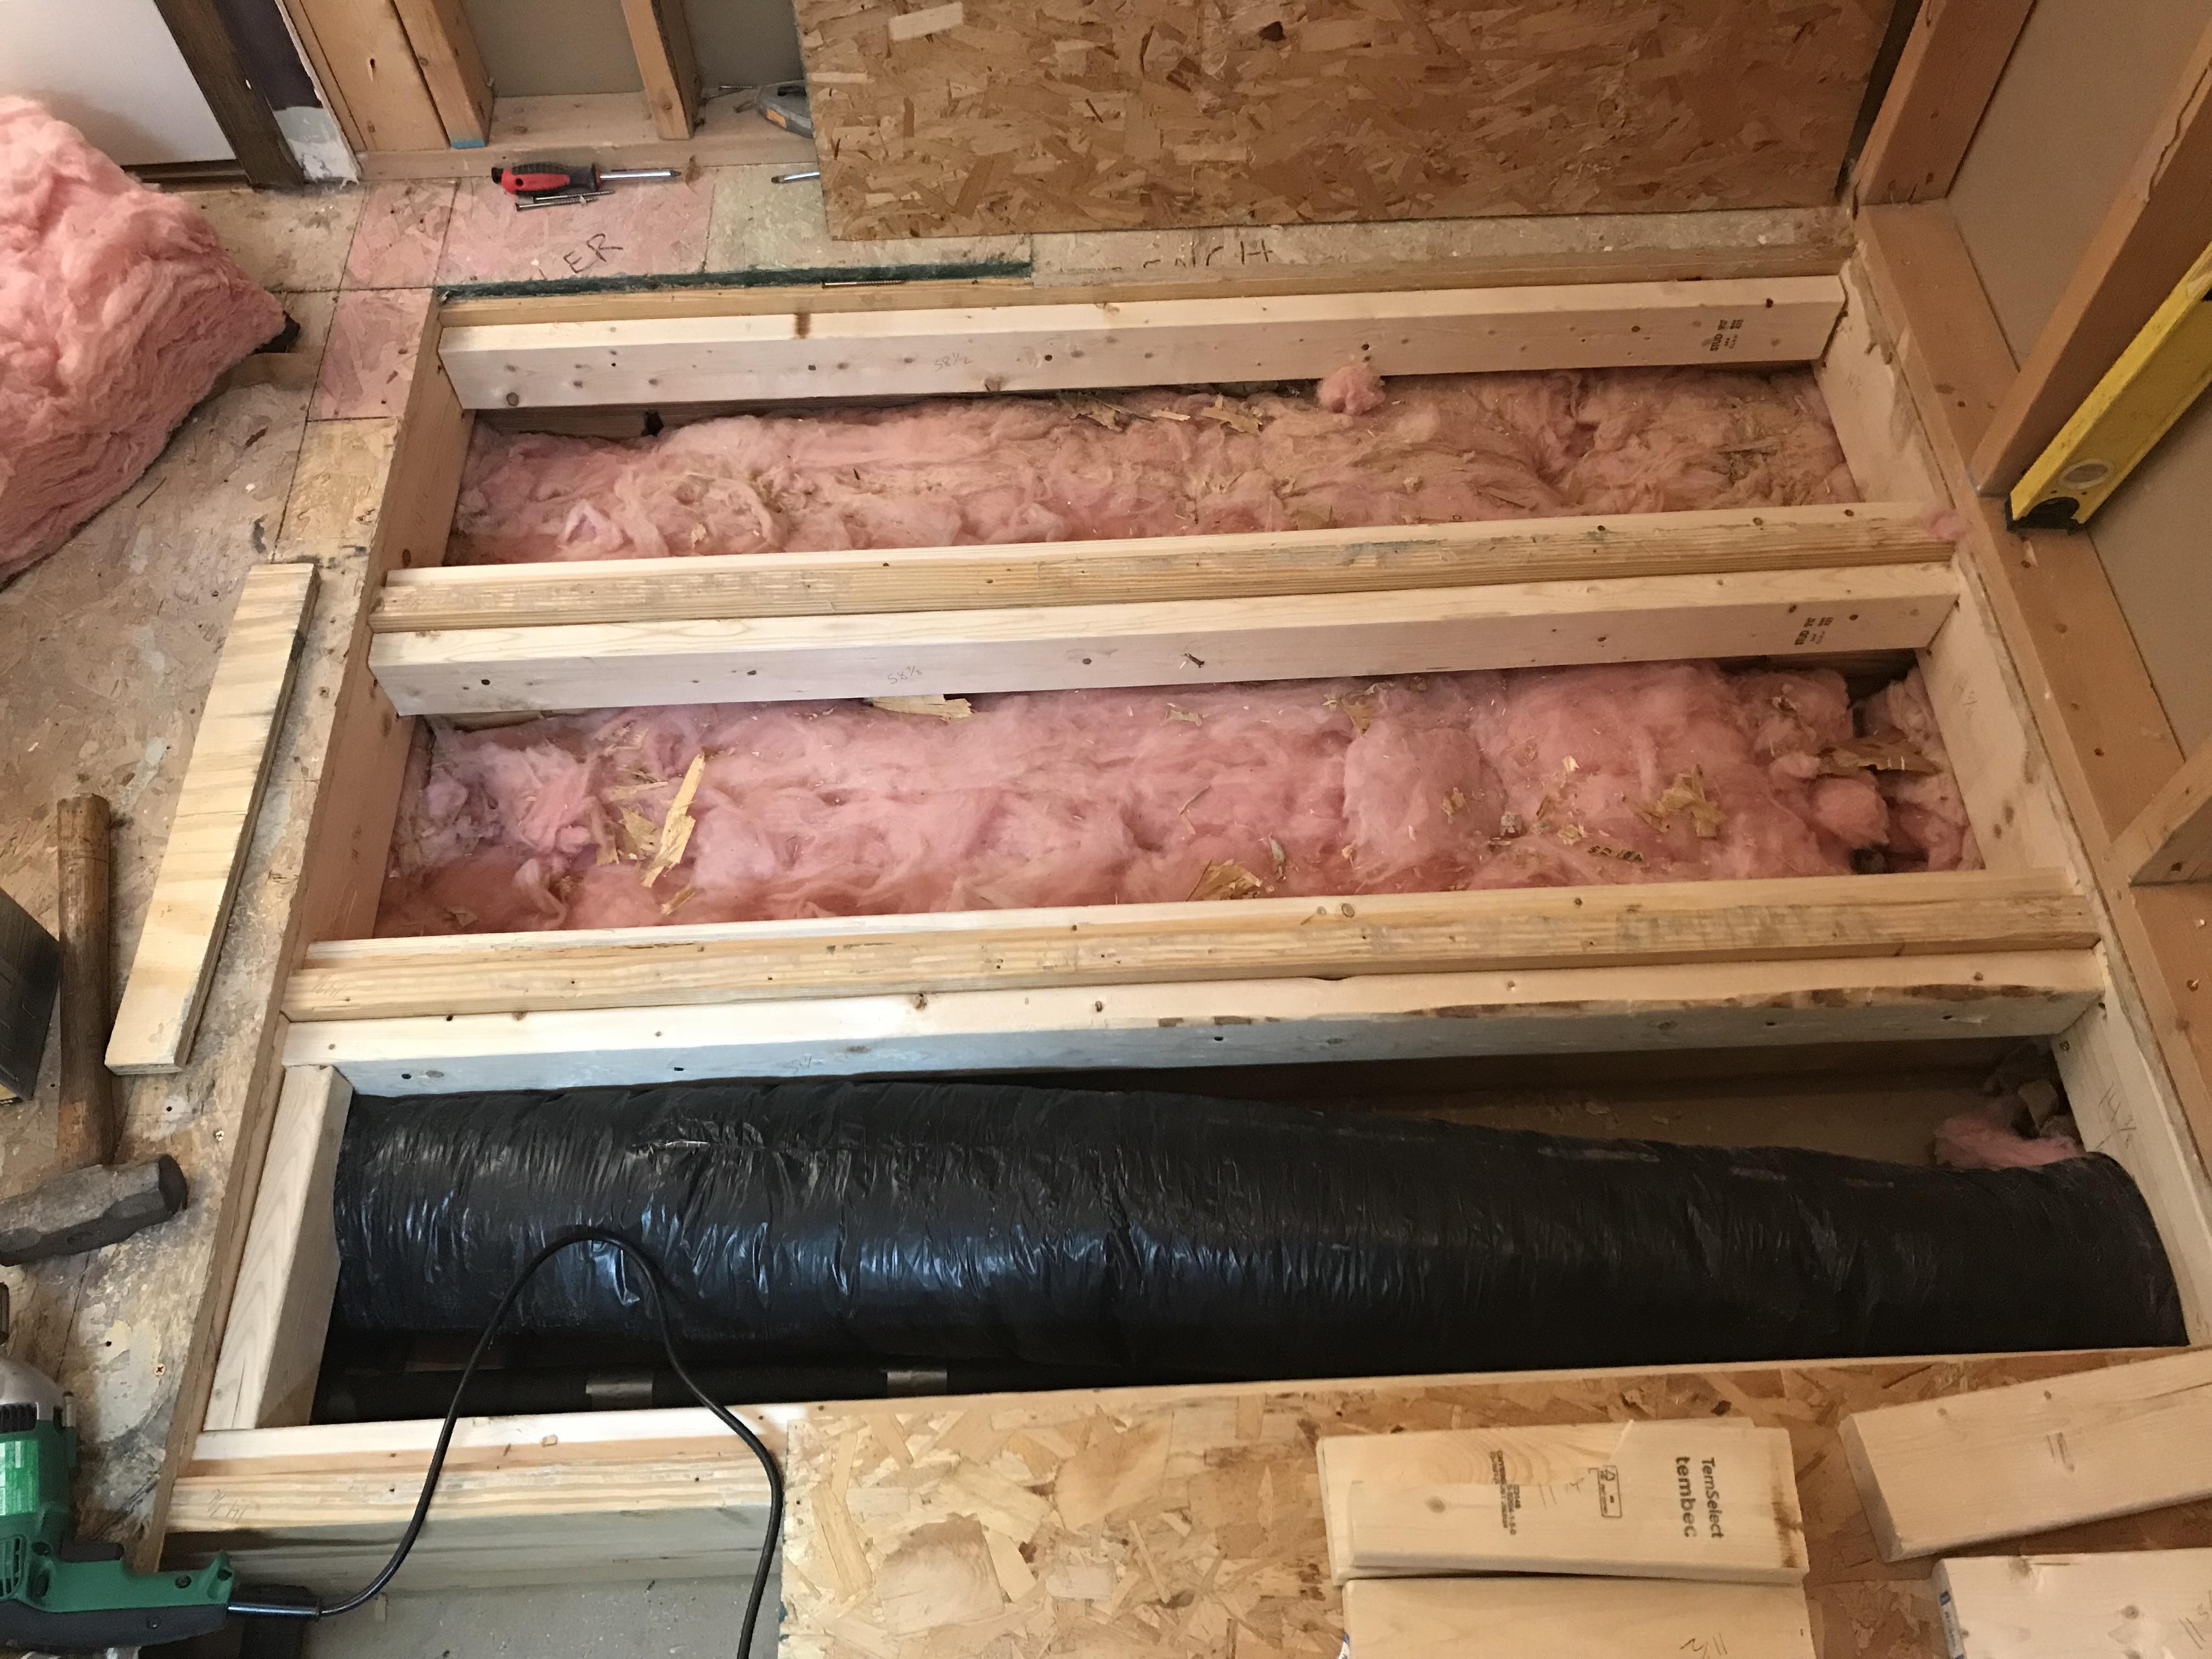
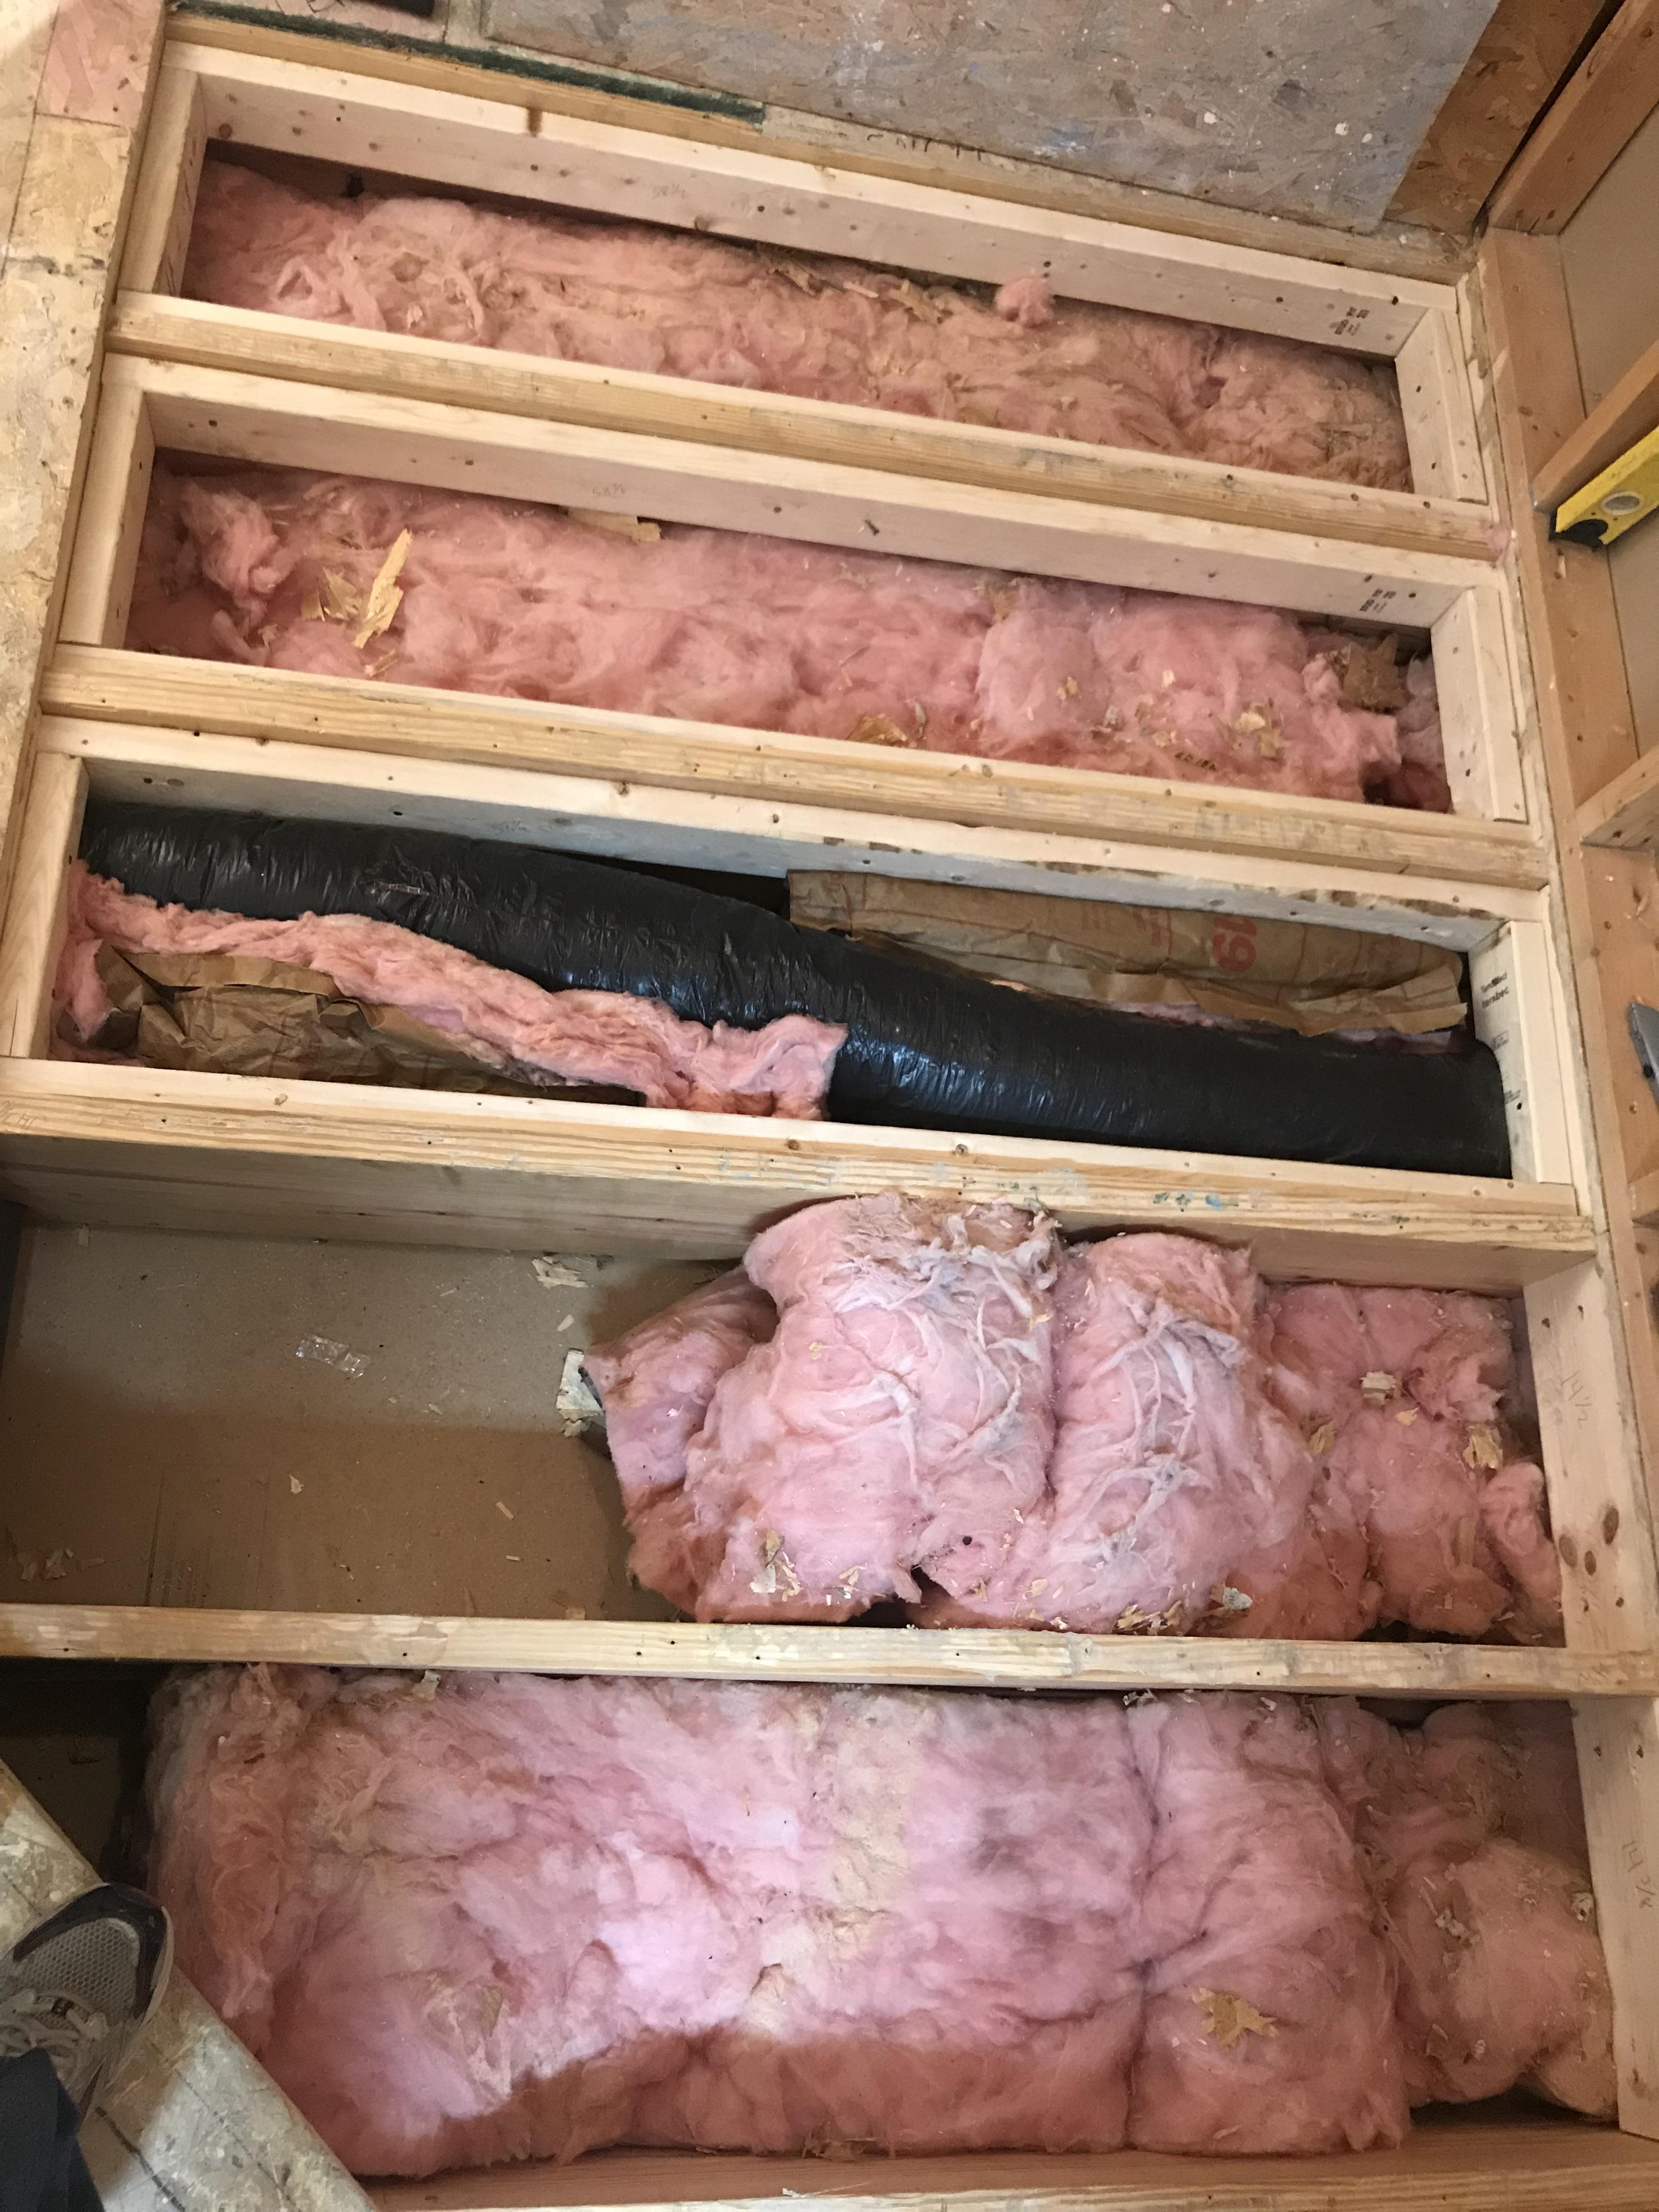
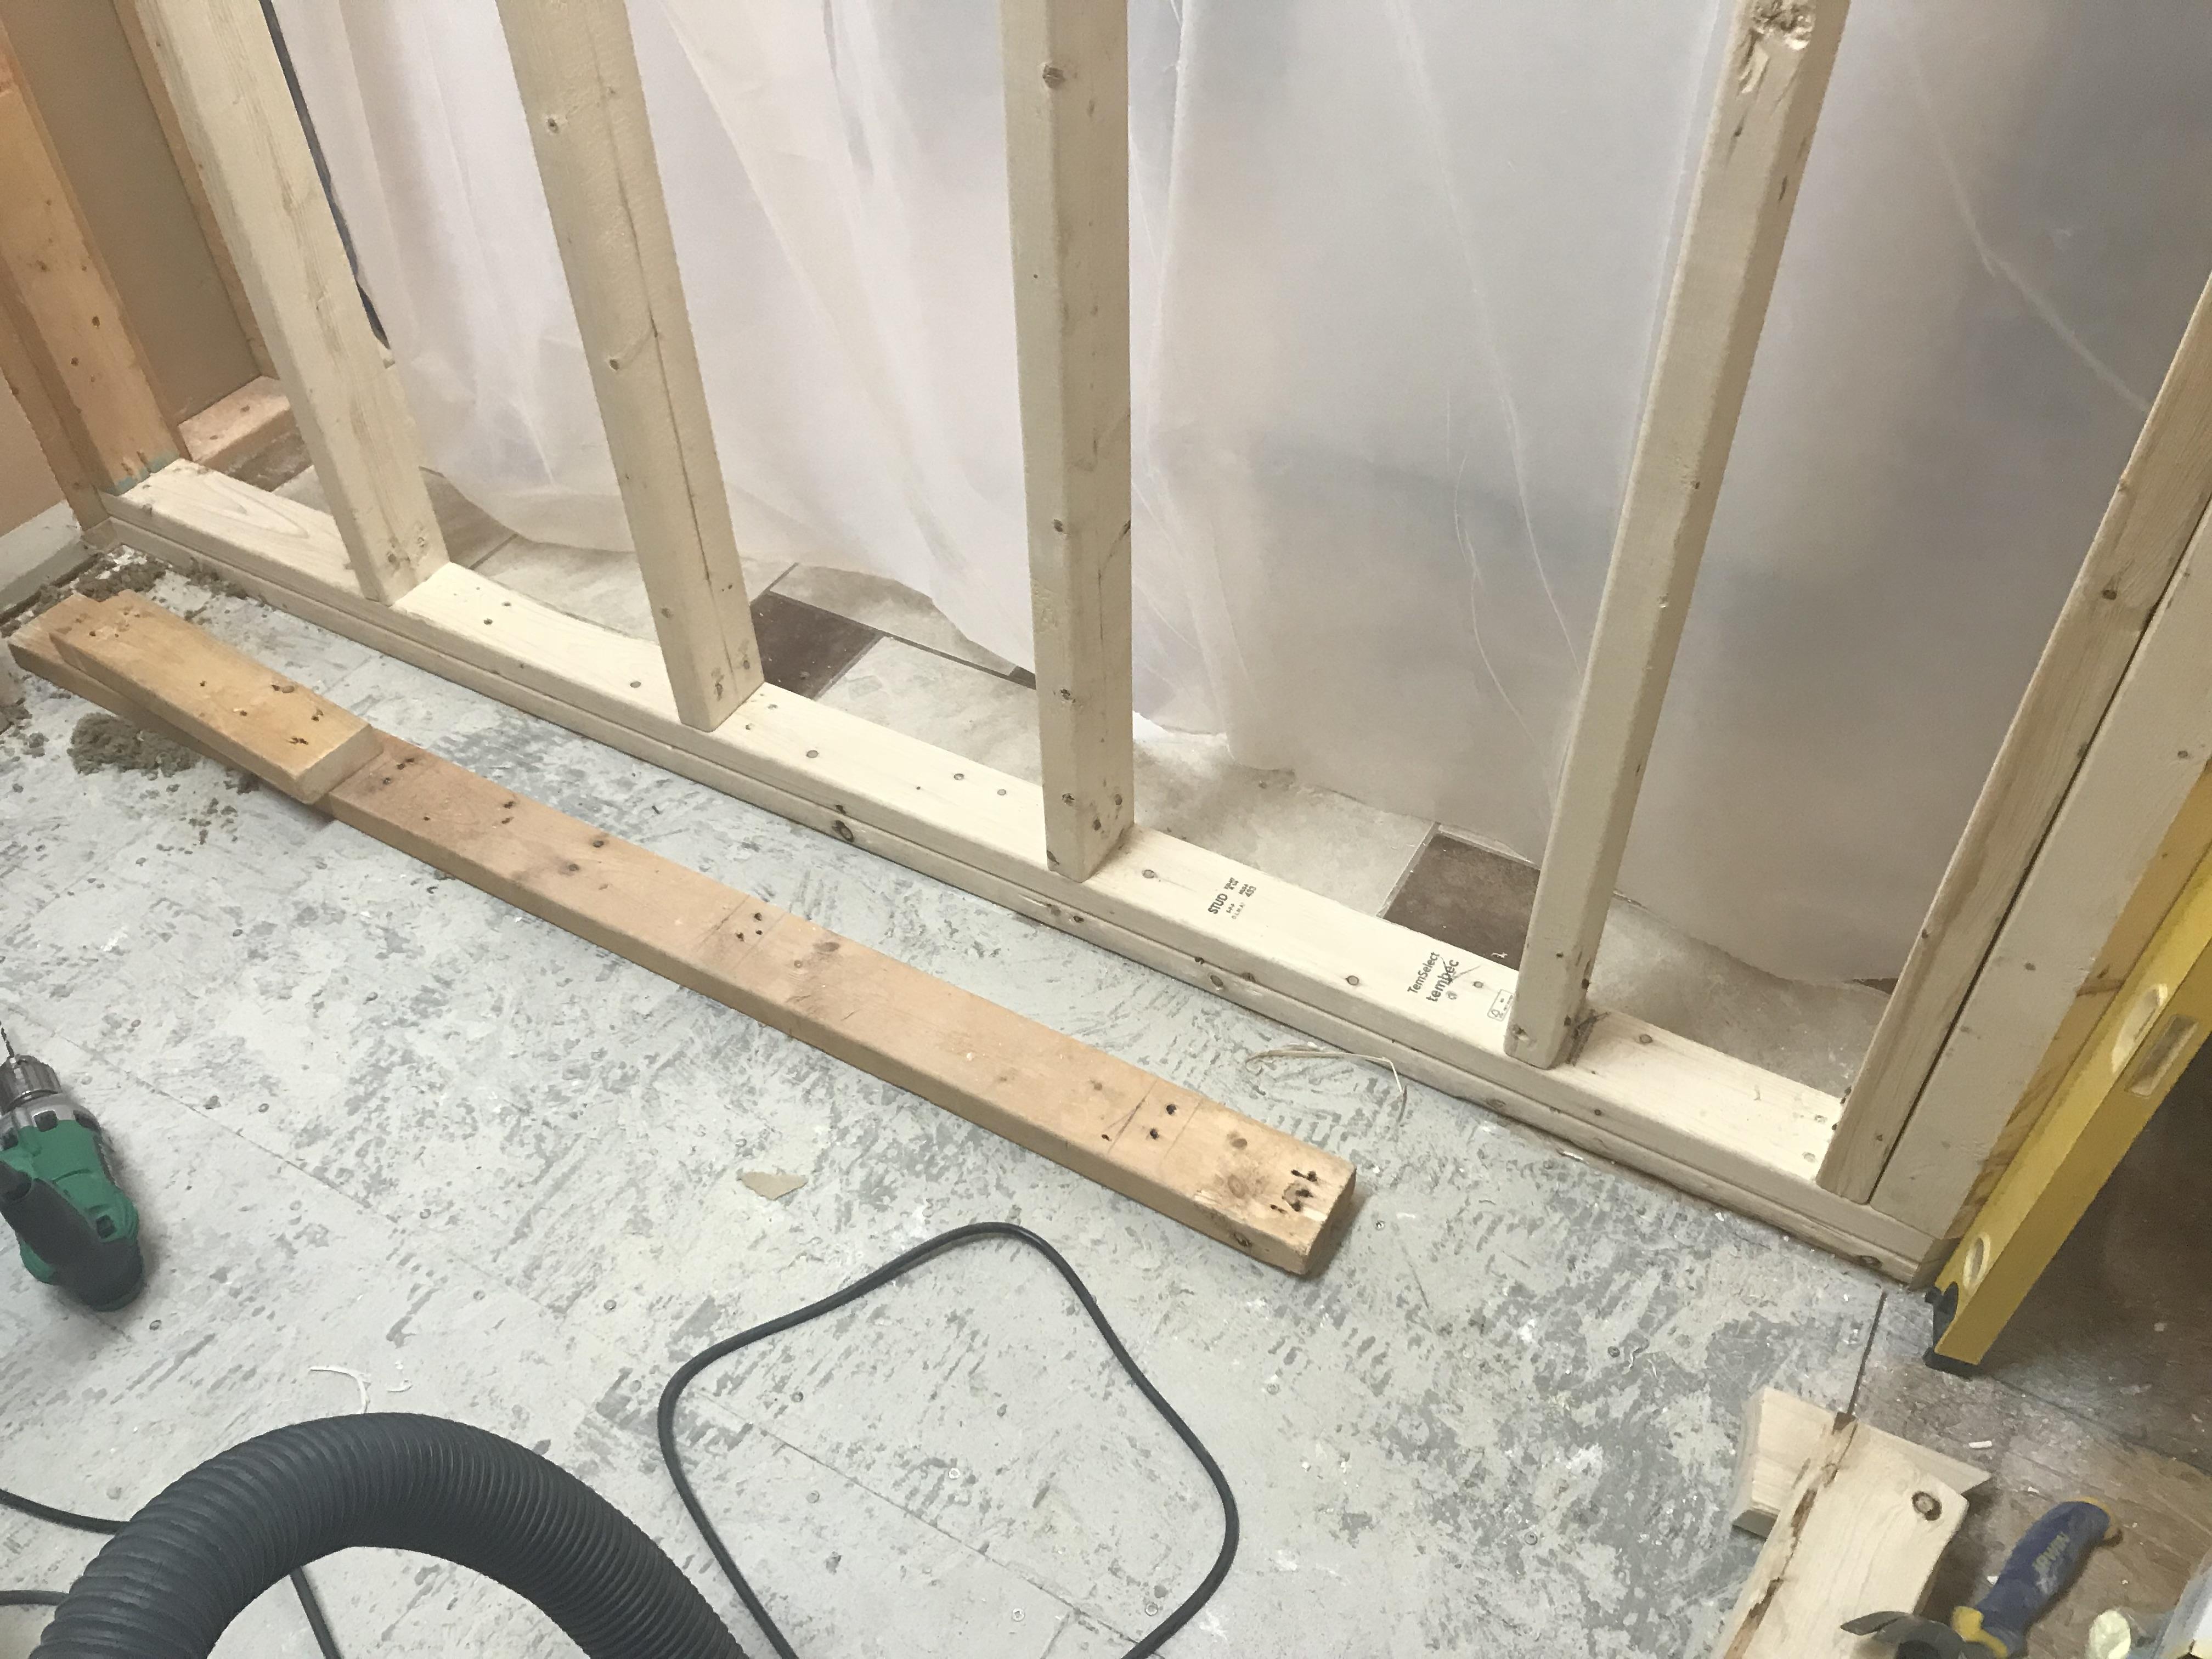
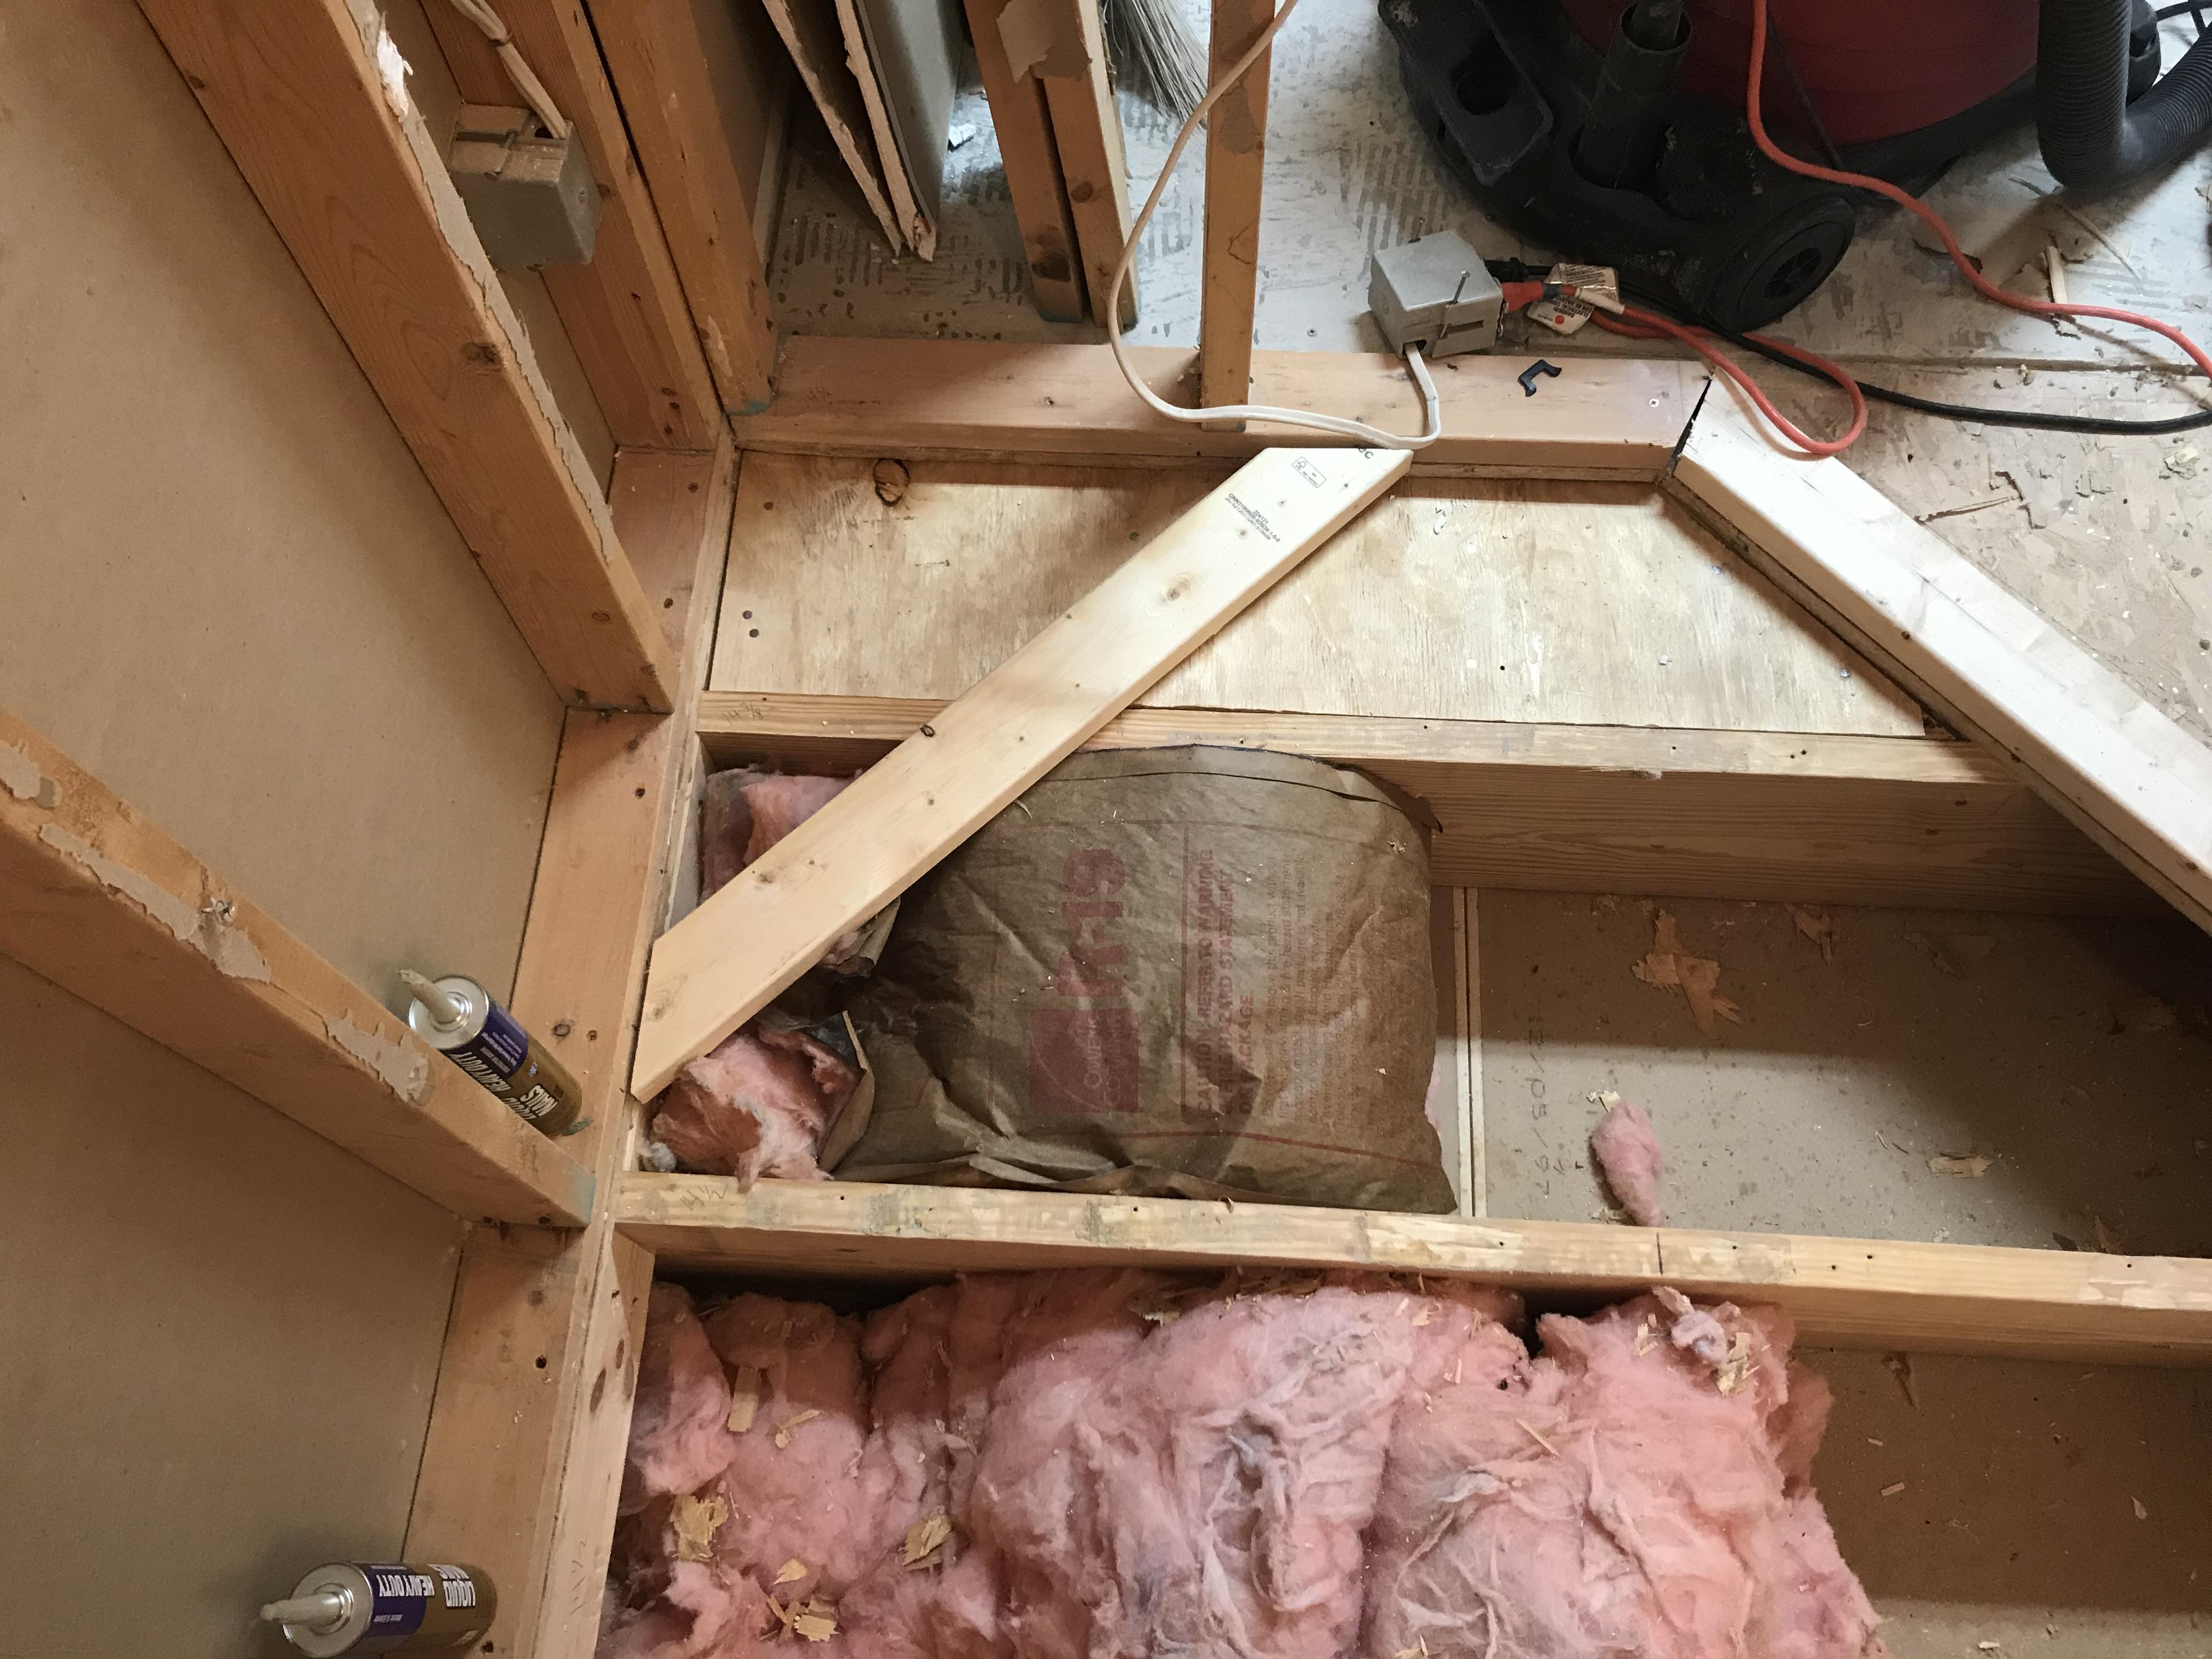
Ok, in these last 3 pics I started to take up the floor to begin the recess. At both ends I have run into a problem. Neither end landed a on joist. On the bench (pic 3) end I just went ahead and cut back to the joist thinking when I’m ready I’ll just add a pc of flooring to make the base of the bench level. You can see where I cut part out and haven’t cut the rest out yet.
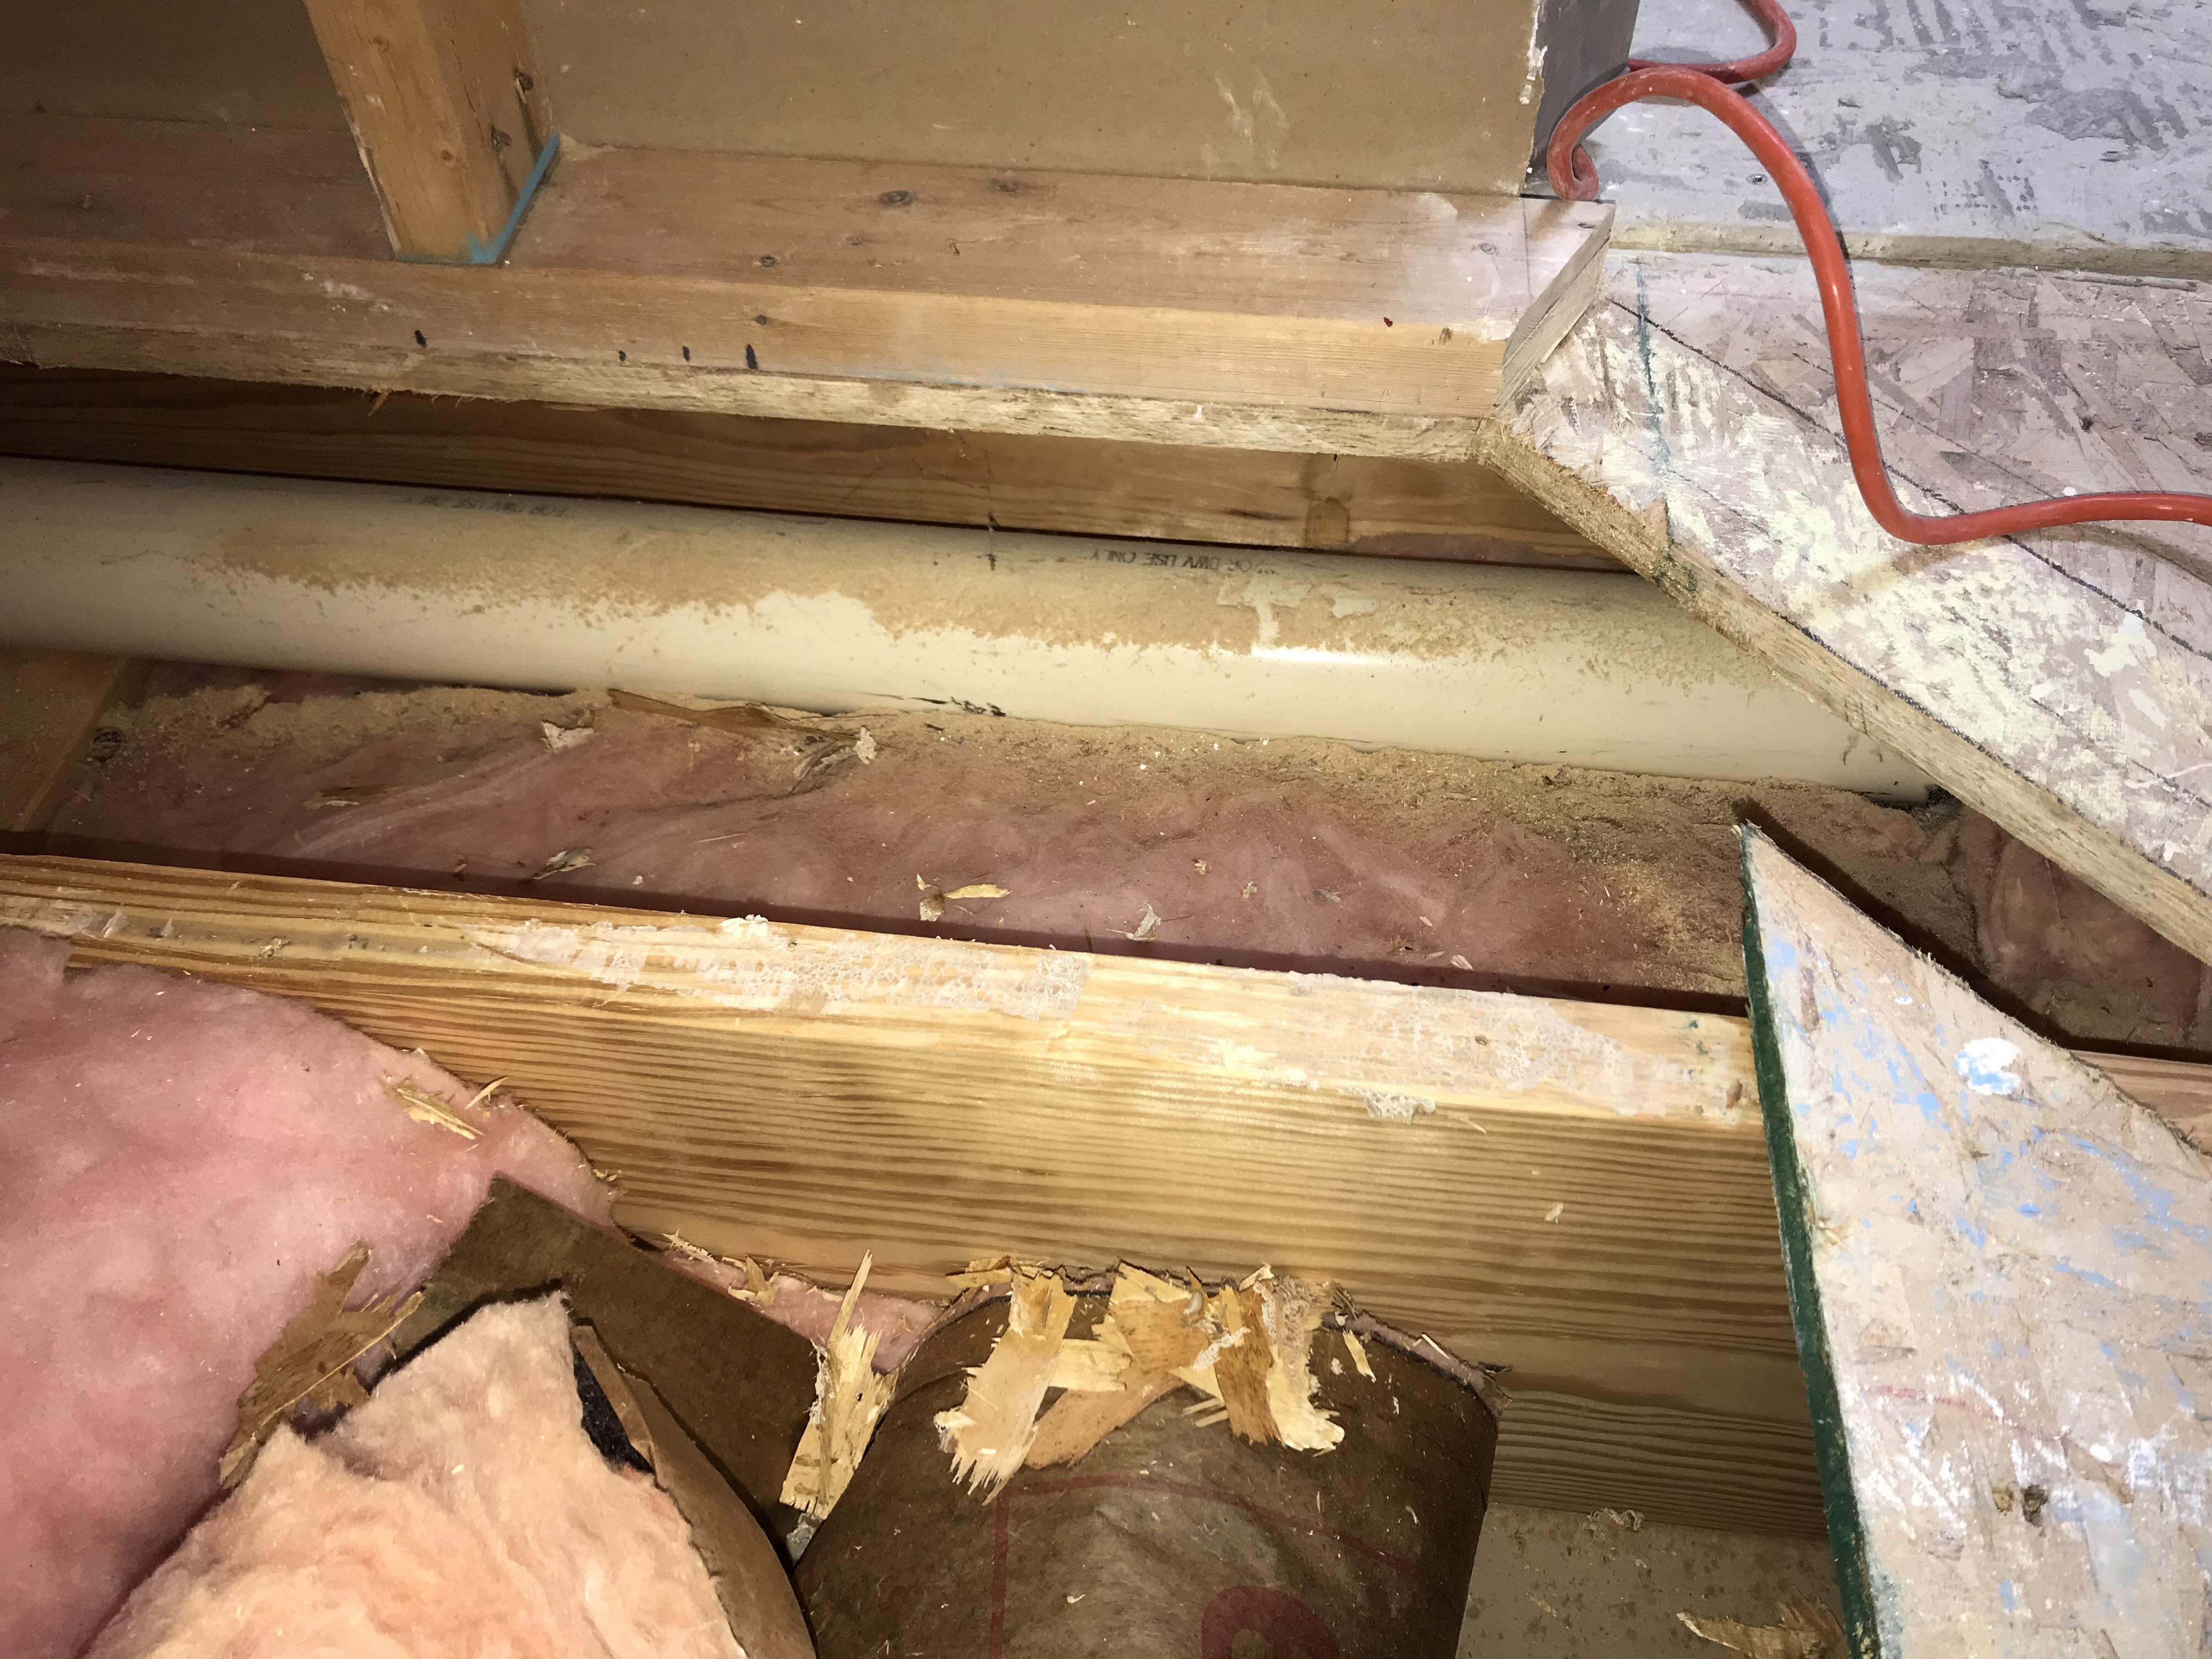
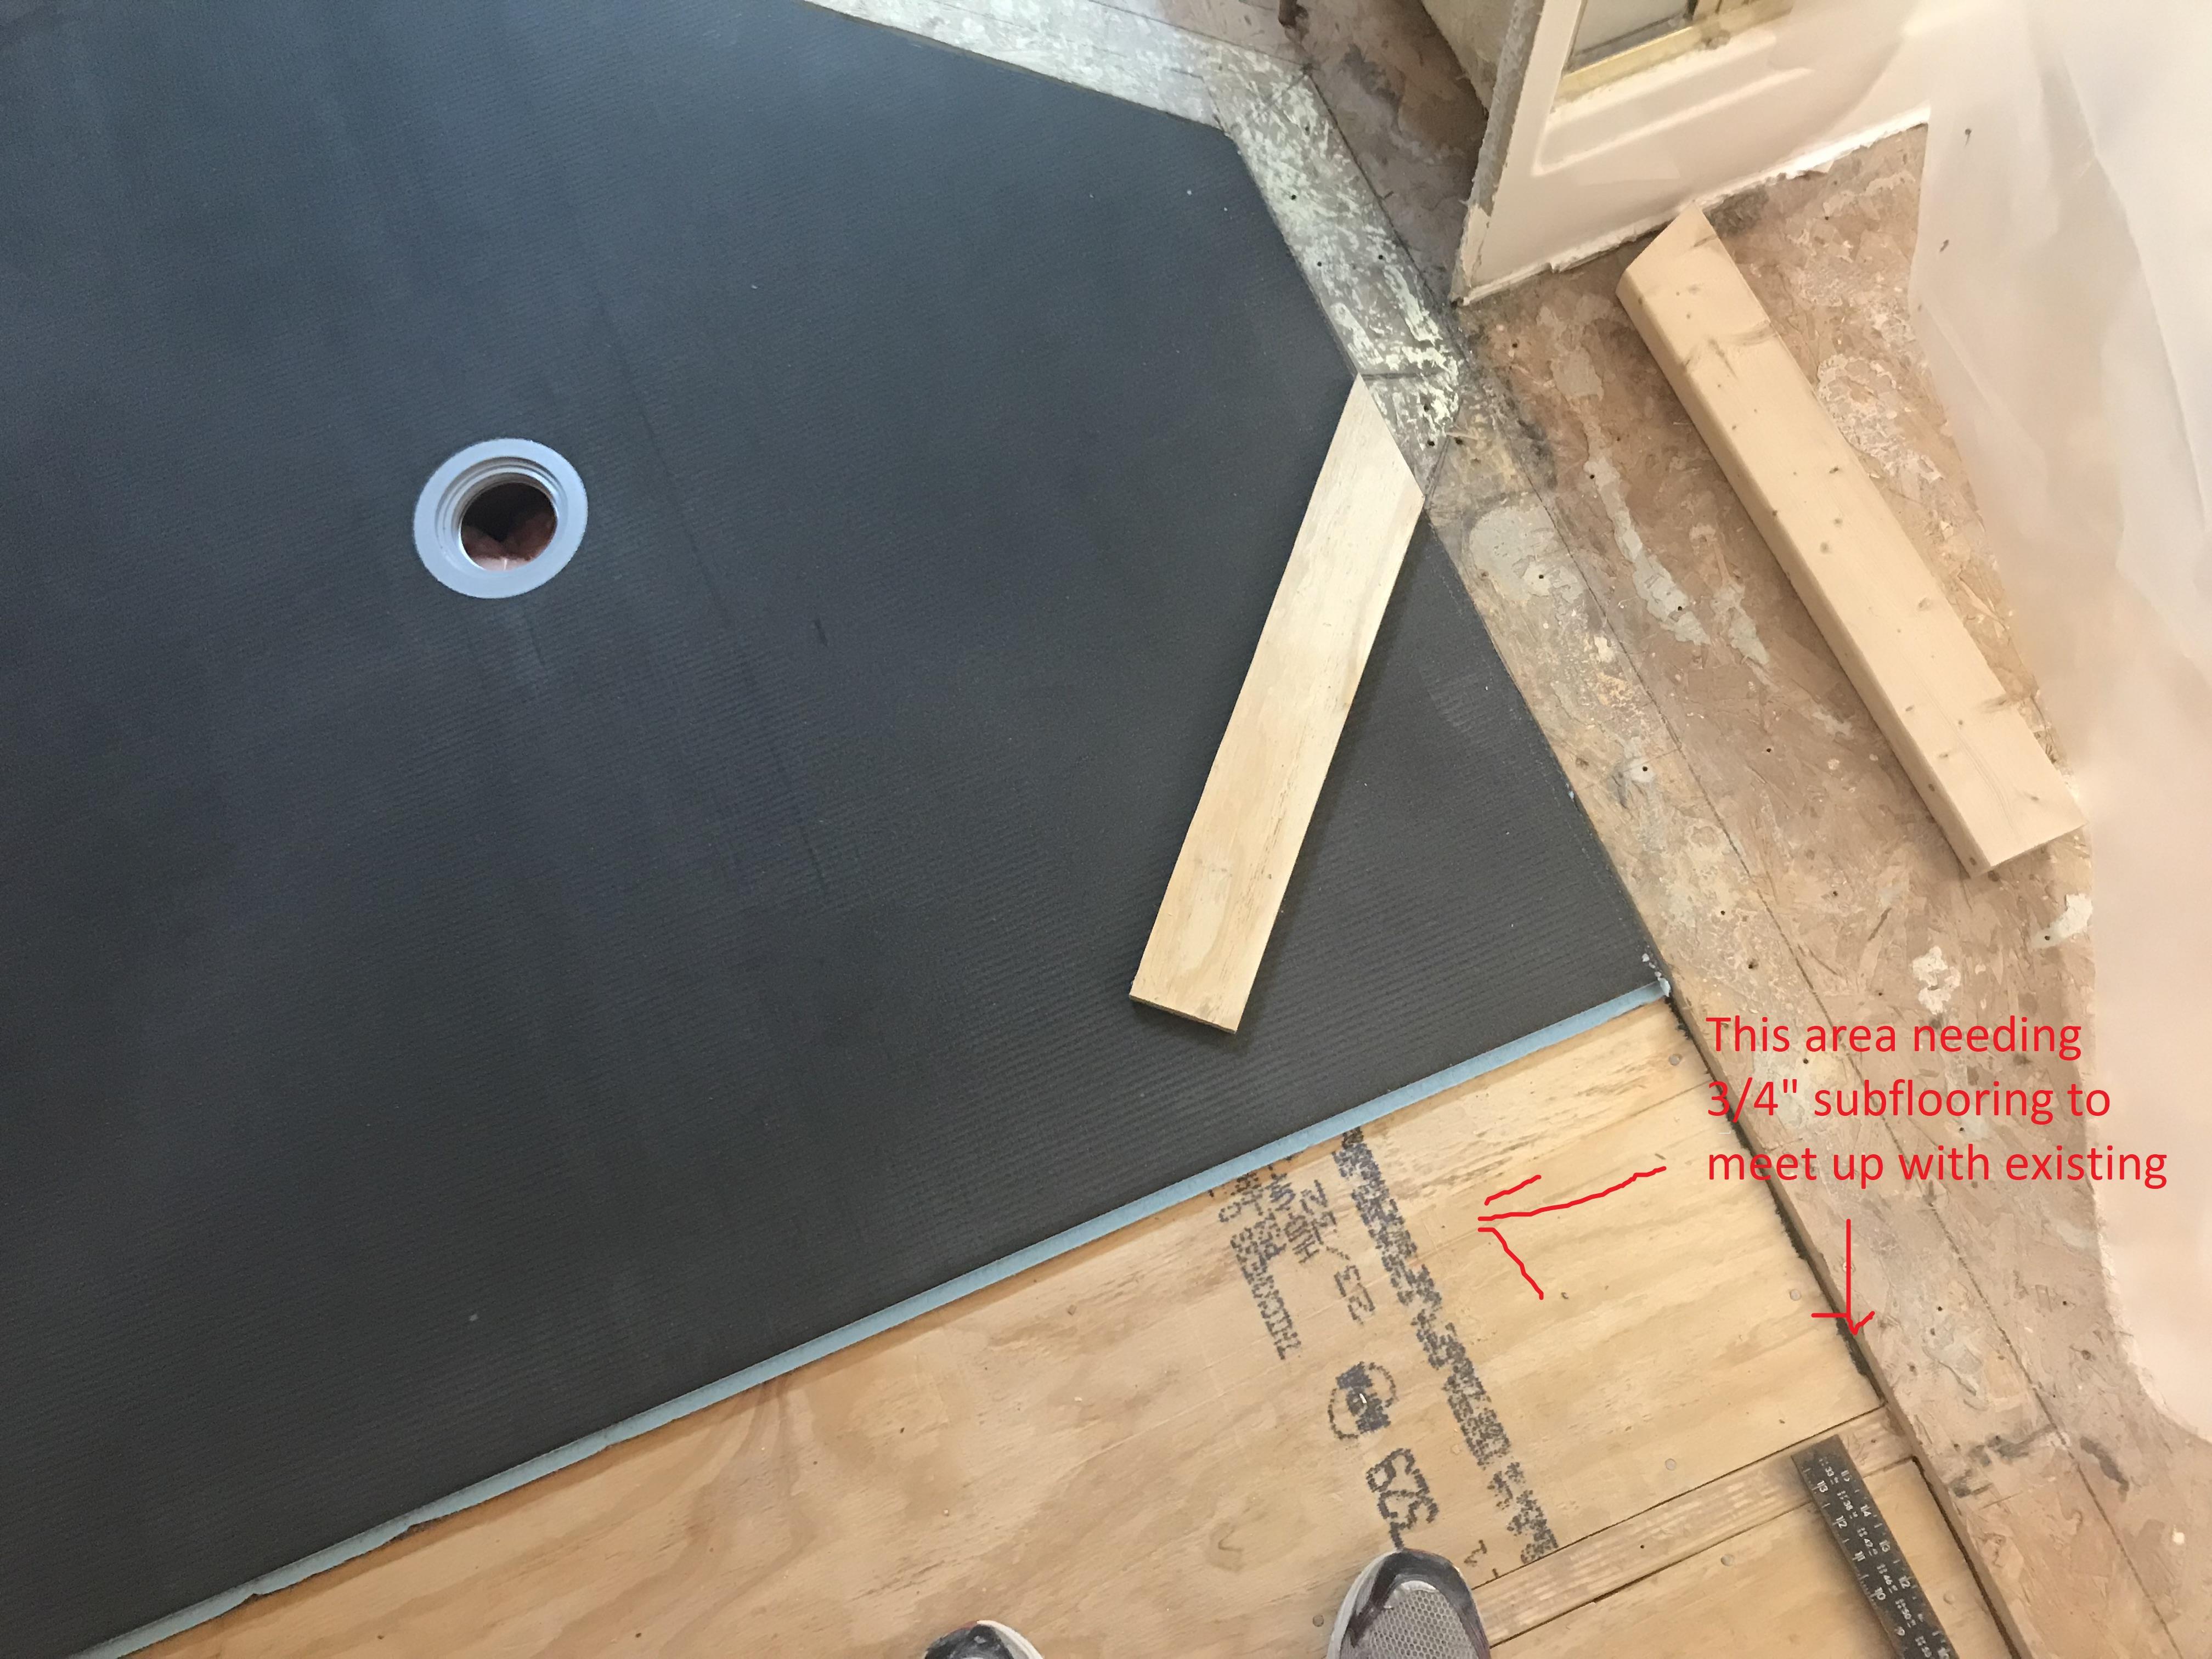
On pics 1 & 2 it is a different story. The overhang is about 51/2”, the wall is there, and on the other side of that is the closet hardie board, and if that wasn’t enough the drain pipe runs about 4” from the floor bottom. What suggestion do you have for securing the floor and shower base? Thank you.
Great question, you can add 2x6s to the joists at those ends. You’ll have toenail or screw them to the joists using 3″ deck screws. That will give you the support for the new 3/4″ sub subfloor required for the Wedi Fundo Ligno. Looks like your framing is in good shape and there’s no water damage!
Hey Ward
you are very detailed with your layout! Doing a great job with that
So:
1. Definitely adapt to pex if you can. I usually solder on pex adapters where they enter the bathroom and install all new pex to all of the fixtures. Much easier this way
2. Bench depths vary, but I’d say for a corner bench, if you can make it 16″ deep from corner to front of bench that would be something you can actually sit on. I would also suggest framing the bench and waterproofing with 1/2″ wedi, unless you want to spend the extra $$ on 2″ wedi or the wedi corner seat. https://amzn.to/2GH57Dp
3. As far as the subfloor. when I’m in that situation I do what jeff is suggesting by installing 2×6’s screwing or toenailing into the joist underneath wall. you will need to notch out the 2 x 6’s to go over your pipe and buffer the existing subfloor with another layer of 3/4″ in order to get your new subfloor to the joist height for a wedi curbless shower.
you should be able to grab the 2×6 with a 3″ screw through bottom plate to keep it in place while you toe nail it.
I always apply glue to these framing members so that it glues to the bottom of subfloor too.
I’ve attached notes to attached image
Let me know if there is any confusion on this
thanks
steve
Thank you both. Off to Lowes. More updates as I make progress. I am assuming Liquid Nails is the glue to use?
Yes, Liquid Nails for the wood. Thanks for keeping us posted!!
Well, something always trying to mess up my direction. I went to the place that sells WEDI and the guy there said they can get it for me but they are putting it on the backburner. Then he proceeds to tell me about a new system from a company called Laticrete that is a very similar system to WEDI. All is sounding very good and much cheaper til we look and their (Laticrete’s) shower pan and it is 2″ thick. How would they expect you to make a curbless system? Answer is that they offer a ramp. I explain that it’s not what I’m looking for and I can’t recess my floor that much. So it looks like WEDI is still the route. They are giving a contractor demonstration mon on a complete Laticrete built shower and he invited me to go to that so I’m going to check it out since they are very similar and it will give me an live almost hands on before I do mine. I guess I will order my WEDI shower pan that day. Always something. 🙂
On the back burner? they must not have it in stock I guess?
Wedi is the easiest curbless system that I have used. I am not sure of another curbless system that would be able to be cut down to the shape of your shower….. Other ones that I have used could only be cut down a few inches, plus required many more steps to get waterproofed
Hopefully they can get that in for you!
Cool, I figured out how to add more than one pic to a post. Well my progress is slow but steady. I have all the openings I can do for now until I do my plumbing and framing. I went ahead and added ledger (don’t know the proper name) to the ends also. Might be over thinking it but I didn’t like the idea of the ends of those floor boards unsupported between joist, especially on the entrance side. used a trusty jig saw and sawzall to make the cuts around ductwork and drain pipe.
More questions. A good friend recommends using shark bites to go from copper to pex. His reasoning is that with pex you have to have a $60 tool and with shark bite you just buy the ends even though more expensive it will be less in the end, the ease of reaching under the floor and pushing them on would also be easier than trying to reach under there and soldering, and he said he thinks the leakage chances are the same with either. He used Shark bites on my water heater and I haven’t had any problems. Your thoughts?
Looking rock solid Ward!
Sharkbites are awesome! But at least here in PA code does not allow them to be buried in a wall or anywhere you do not have access to it.
I personally have never had an issue with any sharkbite (other then when I reused a cap dozens of times and wore out the “shark” part of the fitting)
and I have used them in many areas that you can see them…..but may never be able to replace or doing anything with them without redoing a lot
So its really up to you, code, and really how comfortable you are with them
I agree the crimping tool is an expense…..but with as much of what you are redoing, I’m not sure how much cheaper it’ll be? most of those sharkbite fittings are $5-8
This pex crimper won’t make this decision any easier, but is my favorite one. https://amzn.to/2GISjwh
The ones you get at the box stores are okay…..but kind of cheaply made and sometimes harder to square up and crimp correctly. Probably the more economical choice if not planning to do a lot more pex projects
OK, been working on it when I can. I made some good progress this weekend. As I was working I got to thinking and have a question. 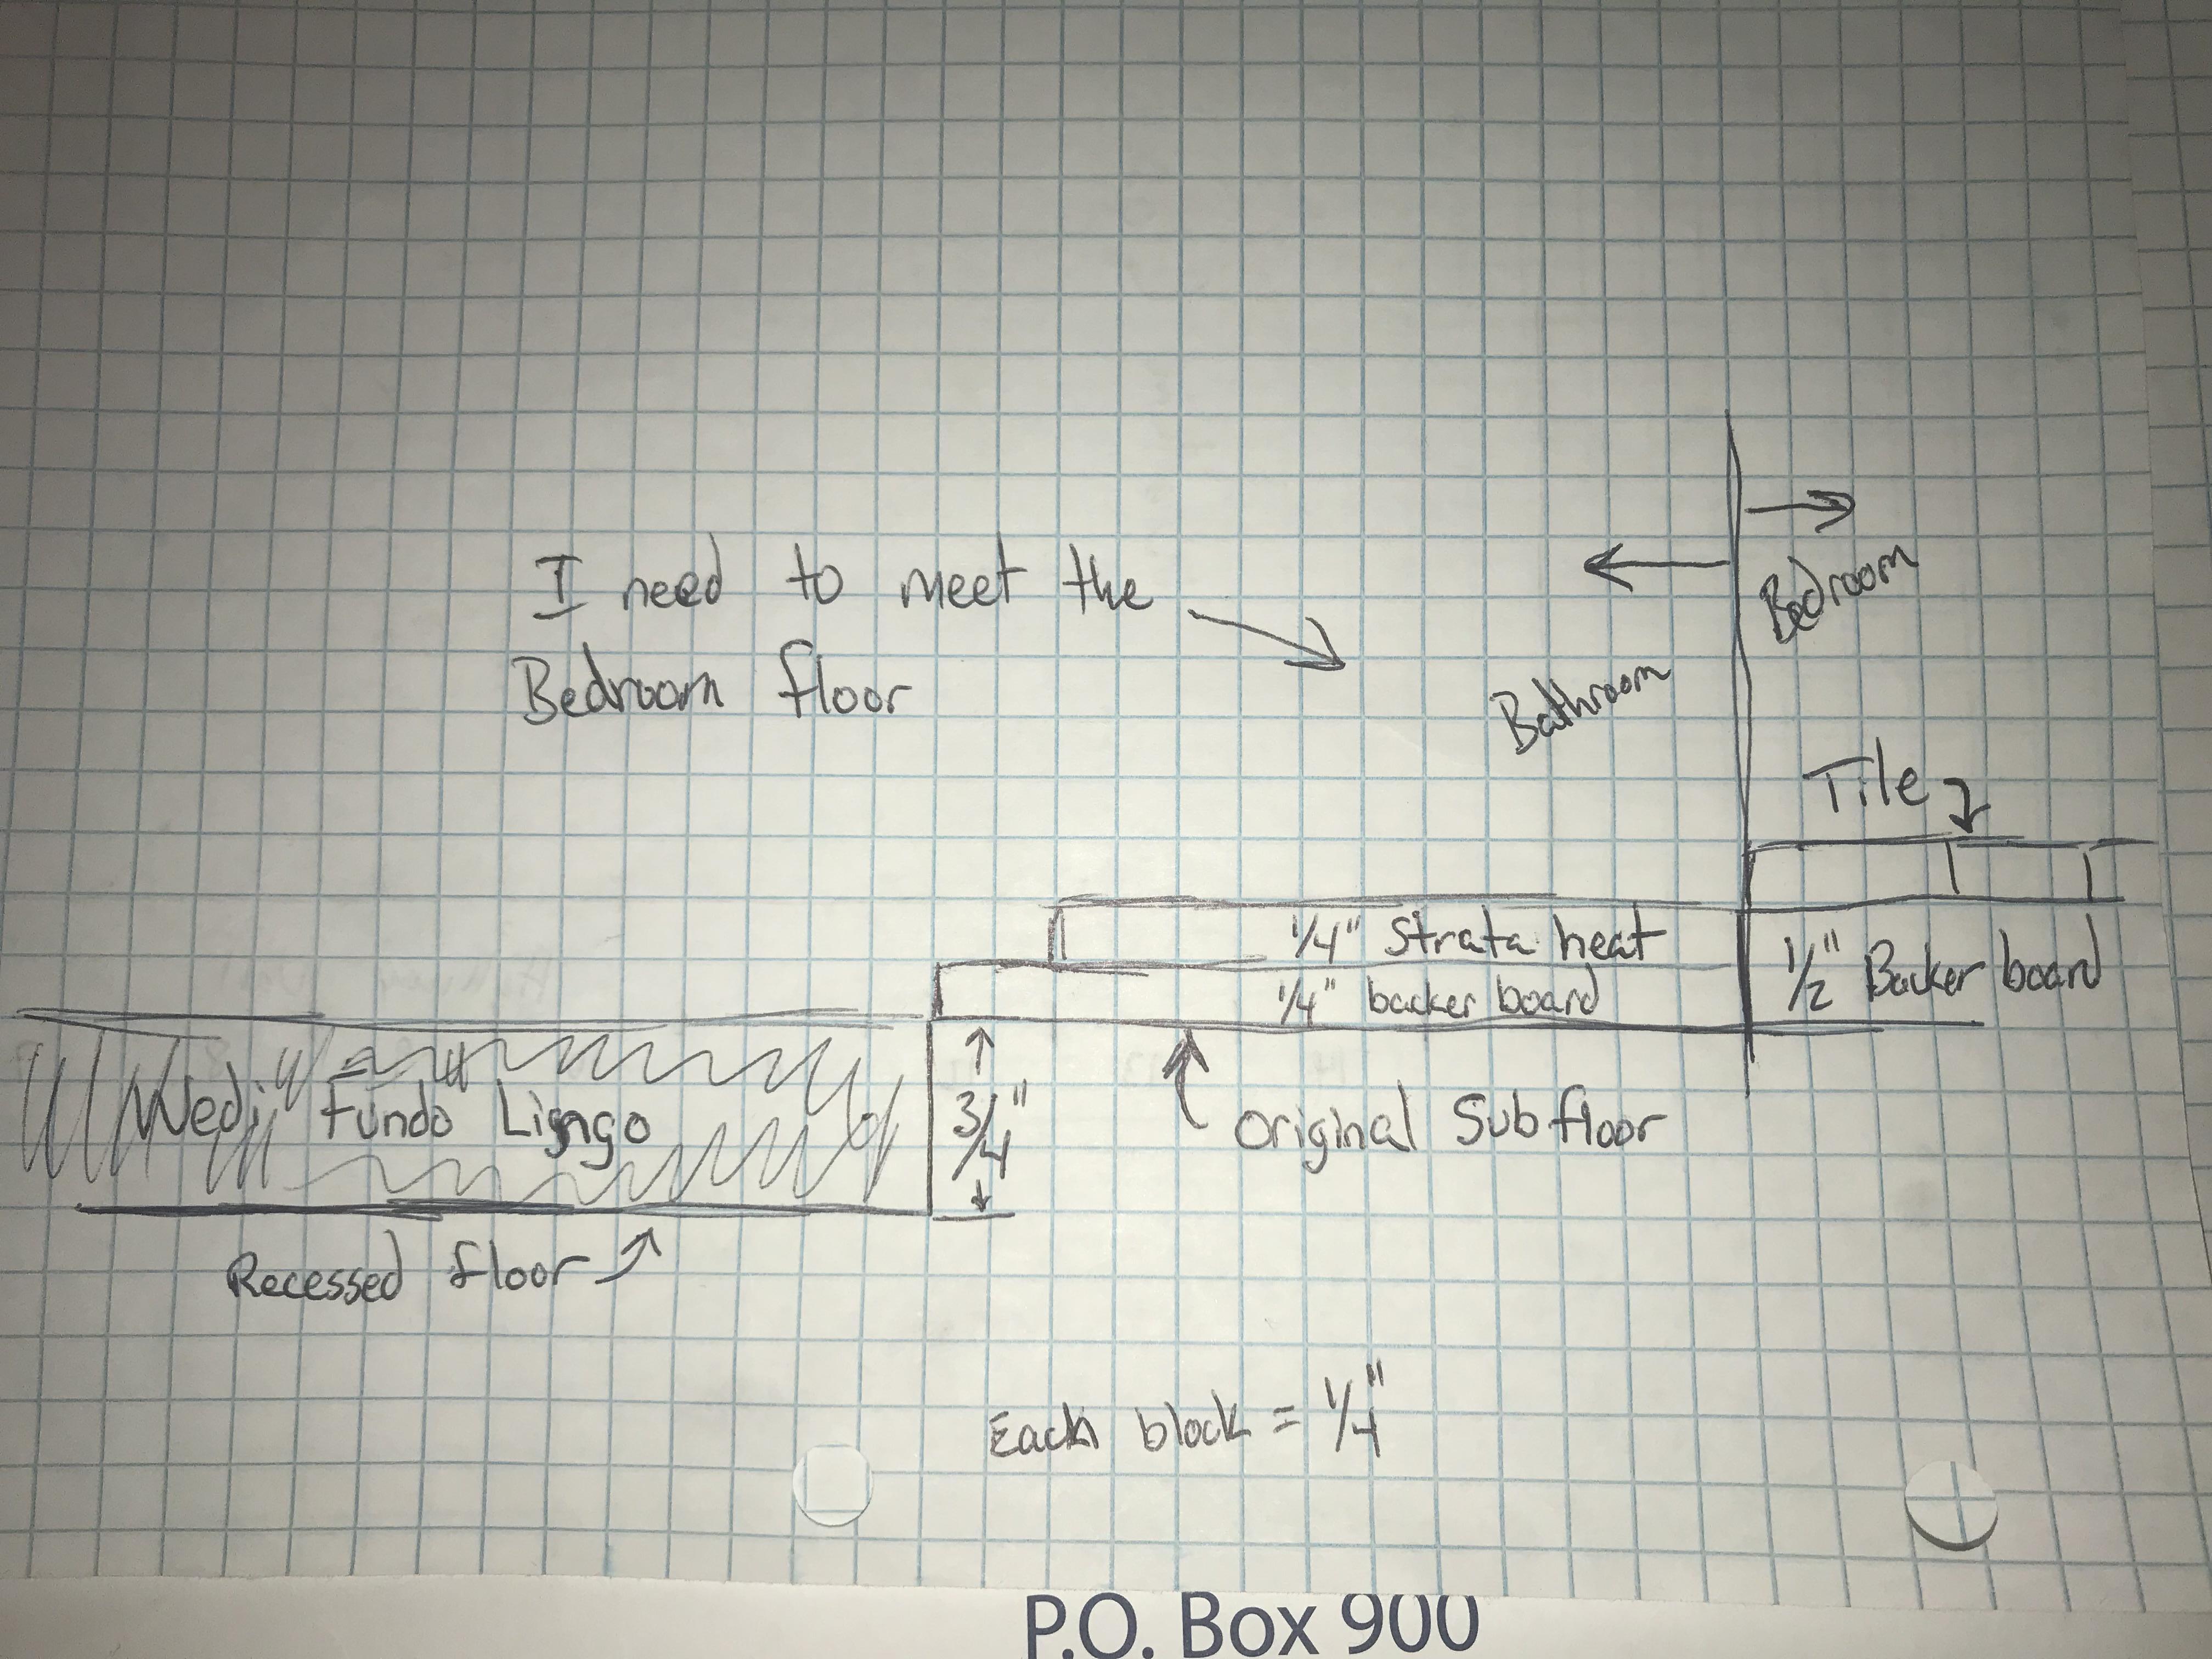
So I drew this big so hopefully it will make since. I have tile in the bedroom that is about 3/4″ thick. I have dropped my subfloor 3/4″ so that my Wedi Fundo Lingo pan comes up to level with the original subfloor. I’m also going to use Latticrete Strata Heat which is 1/4″ thick with a 1/4″ backer board which with tile meets the bedroom tile height. How do I transition from the curless shower floor height to the bathroom/bedroom hright?
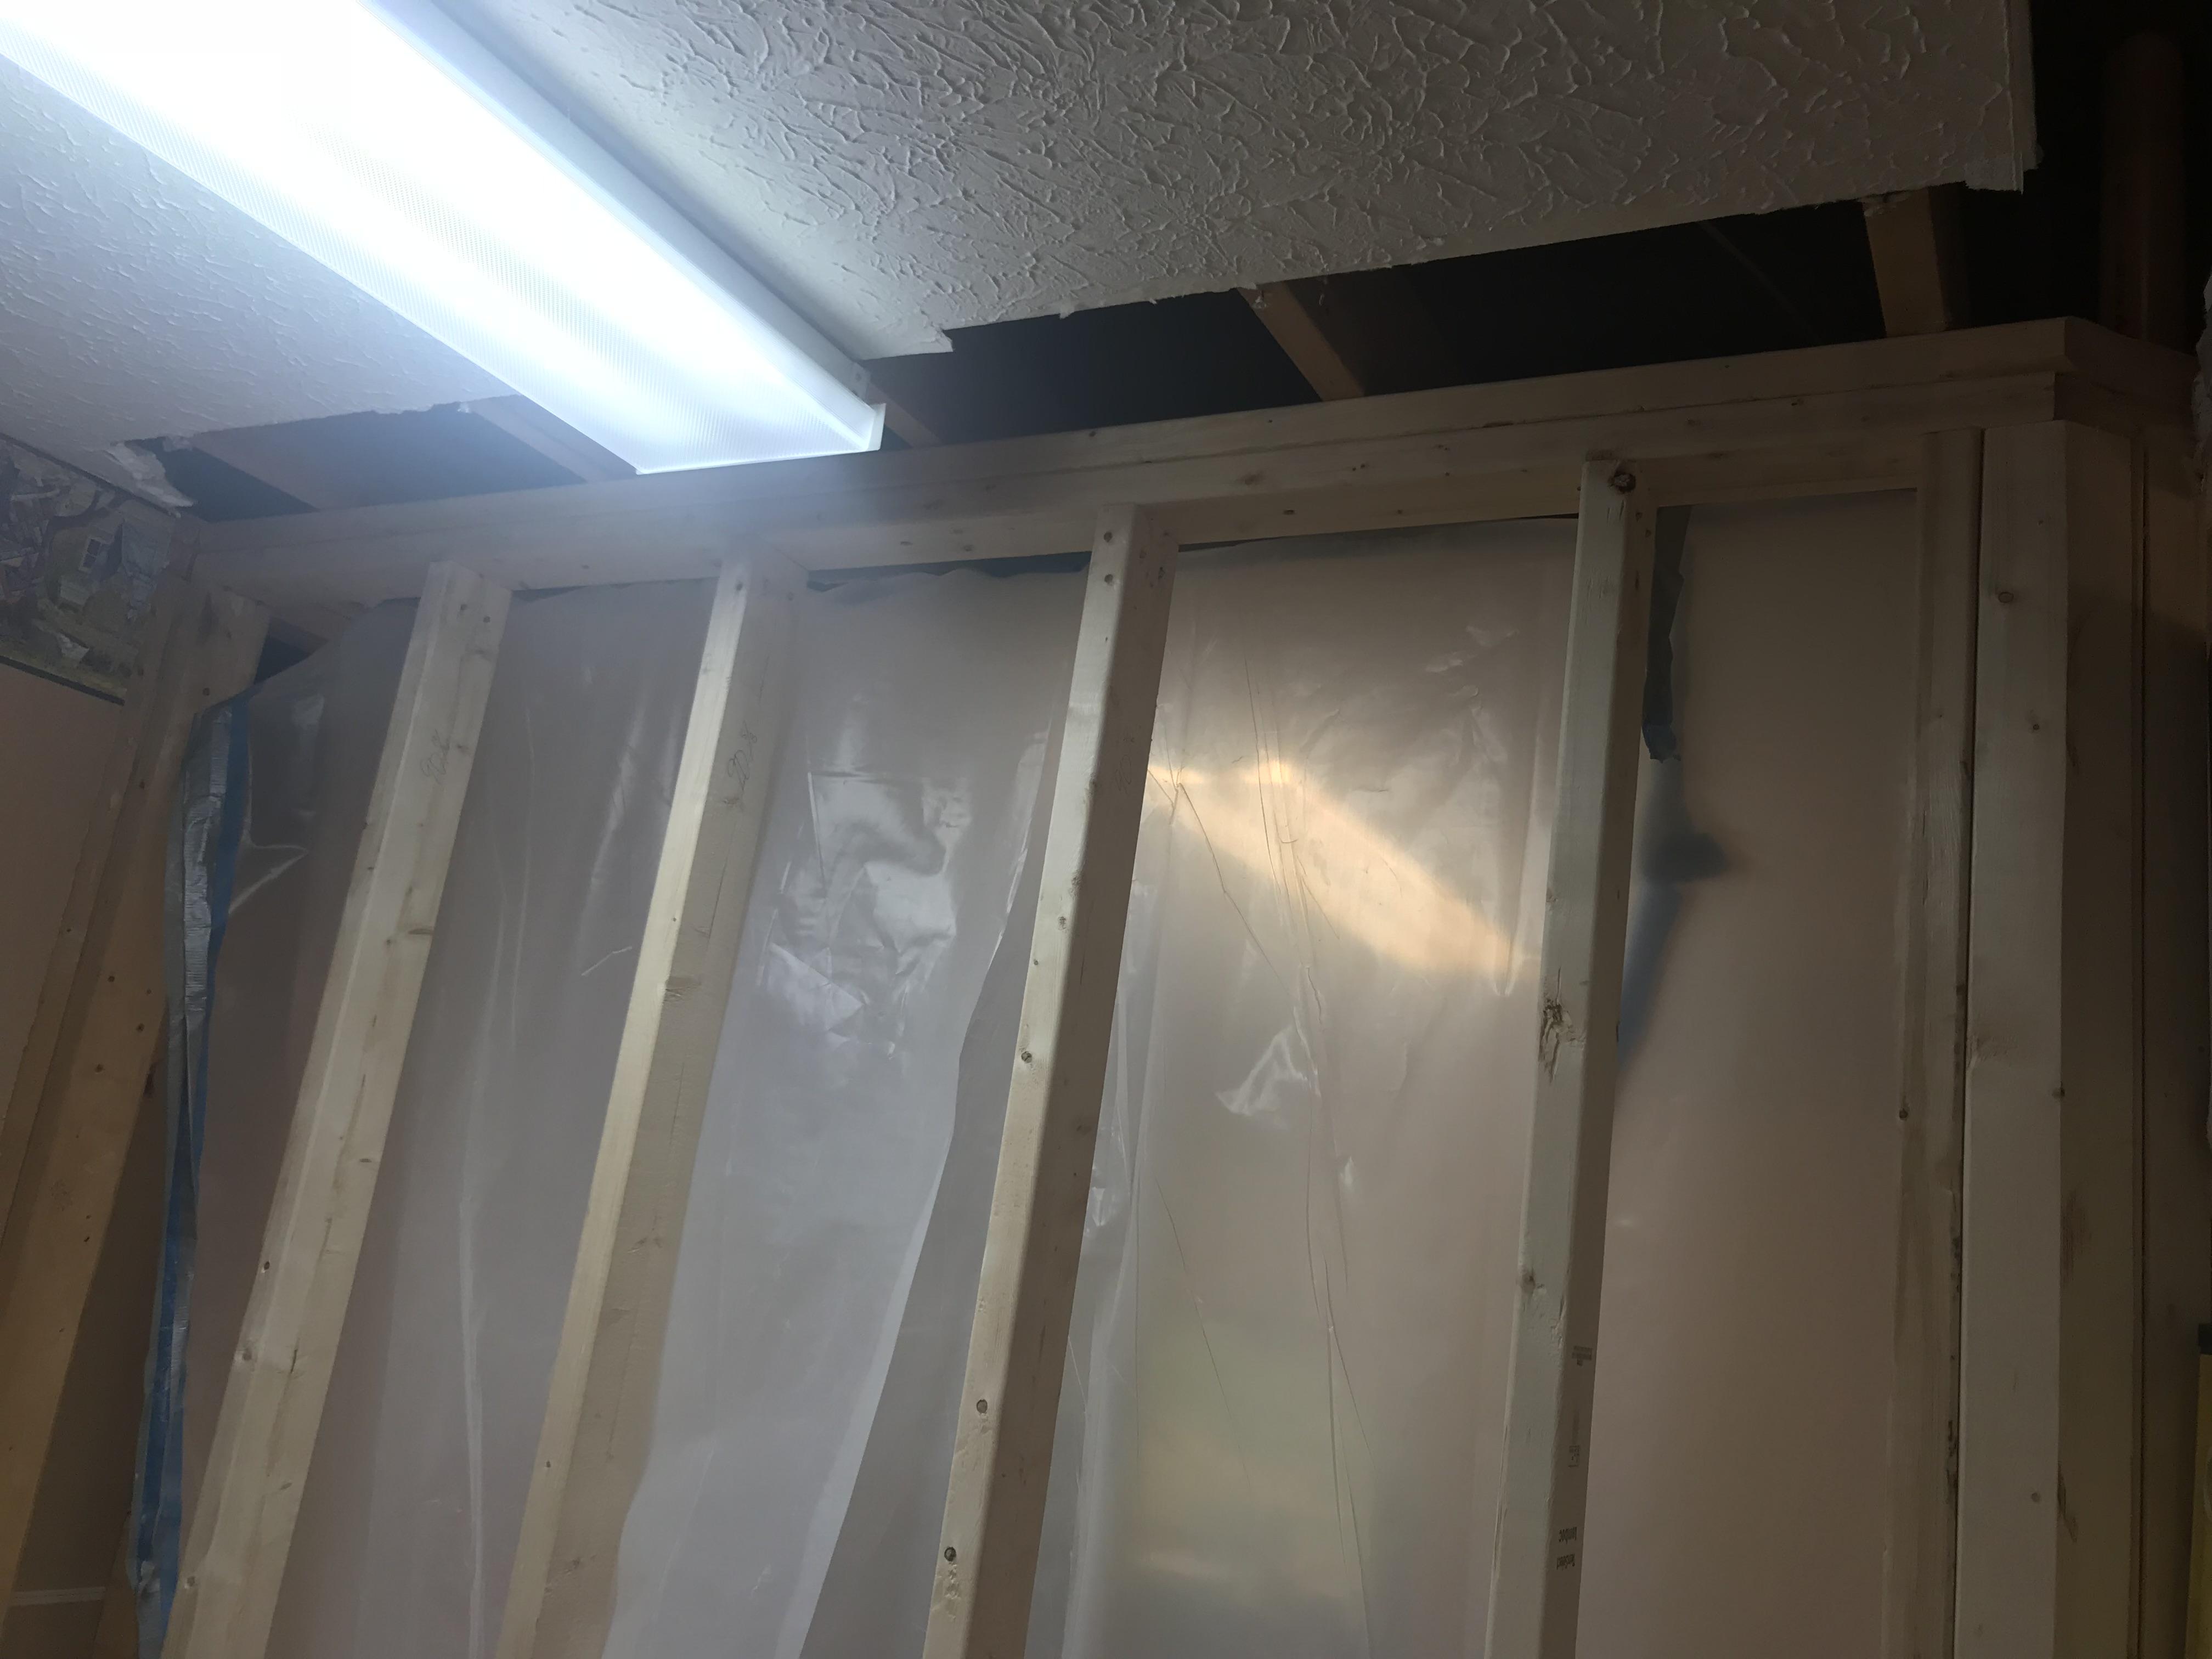
I wanted to show some more progress.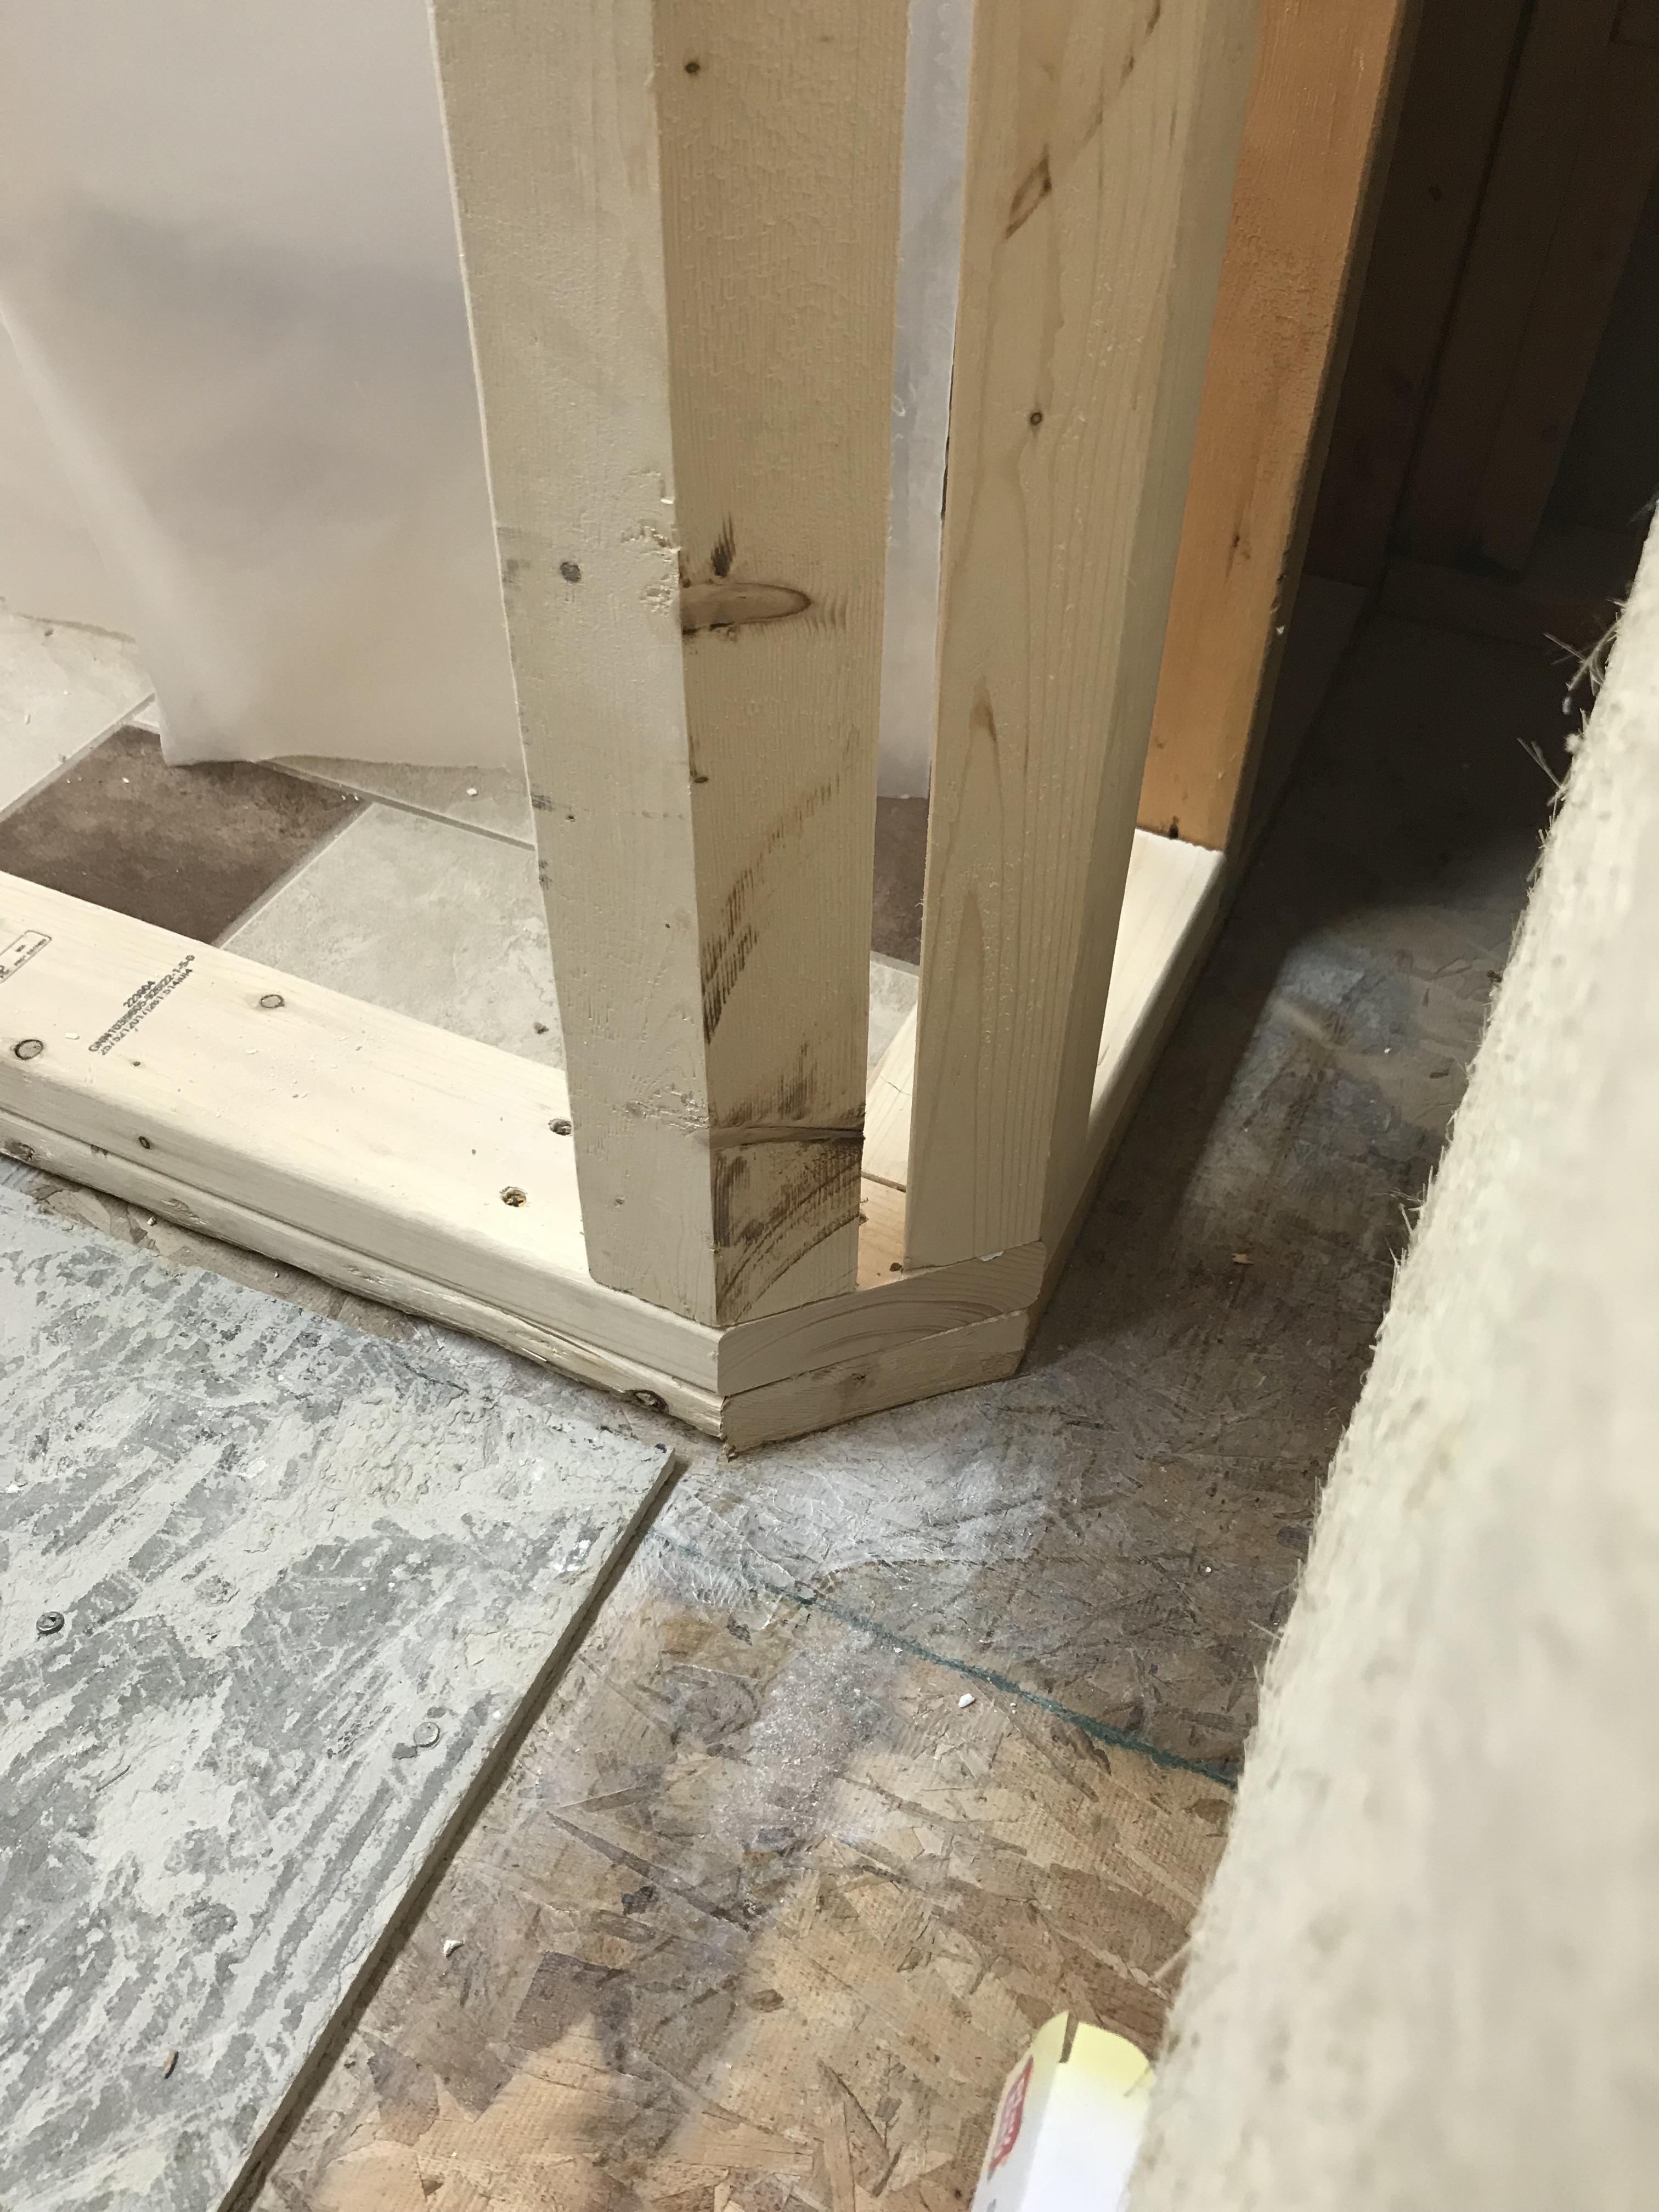
I ripped 45deg in 2 studs. I’m adding a 45 deg to the corner to hopefully give it a little more room walking into the closet plus make it flow with the 45 deg angle of the shower wall.
Its probably overkill but I used the studs I tore out of the old walls. I Liquid nailed them with screws and toenailed them the existing wall.

Finished wall.
More overkill, top and bottom. I doubled them both because I don’t know what I’m doing. 🙂 I overlapped the ends at different angles to add strength. I don’t have the corners permanently installed because the old shower is in the way.
Working on the shower walls, layout anyways.
The 45 deg board left is going to be the seat.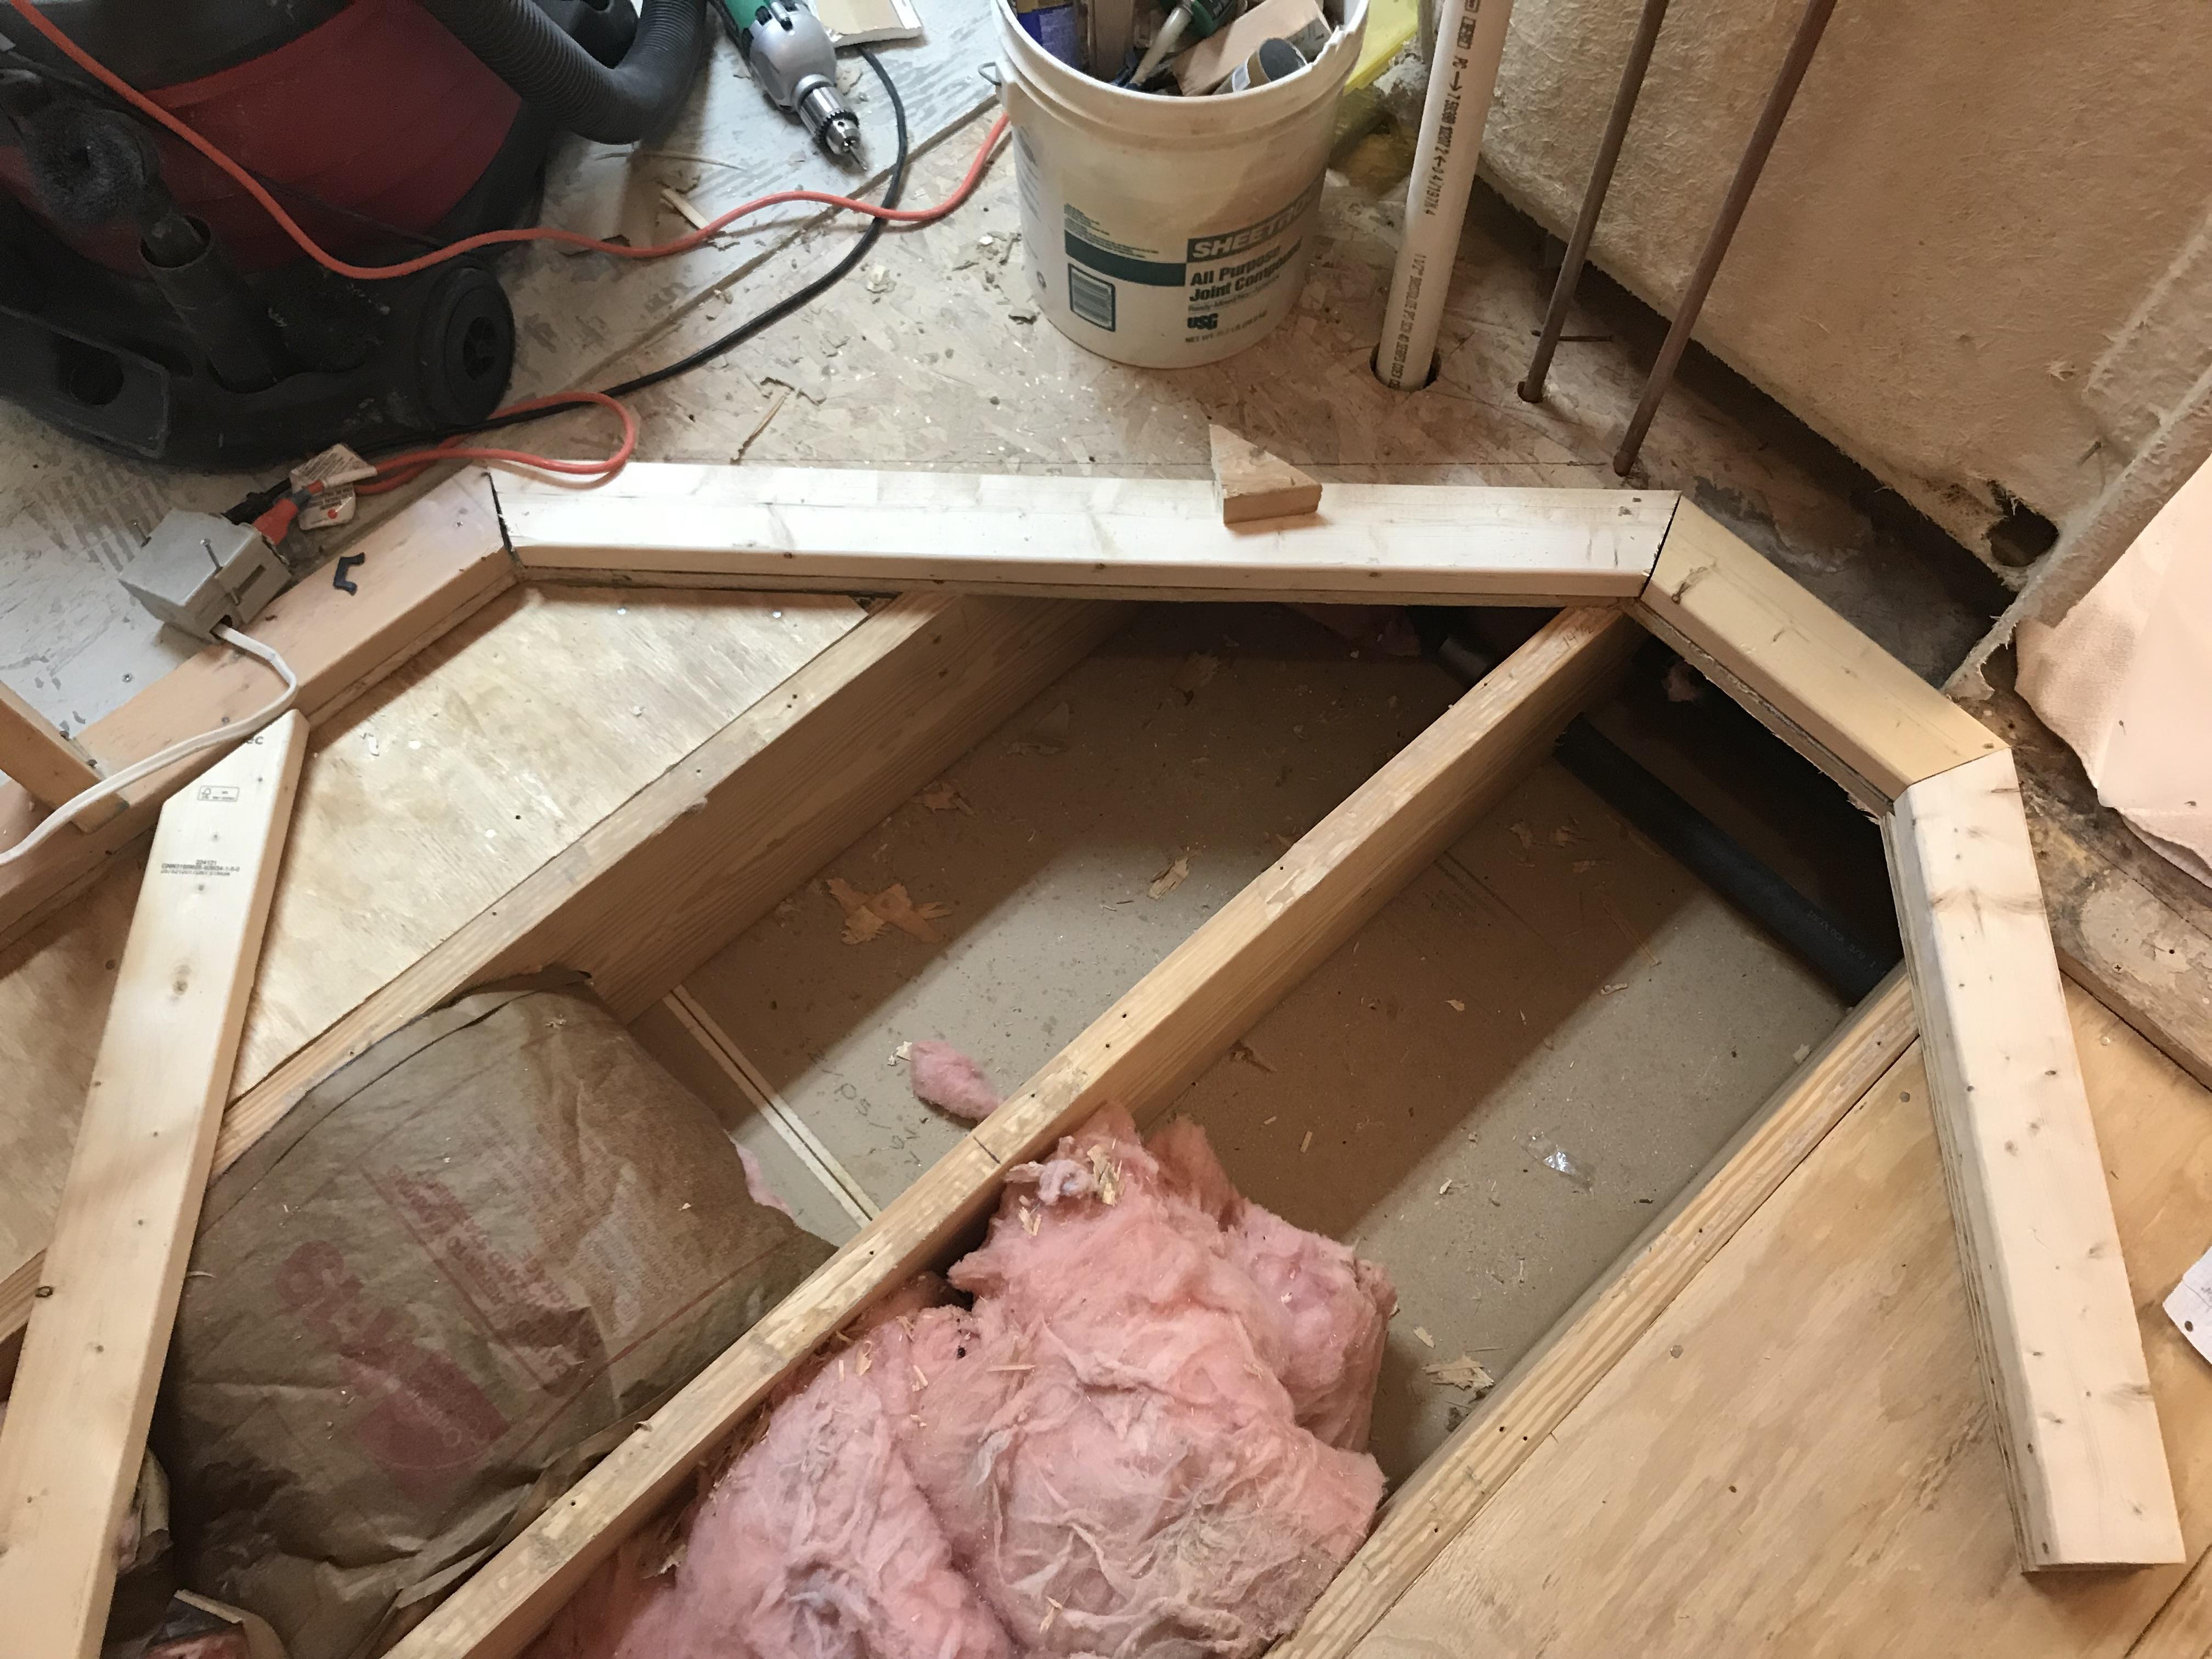
The walls with the seat give it a kind of symmetry.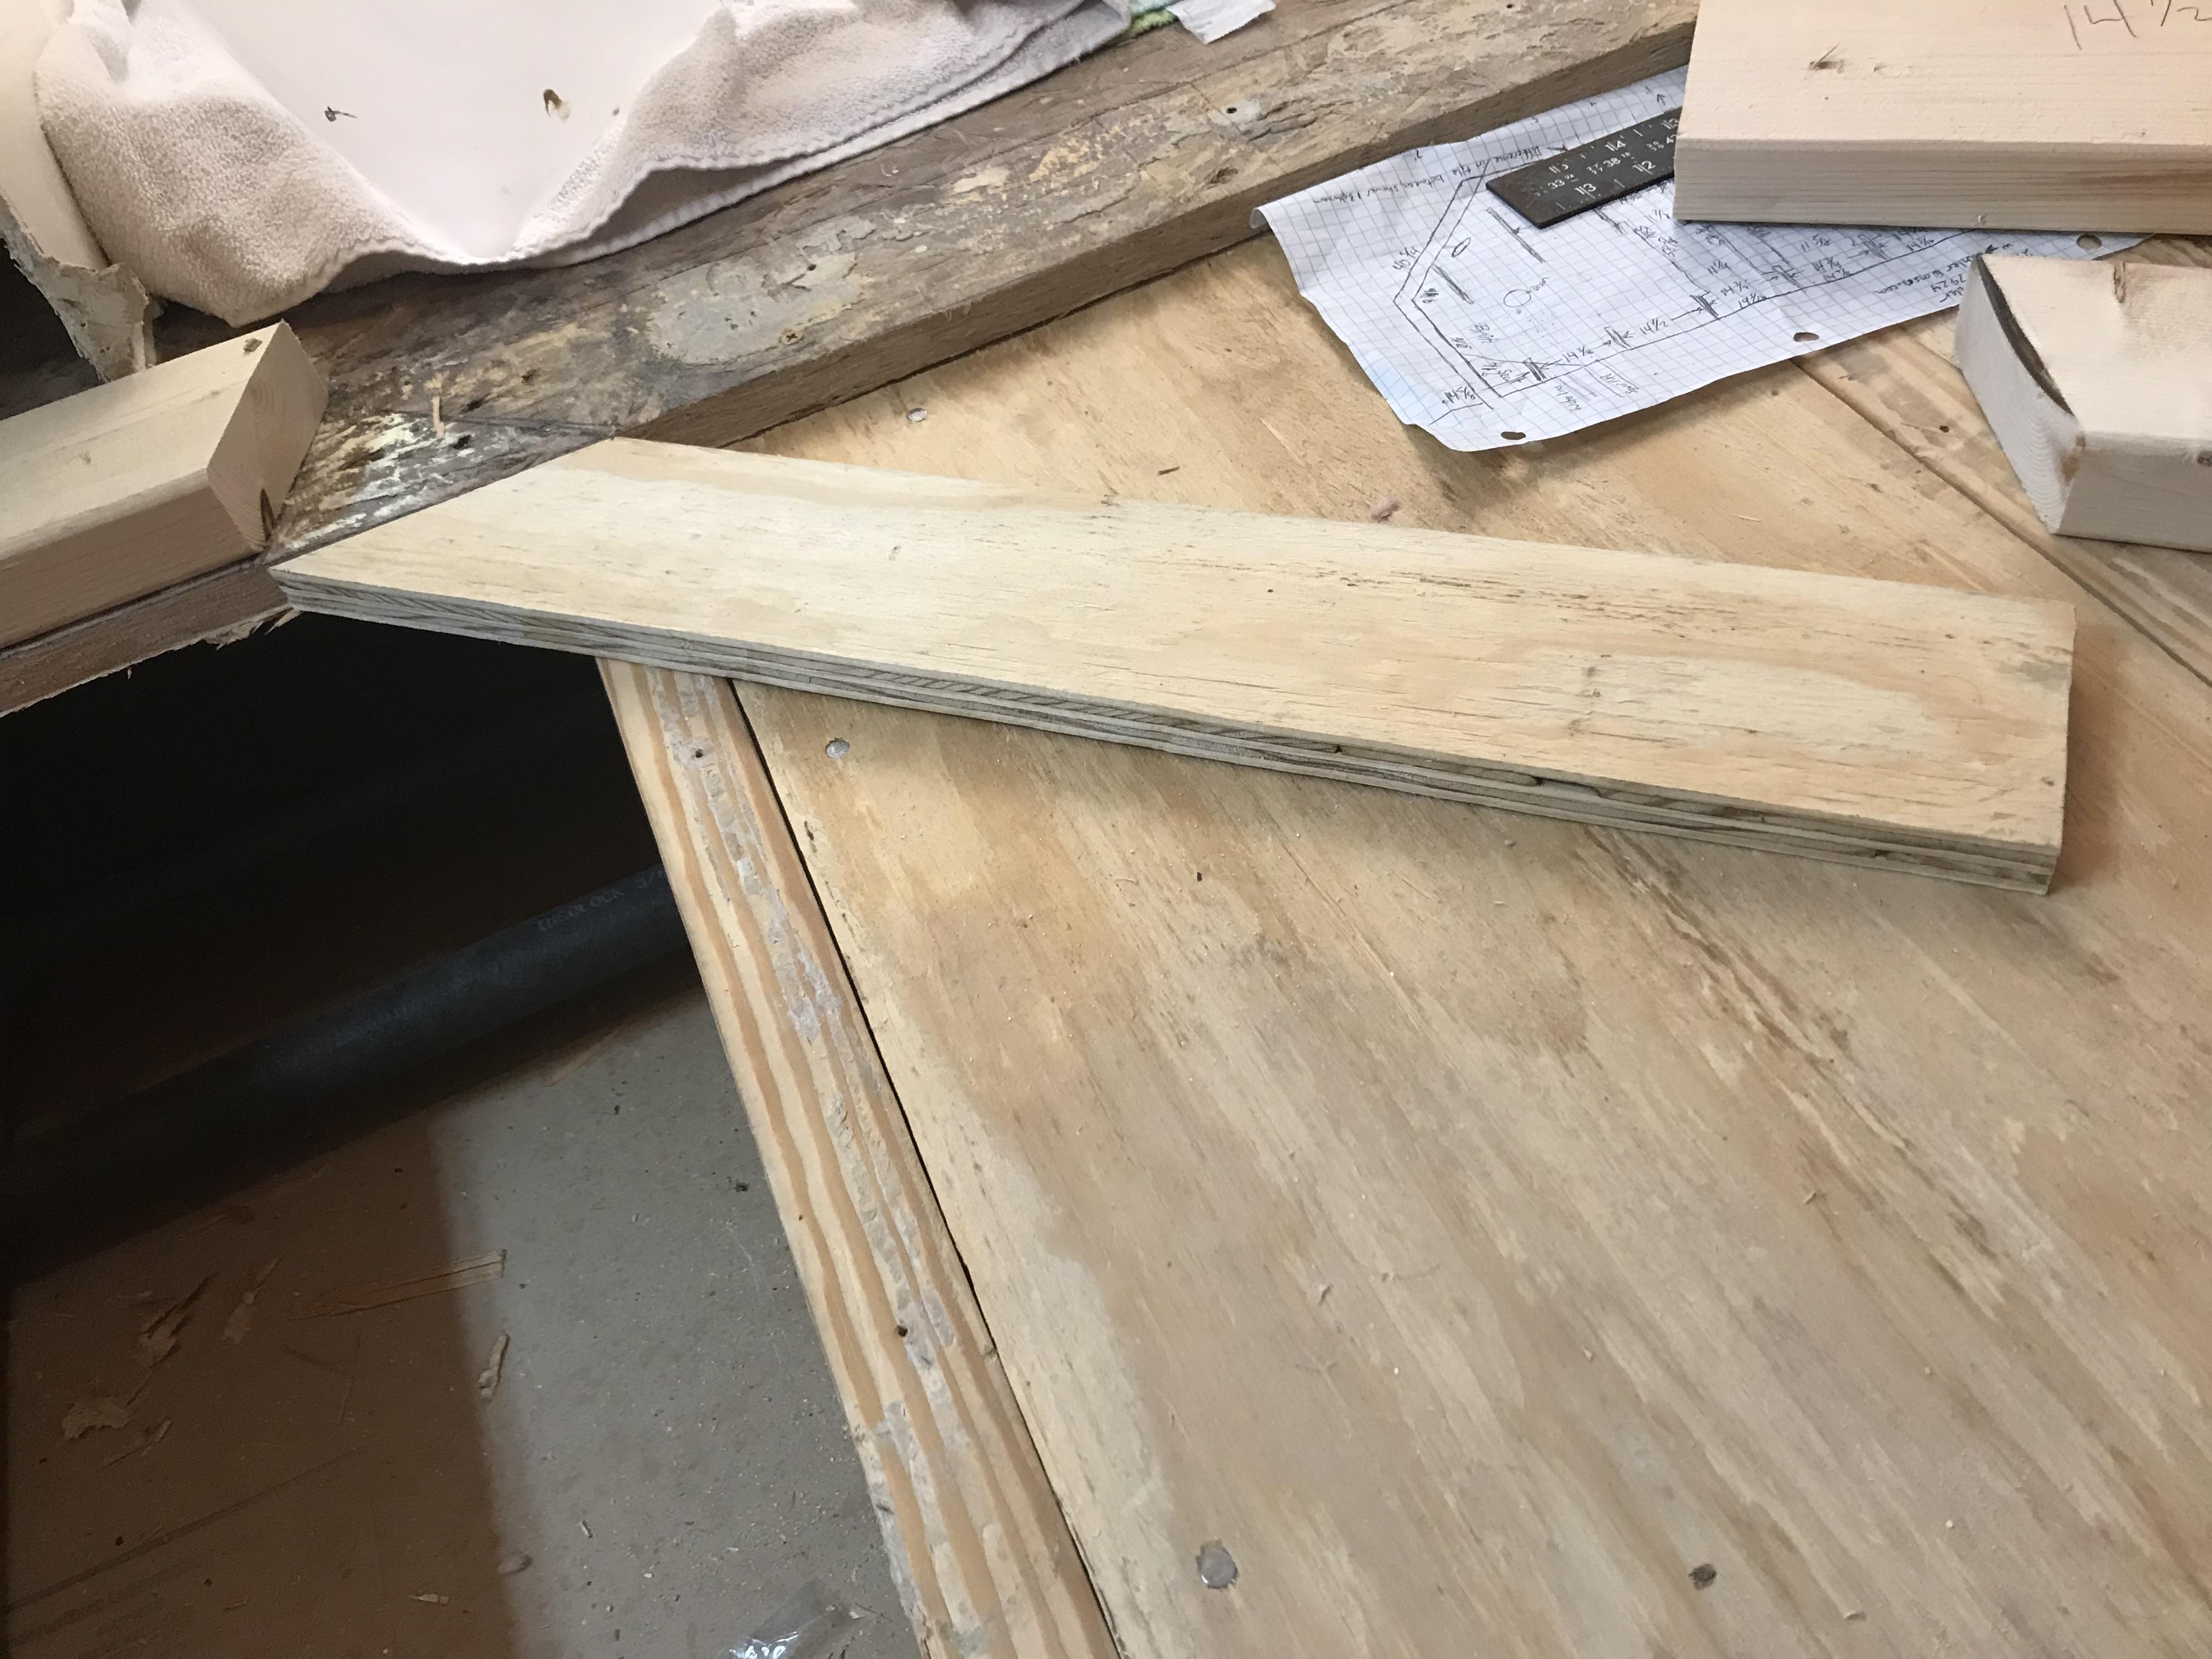
This is the spacer to make the wall frame level.
Got my WEDI Fundo Lingo shower pan last Monday. After finishing the closet wall I wanted to get the pan trimmed before framing the shower because I knew it would be easier. Just in case this might help some one else the way I went about it. I rechalked the edges of the original subfloor. I laid the pan down and pushed it into the corner. Then I stepped on it along the edge of the recessed sub floor. When I pulled it up it had a perfect line to trim. I cut it there and laid it back down, perfect. I still need to make my 1/2″ dado cut. But before I do that I’m going to make the cut around the spacer. Now to plan my next move, any suggestions?
Hey Ward
Looks like some good progress!
So if you are meeting up to a 3/4″ finished floor outside of bath
the strata mat and tile will do just that (give or take an 1/8″)
The thickness should be 1/4″ stratmat +1/4″ thinset + 3/8″ porcelain tile = 7/8″ (give or take an 1/8″ on thinset thickness)
Are you installing a large format tile (larger than 12″ x 12″) I suggest using at least a 1/4″ x 3/8″ square notched trowel and back buttering tile.
Now for the wedi pan area the the stratmat thickness, you will want to feather thinset and apply the wedi subliner to waterproof the transitition. This will result in a little bit of a steeper slope at the transition…..but that is usually a helpful thing in keep water flowing into shower
I always recommend with a curbless shower, to do all the main floor first and then the shower pan tile. This way you can build up the thinset required to get the mosaic floor tile to meet up even with the main floor tile (about impossible if you started with the shower floor)
Oops, forgot the Wedi pan pics. I was going to add that its a little nerve racking cutting into a $1000 shower pan.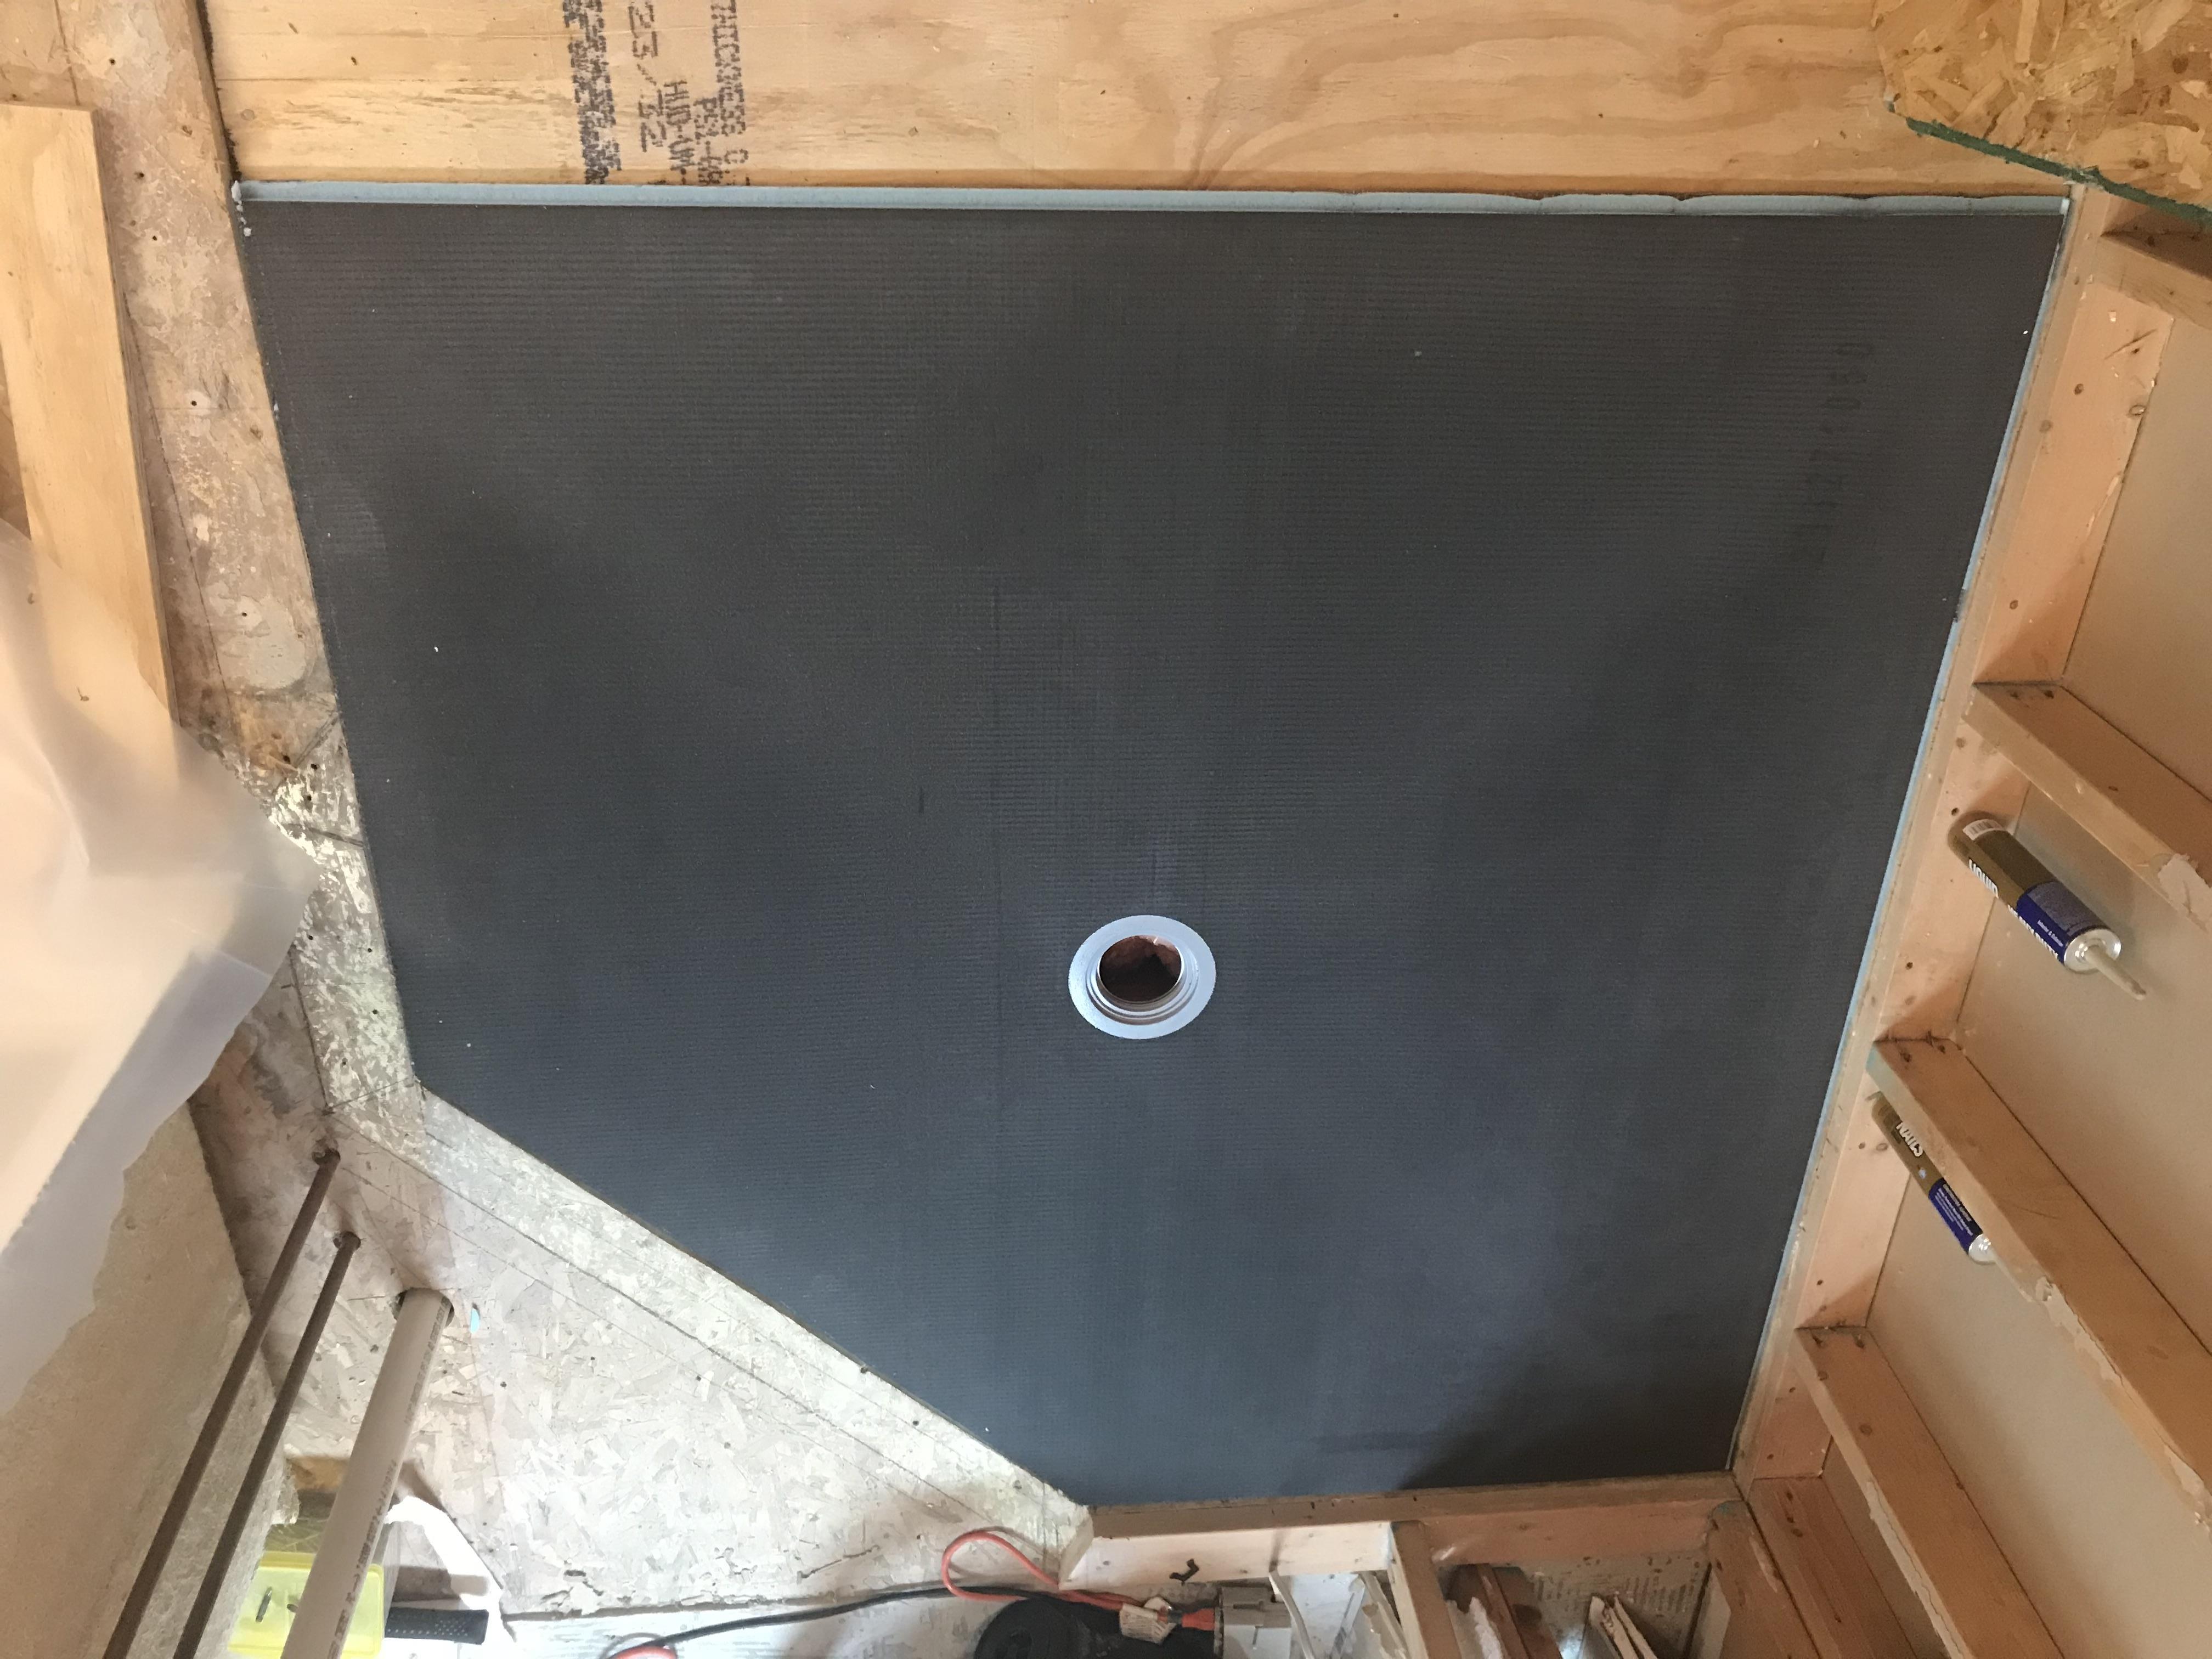
Thank you Steve for the suggestions. Do you cover the Strata mat with the Wedi cloth or do you cover backer board then put down the Strata mat?
We are using mosaic in the shower floor and 12×12 in bathroom and closet.
cool, looks good. And I hear ya….a lot of money for foam!
So are you going to fill the the rest of the shower area with 3/4″ sub flooring to get even with the rest of the subfloor?
And definitely use the subliner over the strata mat and pan.
Its nice to buy enough to overlap each portion 6″ or so
I really don’t think you will need the backer board in the rest of the bathroom. By the time you thinset that down…you will be at least 5/16″. making the overall height in bath that much higher than your 3/4″ outside flooring
Unless I’m misunderstanding the situation
thanks
steve
So are you going to fill the the rest of the shower area with 3/4″ sub flooring to get even with the rest of the subfloor?
Steve I’m sorry if I don’t understand this question. I had thought about covering the dropped subfloor with 1/4″ luan that way the transition would only be 1/4″. Would this be an option?
It looks like you have the recessed subfloor throughout the entire shower area. Are you trying to slope the rest of that area?
They do make a 1 foot wedi extension that could bring that area out
http://www.masterwholesale.com/wedi-fundo-ext2.html
But I think 60″ of shower base is enough area that very little water will extend past that. You could make sure you have your floor tile slightly sloped when installing. That is pretty easy to do if you plan to use a large tile.
Actually Ward,
Whats the area you have left there in the shower area?
Looking at your shower head location…..It might be best to slope that whole area.
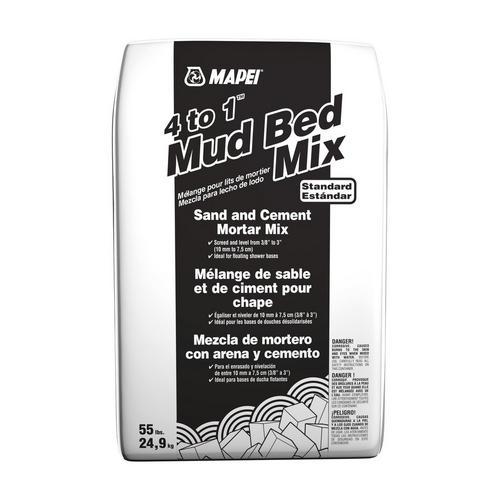
A 4-1 sand mix could be used to fill that area. Shouldn’t be too hard to screed if you go off the shower pan.
4-1 can be used from as little at 3/8″
http://www.mapei.com/public/US/products/1005573-4to1-mud-bed-mix-en.pdf
Then after that sets, you could use the wedi subliner to go over it and overlap pan.
http://www.masterwholesale.com/wedi-subliner-dry.html
And if you used the wedi extension, that would get you even closer to wall.