Stepping over curbed showers is dangerous. Who wants to get hurt while taking a shower?
We recently built a basement curbless shower and it looks awesome.
Here’s the question,
What’s the first step to building this type of shower?
Today’s tutorial has the answer. Let’s dive in!
Build Basement Curbless Showers
The first step for basement curbless showers is busting up all the concrete.
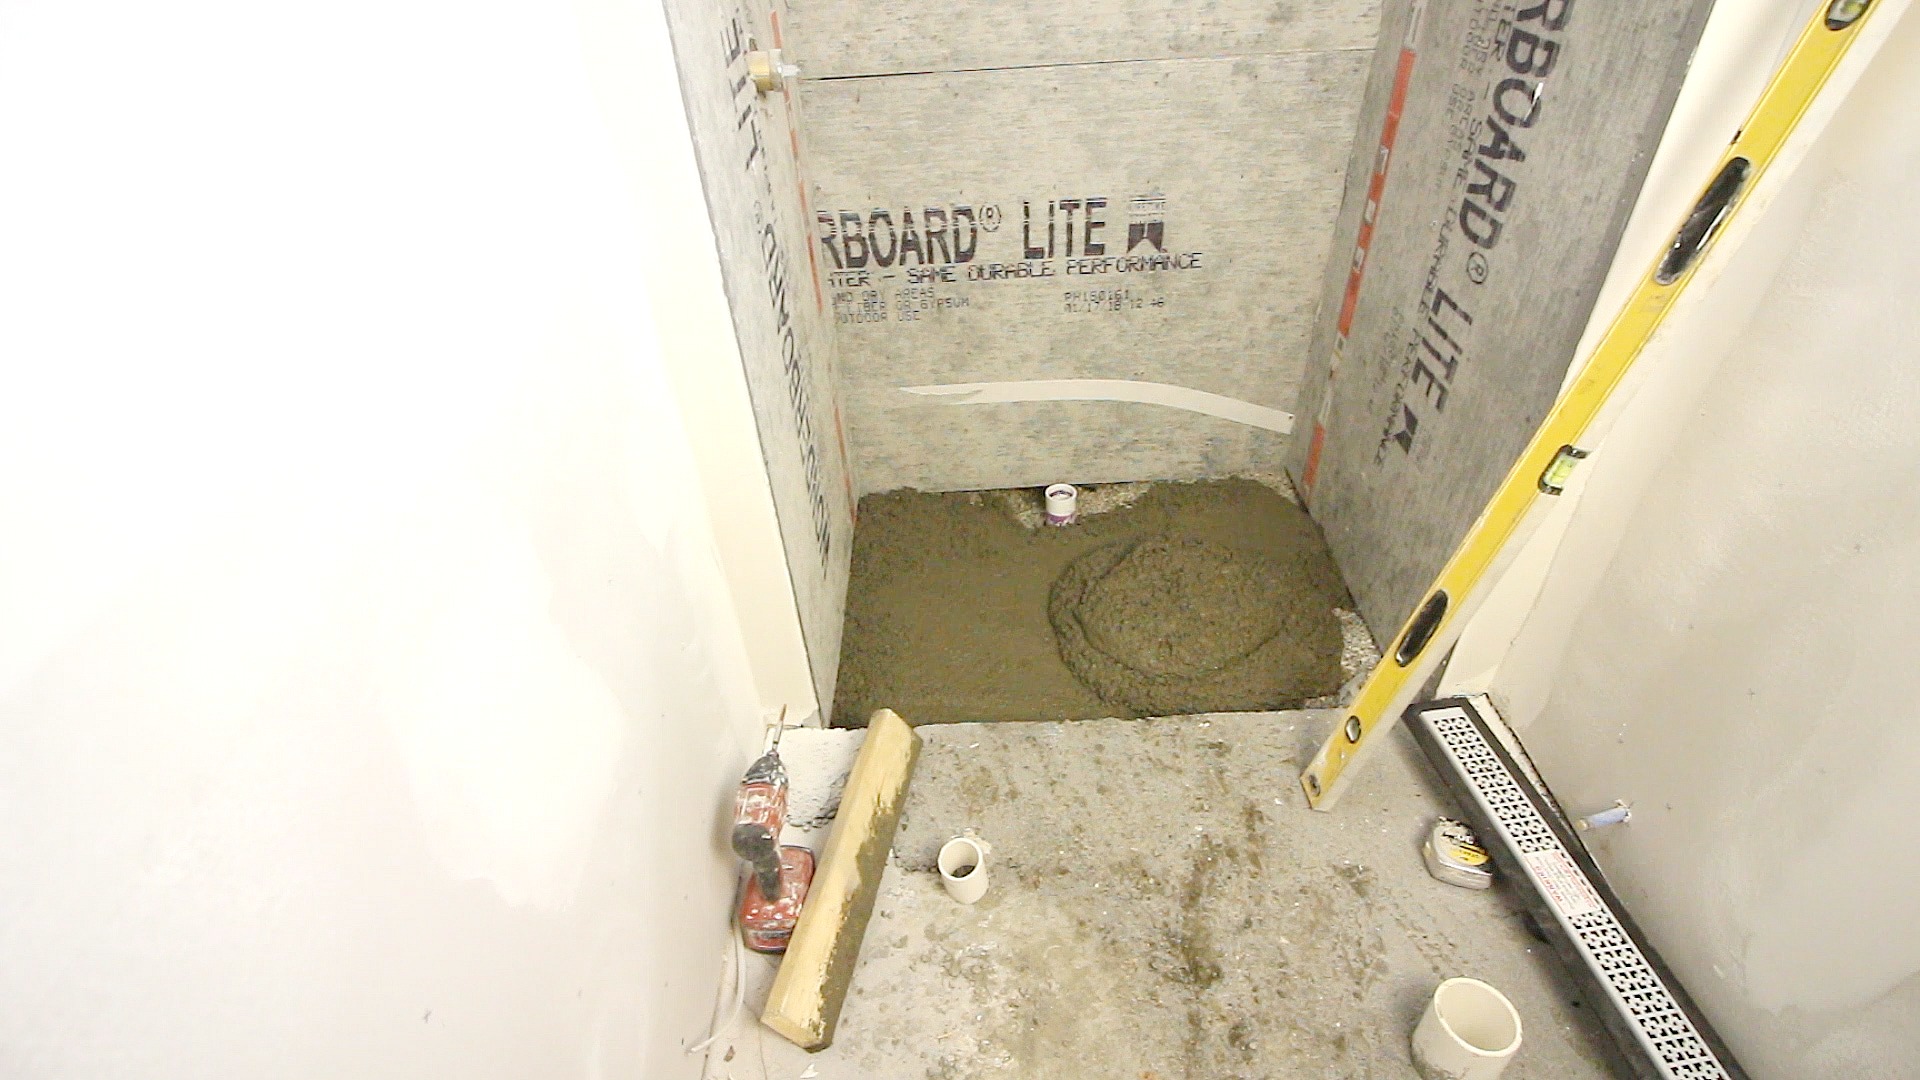
Plumbing, plastic (vapor barrier), and gravel can then be installed. This basement shower used a KBRS linear drain, which is a modern option.
Also, linear drains make it easier to screed the curbless shower (more on that in a later tutorial).
KBRS’s linear drain is two parts, the ABS drain and cover. PVC pipes can use this drain, but a special glue is required to bond ABS to PVC.
If plumbing is scary, call a plumber to run the pipes for the toilet and shower. Just be sure to position the shower pipe a few inches from the wall to some space between the drain and backer board.
The shower we built was only 30″ wide and required just 5/8″ of slope from the transition, i.e. where the shower meets the main bathroom floor.
Here’s the deal,
Showers require 1/4″ of slope per linear foot.
Keep that in mind when building the curbless shower pan.
A reinforced floor is required for basement curbless showers. So we used a high strength concrete to build the initial phase of the shower pan.
Watch this short video to see what we did
What’s Next
If you want to build a basement curbless shower, join Bathroom Repair Tutor
Our videos have tons of detail and are great for beginners. If you want to save time and do a proper job Bathroom Repair Tutor is the answer.
Thanks for reading this tutorial.
Cheers,
Jeff
Comments