Below is a list of tutorials inside Bathroom Repair Tutor’s Video Library. We’re constantly updating the Video Library and you’ll see NEW next to tutorials that have been recently added. We want to make your bathroom renovation easier and provide new tutorials to members at no additional cost.
Demo
See how to safely demo bathtubs, showers, floors and more. You’ll learn which tools make demo easier and faster.
- Where to Start a Bathroom Remodel
- Demo Tips from a Pro
- Demo Cast Iron Bathtubs
- Demo One-Piece Fiberglass Bathtubs
- Demo Large One-Piece Fiberglass Shower Insert with Tile NEW
- Demo Small One-Piece Fiberglass Shower Insert
- Demo Three-Piece Fiberglass Bathtub
- Cap Bathtub Water Supply Lines
- Full Demo Part 1: Inspection and Cabinet, Toilet, & Vanity Removal
- Full Demo Part 2: Fiberglass Neo Angle Shower Removal NEW
- Joist Repair and Subfloor Installation for Curbed Showers
- Joist Repair and Reconstruction for Curbless Showers
- Mirror Removal
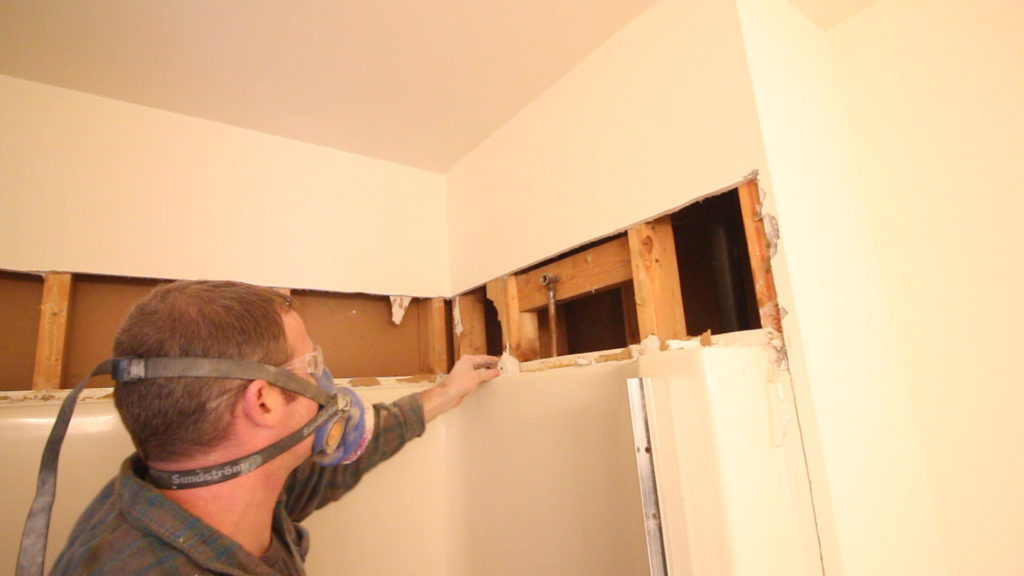
- Stud Framing Fixes for Plaster Walls and Shower Area NEW
- Vanity Shutoff Valve Removal
- Vanity Removal
- Tile Floor Removal with Circular Saw and Diamond Blade
- Tile Floor Removal with Hammer and Pry Bar
Bathtubs
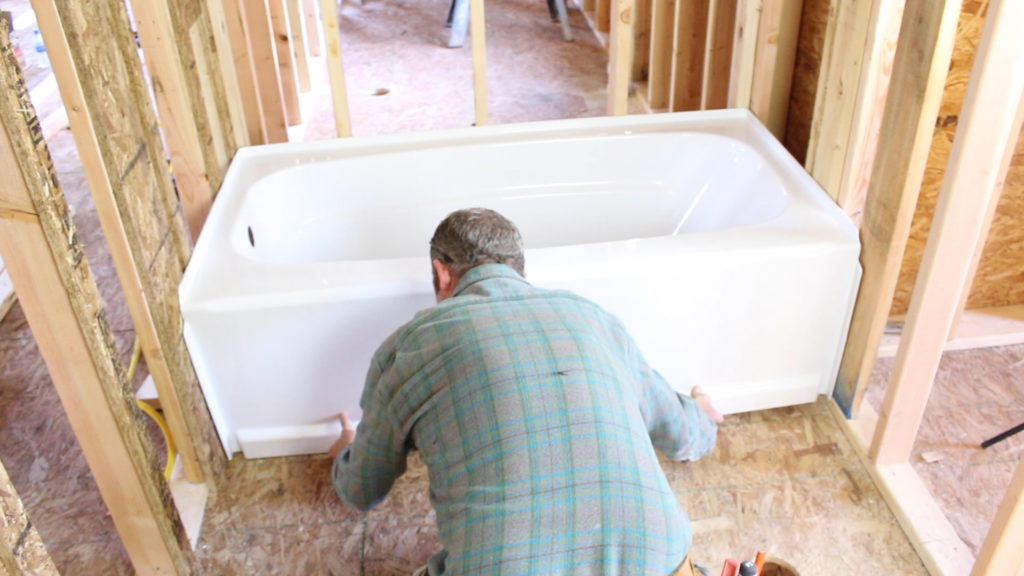
See how to install bathtubs and connect the plumbing. Learn the proper way to set tubs so they drain properly and don’t crack or leak.
- American Standard Americast Over Wood: Self-Leveling Subfloor (Part 1)
- American Standard Americast Over Wood: Bathtub Installation (Part 2)
- Bootz Steel Tub Over Wood: Dry Fitting (Part 1)
- Bootz Steel Tub Over Wood: Drain Assembly (Part 2)
- Bootz Steel Tub Over Wood: Waste Overflow Pipes (Part 3)
- Bootz Steel Tub Over Wood: P-Trap Assembly (Part 4)
- Bootz Steel Tub Over Wood: Shutoff Valves for Rough-In Valve (Part 5)
- Bootz Steel Tub Over Wood: Tub Installation Over Wood (Part 6)
- Delta Acrylic Bathtub Over Wood: Bathtub Installation (Part 1)
- Delta Acrylic Bathtub Over Wood: Tub Drain Kit Installation (Part 2)
- Jacuzzi Acrylic Bathtub (No Jets) Over Wood Floor
- Jacuzzi Acrylic Soaking Bathtub (No Jets) Over Wood Floor Part 1: Ledger Board And Framing NEW
- Jacuzzi Acrylic Soaking Bathtub (No Jets) Over Wood Floor Part 2: Tub Drain Assembly NEW
- Jacuzzi Acrylic Soaking Bathtub (No Jets) Over Wood Floor Part 3: Tub and Plumbing Installation NEW
- Kohler Acrylic Archer Bathtub Over Wood
- Kohler Acrylic Bathtub Over Concrete: Self Level Prep for Concrete Installation (Part 1)
- Kohler Acrylic Bathtub Over Concrete: Pouring Self Leveler Over Concrete (Part 2)
- Kohler Acrylic Bathtub Over Concrete: Bathtub Installation Over Concrete (Part 3)
- Moen Posi-Temp Bathtub Rough-In Valve
rough-in valves
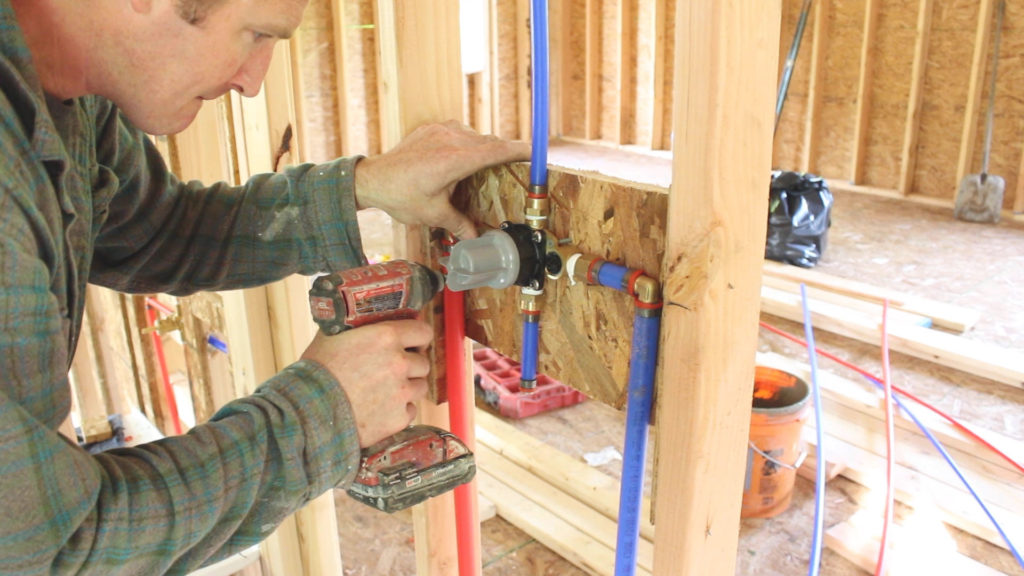
Learn how to easily install shower rough-in valves using copper and PEX. We cover code requirements, the best valves, and how to install them quickly.
- American Standard Bathtub Rough-In Valve
- Delta Bathtub Rough-In Valve Overview (Part 1)
- Delta Bathtub Rough-In Valve using SharkBite Shutoff Valves (Part 2)
- Delta Bathtub Rough-In Valve Planning (Part 3)
- Delta Bathtub Rough-In Valve Soldering (Part 4)
- Delta Bathtub Rough-In Valve Installation (Part 5)
- Delta Bathtub Rough-In Valve with PEX and Copper (Part 1)
- Delta Body Sprays (Part 1)
- Delta Body Sprays (Part 2)
- Delta Shower Rough-In Valve with Copper Pipes NEW
- Delta Shower Rough-In Valve with PEX Barbs and PEX Pipes NEW
- Delta Shower Rough-In Valve with Handheld Shower
- Delta Shower Trim Kit for Rough-In Valve and Handheld Shower NEW
- Grohe Rough-In Valve in GoBoard Shower
- Grohe Euphoria Rough-In Valve in Schluter Shower
- GrohFlex Shower Rough-In Valve in VIM Curbless Shower (Part 1)
- GrohFlex Shower Rough-In Trim Kit in VIM Curbless Shower (Part 2)
- Hansgrohe iBox Bathtub Rough-In Valve
- Hansgrohe iBox Shower Rough-In Valve (Part 1) NEW
- Hansgrohe iBox Shower Rough-In Valve (Part 1)
- Hansgrohe iBox Trim Kit and Raindance Shower Head (Part 2)
- Moen Digital U Rough-In Valve Part 1: Valve Installation NEW
- Moen Digital U Rough-In Valve Part 2: Handheld Shower Port NEW
- Moen Digital U Rough-In Valve Part 3: Digital Interface and Shower Arm NEW
- Moen Digital U Rough-In Valve Part 4: Shower Wand and Shower Head NEW
bathtub surrounds
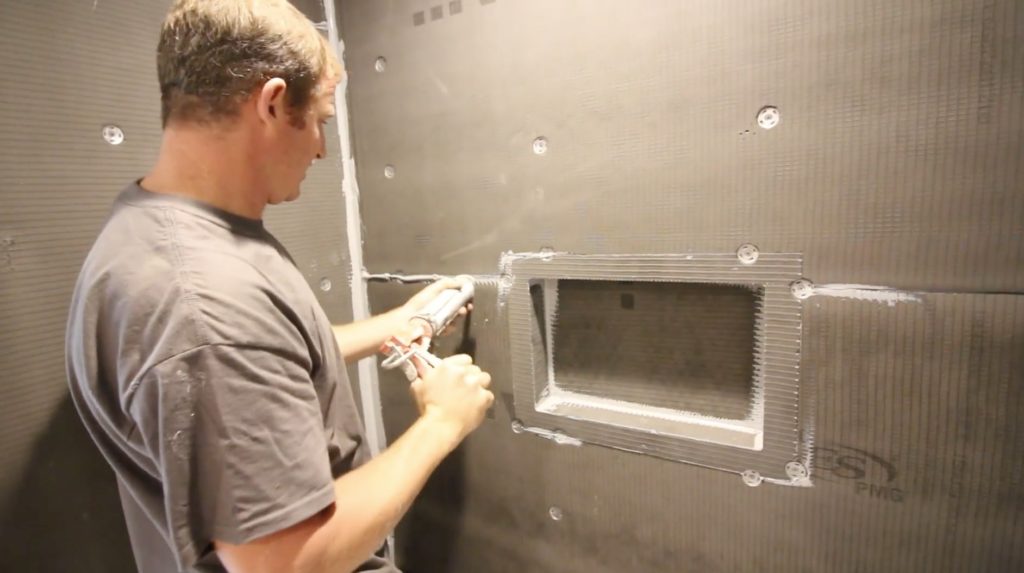
Learn how to waterproof bathtub shower walls using cement board, Hydro Ban Board, KERDI-BOARD, USG Board, and Wedi. See how to properly waterproof shower niches and how to waterproof around windows.
- Cement Board Installation on Main Wall of Bathtub
- Cement Board Installation on Side Wall of Bathtub
- Cement Board and Drywall Transition Tips
- Cement Board Installation on Plumbing Wall of Bathtub
- Waterproofing Cement Board with Ardex 8+9 in Bathtub
- Cement Board Prep for Bathtub with RedGard
- Waterproofing Cement Board with RedGard in Bathtub
- Hydro Ban Board Installation in Bathtub
- KERDI-BOARD – Cape Cod Bathtub Surround with Knee Wall
- KERDI-BOARD – Three Wall Bathtub Surround with Prefab Niche
- Planning KERDI-BOARD Tub Showers with a Window
- Adding KERDI-BOARD to Window Wall in Bathtub
- Adding KERDI-BOARD to Plumbing Wall and Custom Niche in Bathtub
- Adding KERDI-BAND to Window Wall in Bathtub
- Adding KERDI-BAND to Custom Niche in Bathtub
- Adding KERDI-BAND to Entire Shower in Bathtub
- USG Foam Board Installation with Corner Niche (Part 1): Board Installation NEW
- USG Foam Board Installation with Corner Niche (Part 2): Waterproofing Boards NEW
- Wedi Three Wall Bathtub Surround with Prefab Niche
Curbed Shower Systems
Learn how to build curbed showers using KBRS’s Tile-Basin or ShowerSlope, Schluter, and Wedi. In addition, see how to properly set shower curbs so they work properly and seal against walls.
- KBRS Curbed ShowerSlope (30″ x 60″) Part 1: How to Choose the Right System
- KBRS Curbed ShowerSlope (30″ x 60″) Part 2: Drain Assembly
- KBRS Curbed ShowerSlope (30″ x 60″) Part 3: How to Install Drain, Tray, and Curb
- KBRS Curbed ShowerSlope (30″ x 60″) Part 4: How to Install Cement Backer Board and KBRS Niche
- KBRS Curbed ShowerSlope (30″ x 60″) Part 5: How to Waterproof Cement board, Tray, and Curb
- KBRS Curbed ShowerSlope (30″ x 60″) Part 6 How to Flood Test
- KBRS Curbed ShowerSlope (30″ x 60″) Part 7: How to Fill ShowerSlope Drain Recess
- KBRS Curbed Tile-Basin (36″ x 48″) Specifications and Installation
- KBRS Curbed Neo Angle Tile-Basin Part 1: Pan Installation
- KBRS Curbed Neo Angle Tile-Basin Part 2: Waterproofing Shower Walls with GoBoard
- Mud Bed (Heated) with GoBoard Part 1: Why Clamp Style Drains Are Bad NEW
- Mud Bed (Heated) with GoBoard Part 2: Prepping Shower Drain and Plumber’s Box NEW
- Mud Bed (Heated) with GoBoard Part 3: Framing Main Shower Wall NEW
- Mud Bed (Heated) with GoBoard Part 4: Board Installation NEW
- Mud Bed (Heated) with GoBoard Part 5: Waterproofing GoBoard Seams and Screws NEW
- Mud Bed (Heated) with GoBoard Part 6: HardCurb Installation NEW
- Mud Bed (Heated) with GoBoard Part 7: Shower Pan Material Selection and Cutting Drain NEW
- Mud Bed (Heated) with GoBoard Part 8: Embedding KERDI-DRAIN in Mud Bed NEW
- Mud Bed (Heated) with GoBoard Part 9: Building the Mud Bed Pan Perimeter NEW
- Mud Bed (Heated) with GoBoard Part 10: Screeding Mud Bed Pan to KERDI-DRAIN NEW
- Mud Bed (Heated) with GoBoard Part 11: Waterproofing Shower Mud Bed NEW
- Schluter Curbed Shower (30″ x 46″) with KERDI-BOARD, Niche, and Corner Bench Part 1: Stud Framing NEW
- Schluter Curbed Shower (30″ x 46″) with KERDI-BOARD, Niche, and Corner Bench Part 2: Planning Shower Niche Location NEW
- Schluter Curbed Shower (30″ x 46″) with KERDI-BOARD, Niche, and Corner Bench Part 3: Cutting Studs and Plumbing Shower Vent NEW
- Schluter Curbed Shower (30″ x 46″) with KERDI-BOARD, Niche, and Corner Bench Part 4: Framing Shower Niche NEW
- Schluter Shower (48″ x 58″) with KERDI Membrane & Corner Bench Part 1: How to Cut Pan and Install Prefab Niche
- Schluter Shower (48″ x 58″) with KERDI Membrane & Corner Bench Part 2: How to Add Kerdi to Drywall
- Schluter Shower (48″ x 58″) with KERDI Membrane & Corner Bench Part 3: How to Add Kerdi to Shower Pan and Curb
- Schluter Shower (32″ x 47″) with Wide Roll KERDI Membrane Part 1: Drywall and KERDI Membrane Installation
- Schluter Shower (32″ x 47″) with Wide Roll KERDI Membrane Part 2: Shower Tray and Curb Installation
- Wedi Curbed Fundo Primo (36″ x 48″) Part 1: How to Cap Copper Pipes
- Wedi Curbed Fundo Primo (36″ x 48″) Part 2: Shower Bench Seat Framing and Construction
- Wedi Curbed Fundo Primo (36″ x 48″) Part 3: Shower Pan and Curb Planning
- Wedi Curbed Fundo Primo (36″ x 48″) Part 4: Cutting Wedi Fundo Primo Pan
- Wedi Curbed Fundo Primo (36″ x 48″) Part 5: Shower Pan Installation
- Wedi Curbed Fundo Primo (36″ x 48″) Part 6: How to Waterproof Shower Bench
- Wedi Curbed Fundo Primo (36″ x 48″) Part 7: How to Waterproof Shower Walls
- Wedi Curbed Fundo Primo (36″ x 48″) Part 8: How to Flood Test
Curbless Shower Systems
See how to build curbless showers using concrete, VIM, and Wedi methods. In addition, you’ll learn important steps for waterproofing the entire bathroom and making tile setting much easier.
- Basement Curbless Shower Part 1: Shaping Shower Pan with High Strength Concrete
- Basement Curbless Shower Part 2: NuHeat Wire Installation and Self-Leveling
- Basement Curbless Shower Part 3: How to Mud Basement Curbless Shower Pan
- Basement Curbless Shower Part 4: Waterproof Shower Pan and Walls with KBRS ShowerSeal
- Schluter Heated Curbless Shower Part 1: Subfloor Installation NEW
- Schluter Heated Curbless Shower Part 2: Conduit and Electrical Box for DITRA-HEAT NEW
- Schluter Heated Curbless Shower Part 3: Shower Bench Framing NEW
- Schluter Heated Curbless Shower Part 4: Stud Wall Prep for KERDI-BOARD NEW
- Schluter Heated Curbless Shower Part 5: KERDI-BOARD NEW
- Schluter Heated Curbless Shower Part 6: Tray Installation NEW
- Schluter Heated Curbless Shower Part 7: KERDI-DRAIN Installation NEW
- Schluter Heated Curbless Shower Part 8: Extending Tray with Mud Bed Mix NEW
- Schluter Heated Curbless Shower Part 9: DITRA-HEAT Mat Installation NEW
- Schluter Heated Curbless Shower Part 10: DITRA-HEAT Cable Testing and Installation NEW
- Schluter Heated Curbless Shower Part 11: Waterproofing KERDI-BOARD NEW
- Schluter Heated Curbless Shower Part 12: Waterproofing Shower Tray NEW
- Engineered Joist Framing for Curbless Showers
- Schluter Linear Curbless Shower Pans Explained
- Schluter Linear Curbless Shower Part 1: KERDI-BOARD Installation with Full-Length Niche
- Schluter Linear Curbless Shower Part 2: Pan and Drain Installation
- Schluter Linear Curbless Shower Part 3: Planning DITRA-HEAT
- Schluter Linear Curbless Shower Part 4: DITRA-HEAT Mat Installation
- Schluter Linear Curbless Shower Part 5: DITRA-HEAT Cable Installation (Main Floor)
- Schluter Linear Curbless Shower Part 6: DITRA-HEAT Cable Installation (Shower Pan)
- VIM Curbless Shower Part 1: How to Frame Subfloor and Install Pan (30″ x 60)
- VIM Curbless Shower Part 2: How to Install Hydro Ban Board on Stud Walls
- VIM Curbless Shower Part 3: How to Waterproof VIM Shower Pan and Bathroom Floor
- VIM Curbless Shower with Wedi Part 1: How to Frame Subfloor and Install Pan
- VIM Curbless Shower with Wedi Part 2: Floating Shower Pan Perimeter and Adding KERDI-BAND
- VIM Curbless Shower with Wedi Part 3: Waterproofing VIM Curbless Shower Pan (1st Coat)
- VIM Curbless Shower with Wedi Part 4: Waterproofing VIM Curbless Shower Pan (2nd Coat)
- Wedi Curbless Fundo Lingo (30″ x 60″) with Bench, Window, and Niche
- Wedi Curbless Fundo Lingo (36″ x 48″)
- Wedi Curbless Fundo Ligno (48″ x 48″) Part 1: Shower Pan and Drain Explained
- Wedi Curbless Fundo Ligno (48″ x 48″) Part 2: Shower Pan Installation
- Wedi Curbless Fundo Ligno (48″ x 48″) Part 3: Wedi Shower Shower Walls with Bench and Custom Niche
- Wedi Curbless Fundo Ligno (48″ x 48″) Part 4: Waterproofing Transition to Ditra-Heat
Tile Bathroom Floors
See how to waterproof bathrooms floors with DITRA, DITRA-HEAT, liquid membranes and more. In addition, you’ll see how to set tiles, make them flat, and properly bond them to substrates using the right tools and materials.
- Tile Floor Prep: Smooth Uneven Plywood Transitions NEW NEW
- Cement Board Installation Over Wood NEW
- Cement Board Waterproofing with USG Durock Liquid Waterproofing NEW
- Hydro Ban Waterproofing Over Concrete Floor
- DITRA on 8’x8′ Wood Subfloor Part 1: Installation
- DITRA on 8’x8 Wood Subfloor Part 2: Waterproofing
- DITRA-HEAT Roll on L-Shaped Wood Subfloor Part 1: Installation
- DITRA-HEAT Roll on L-Shaped Wood Subfloor Part 2: Wire Testing
- DITRA-HEAT Roll on L-Shaped Wood Subfloor Part 3: Wire Installation
- DITRA-HEAT Roll on L-Shaped Wood Subfloor Part 4: Touchscreen Thermostat
- DITRA-HEAT Mat on Wood Subfloor Part 1: Mat Installation NEW
- DITRA-HEAT Mat on Wood Subfloor Part 2: Wire Installation and Waterproofing NEW
- Warming Systems Heated Floor Part 1: Conduit Tips NEW
- Warming Systems Heated Floor Part 2: Overview and Guide Installation NEW
- Warming Systems Heated Floor Part 3: Wire Testing and Fishing Thru Conduit NEW
- Warming Systems Heated Floor Part 4: Running Wire Thru Guides and Shower Curb NEW
- Warming Systems Heated Floor Part 5: Priming Subfloor NEW
- Warming Systems Heated Floor Part 6: Self-Leveling NEW
- Wood Plank Tile Floor Part 1: Layout
- Wood Plank Tile Floor Part 2: Setting the First Rows
- Wood Plank Tile Floor Part 3: Completing the Tile Work
- Wood Plank Tile Floor Part 4: Removing the SeamClips
- 8″ Hexagonal Tile Bathroom Floor NEW
- 12″ x 12″ Patterned Porcelain Part 1: Setting Tile Over DITRA-HEAT NEW
- 12″ x 12″ Patterned Porcelain Part 2: Repairing Tile Over DITRA-HEAT NEW
- 12″x12″ Porcelain Tile Part 1: Layout
- 12″x12″ Porcelain Tile Part 2: Setting and Grouting the Tile
- 12″x24″ Porcelain Tile Next to VIM Curbless Shower Part 1: Planning
- 12″x24″ Porcelain Tile Next to VIM Curbless Shower Part 2: Setting the Tile
- 12″x24″ Porcelain Over DITRA-HEAT
- 12″ x 48″ Porcelain Floor Over Hydro Ban Part 1: Layout
- 12″ x 48″ Porcelain Floor Over Hydro Ban Part 2: Setting the Tile
- 18″ x 18″ Travertine Tile Over DITRA NEW
- Penny Tile Installation Over Cement Board NEW
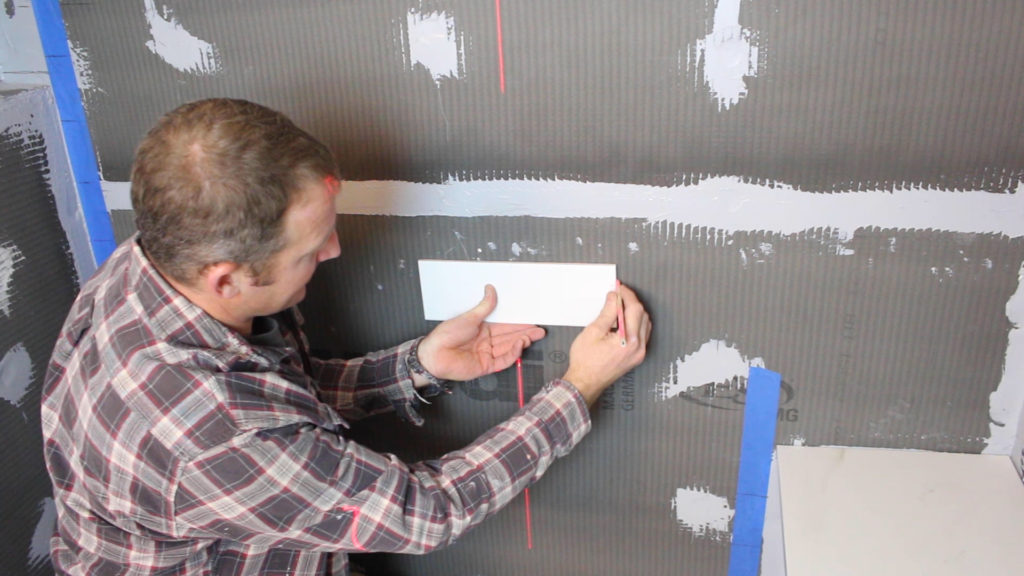
Tile Bathtub Shower Walls
Learn how to tile shower walls using 12×24 ceramic, subway tile, porcelain, glass mosaics, and more. Plus, see how to use metal profiles, tile shower niches, specialty grouts, and silicone to make your bathtub tile look professional.
- Tile Over KERDI-BOARD with Horizontal 12″x24″ Ceramic – Layout and Starting First Two Rows
- Tile Over KERDI-BOARD with Horizontal 12″x24″ Ceramic – Tiling Around Niche
- Tile Over KERDI-BOARD with Horizontal 12″x24″ Ceramic – Add Schluter Metal Profiles Around Niche
- Tile Over KERDI-BOARD with Horizontal 12″x24″ Ceramic – Finishing Main Wall and Adding Glass Mosaic Accent
- Tile Over KERDI-BOARD with Horizontal 12″x24″ Ceramic – Tiling Shower Niche with Glass Mosaic
- Tile Over KERDI-BOARD with Horizontal 12″x24″ Ceramic – Tiling the Plumbing Wall
- Tile Over KERDI-BOARD with Horizontal 12″x24″ Ceramic – Tiling the Last Wall
- Tile Over KERDI-BOARD with Horizontal 12″x24″ Ceramic – Grouting the Main Wall
- Tile Over KERDI-BOARD with Horizontal 12″x24″ Ceramic – Grouting the Side Walls
- Tile Over Hydro Ban Board with 4″x12″ Stacked Subway Tile – How to Plan Tile Layout
- Tile Over Hydro Ban Board with 4″x12″ Stacked Subway Tile – How to Tile Main Wall to Niche
- Tile Over Hydro Ban Board with 4″x12″ Stacked Subway Tile – How to Tile Shower Niche Back Wall
- Tile Over Hydro Ban Board with 4″x12″ Stacked Subway Tile – How to Tile Side Walls Into Niche Part 1
- Tile Over Hydro Ban Board with 4″x12″ Stacked Subway Tile – How to Tile Side Walls Into Niche Part 2
- Tile Over Hydro Ban Board with 4″x12″ Stacked Subway Tile – How to Tile Above the Shower Niche
- Tile Over Hydro Ban Board with 4″x12″ Stacked Subway Tile – How to Tile Side Walls Above Niche
- Tile Over Hydro Ban Board with 4″x12″ Stacked Subway Tile – How to Grout Shower Niche
- Tile Over Hydro Ban Board with 4″x12″ Stacked Subway Tile – How to Tile Grout Shower Walls
- Tile Over USG Foam Board with 6″ x 6″ Ceramic Part 1: Tub and Wainscoting Layout NEW
- Tile Over USG Foam Board with 6″ x 6″ Ceramic Part 2: Plumbing Wall, Shower Niche, and Main Wall NEW
- Tile Over USG Foam Board with 6″ x 6″ Ceramic Part 3: Accent Strip Tips and Finishing Project NEW
- Tile Over USG Foam Board with 6″ x 6″ Ceramic Part 4: Grouting Walls and Floor with Spectralock Epoxy Grout NEW
- Tile Over Wedi with 18″ x 18″ Travertine Part 1: How to Plan Layout and Set First Row NEW
- Tile Over Wedi with 18″ x 18″ Travertine Part 2: Tiling Around Niche and Completing Main Wall NEW
- Tile Over Wedi with 18″ x 18″ Travertine Part 3: Tiling Side Wall Opposite Plumbing NEW
- Tile Over Wedi with 18″ x 18″ Travertine Part 4: Tiling Plumbing Wall NEW
- Tile Over Wedi with 18″ x 18″ Travertine Part 5: Tiling Shower Niche with Mosaic and Pencil Trim NEW
Tile Shower Pans
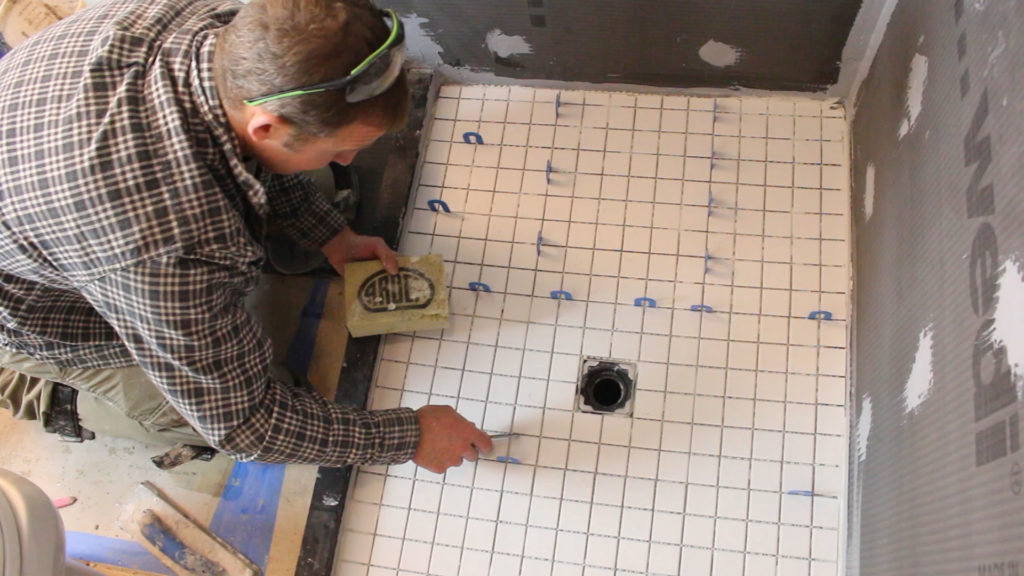
Learn how to set tile over curbed or curbless shower pans. You’ll see how to plan the layout, what tools make it easier, and how to set tile so that it won’t crack or fail.
- How to Plan a Tiled Curbless Shower
- Quick Tips for Tiling Shower Pans
- KBRS Basement Curbless Shower Pan with Porcelain Mosaic
- KBRS Neo-Angle Tile-Basin with 2″ x 2″ Tile Part 1: Dry Layout
- KBRS Neo-Angle Tile-Basin with 2″ x 2″ Tile Part 2: Setting Tile
- KBRS ShowerSlope with Hexagon Stone Tile Part 1: Planning Layout NEW
- KBRS ShowerSlope with Hexagon Stone Tile Part 2: Setting Tile NEW
- Mud Bed (Heated) with 24″ x 24″ Porcelain Part 1: How to Template with Cardboard NEW
- Mud Bed (Heated) with 24″ x 24″ Porcelain Part 2: How to Cut and Dry Fit Tiles NEW
- Mud Bed (Heated) with 24″ x 24″ Porcelain Part 3: How to Set Tiles NEW
- Schluter Curbed Shower Pan with Black Penny Mosaics NEW
- Schluter Curbed Shower Pan with Pebble Stone
- Schluter Curbless Shower Pan with Hexagon Tile NEW
- Schluter Curbless Shower Pan with Tileable Linear Drain Grate NEW
- VIM Curbless Shower Pan with Marble Leaf Mosaic Part 1: Setting VIM Curbless Shower Drain
- VIM Curbless Shower Pan with Marble Leaf Mosaic Part 2: Dry Layout NEW
- VIM Curbless Shower Pan with Marble Leaf Mosaic Part 3: Setting Mosaic
- Wedi Fundo Ligno Curbless Shower Pan with Natural Stone
- Wedi Fundo Primo Curbed Pan with 2″ x 2″ Porcelain Part 1: Dry Layout
- Wedi Fundo Primo Curbed Pan with 2″ x 2″ Porcelain Part 2: Setting Tile
Tile Walk-In Shower Walls
See how to tile shower walls using 12x24s, subway tile, porcelain, and more. Plus, learn to set mosaic accents, tile shower benches & niches, install glass corner shelves and much more.
- KBRS Curbless Basement Shower with Glass Shelves and Vertical 12″x24″ Porcelain – How to Tile Bathroom Floor with 12″x24″ Porcelain Tile
- KBRS Curbless Basement Shower with Glass Shelves and Vertical 12″x24″ Porcelain – How to Tile Curbless Shower Pan with Porcelain Mosaic
- KBRS Curbless Basement Shower with Glass Shelves and Vertical 12″x24″ Porcelain – How to Tile Main Shower Wall with Vertical 12″x24″ Porcelain and Glass Mosaic
- KBRS Curbless Basement Shower with Glass Shelves and Vertical 12″x24″ Porcelain – How to Tile Back Shower Wall with Vertical 12″x24″ Porcelain and Glass Shelf
- KBRS Curbless Basement Shower with Glass Shelves and Vertical 12″x24″ Porcelain – How to Tile Plumbing Wall with Vertical 12″x24″ Porcelain and Glass Shelf
- KBRS Curbless Basement Shower with Glass Shelves and Vertical 12″x24″ Porcelain – Grout Shower Pan and Floor with Mapei FA
- KBRS Curbless Basement Shower with Glass Shelves and Vertical 12″x24″ Porcelain – Grout Shower Walls and Floor with Mapei FA
- KBRS Curbless Basement Shower with Glass Shelves and Vertical 12″x24″ Porcelain – Caulk Shower Corners
- Schluter KERDI Shower with 8″x8″ Porcelain, 3″x6″ Herringbone and Metal Shelves Part 1 – Tile 8″x8″ Porcelain Accent Wall NEW
- Schluter KERDI Shower with 8″x8″ Porcelain, 3″x6″ Herringbone and Metal Shelves Part 2 – Herringbone Tile Layout NEW
- Schluter KERDI Shower with 8″x8″ Porcelain, 3″x6″ Herringbone and Metal Shelves Part 3 – Setting Herringbone Tile to Mid Wall Opposite Plumbing NEW
- Schluter KERDI Shower with 8″x8″ Porcelain, 3″x6″ Herringbone and Metal Shelves Part 4 – Metal Shelf and Setting Herringbone Tile to Ceiling NEW
- Schluter KERDI Shower with 8″x8″ Porcelain, 3″x6″ Herringbone and Metal Shelves Part 5 – Setting Herringbone Tile on Plumbing Wall NEW
- Schluter KERDI Shower with 8″x8″ Porcelain, 3″x6″ Herringbone and Metal Shelves Part 6 – Tiling Curb with Chair Rail and Subway Tile NEW
- Schluter KERDI Shower with 8″x8″ Porcelain, 3″x6″ Herringbone and Metal Shelves Part 7 – Grout Herringbone Tile and Curb with Mapei FA NEW
- Schluter KERDI Shower with 8″x8″ Porcelain, 3″x6″ Herringbone and Metal Shelves Part 8 – Grout Accent Wall and Pan with Mapei FA NEW
- Schluter KERDI Shower with 8″x8″ Porcelain, 3″x6″ Herringbone and Metal Shelves Part 9 – Caulking Corners, Ceiling Joint, and Metal Shelves NEW
- Schluter KERDI Shower with Vertical 12″x24″ Porcelain, Corner Niche and Shower Bench – Tile Main Shower Wall
- Schluter KERDI Shower with Vertical 12″x24″ Porcelain, Corner Niche and Shower Bench – Tile Shower Bench Wall
- Schluter KERDI Shower with Vertical 12″x24″ Porcelain, Corner Niche and Shower Bench – Tile Shower Bench
- Schluter KERDI Shower with Vertical 12″x24″ Porcelain, Corner Niche and Shower Bench – Tile Plumbing Wall
- Schluter KERDI Shower with Vertical 12″x24″ Porcelain, Corner Niche and Shower Bench – Tile Shower Curb
- Schluter KERDI Shower with Vertical 12″x24″ Porcelain, Corner Niche and Shower Bench – Grout Pebble Stone Shower Floor with Mapei FA
- Schluter KERDI Shower with Vertical 12″x24″ Porcelain, Corner Niche and Shower Bench – Grout Shower Walls with Mapei FA
- VIM Curbless Shower with Glass Shelf, 3″x6″ Subway Tile, and Window – Tools and Materials
- VIM Curbless Shower with Glass Shelf, 3″x6″ Subway Tile, and Window – Planning Tile Layout
- VIM Curbless Shower with Glass Shelf, 3″x6″ Subway Tile, and Window – Setting Subway Tile to Window
- VIM Curbless Shower with Glass Shelf, 3″x6″ Subway Tile, and Window – Setting Subway Tile Below Window and Left of Window
- VIM Curbless Shower with Glass Shelf, 3″x6″ Subway Tile, and Window – Setting Subway Right of Window and Above Window
- VIM Curbless Shower with Glass Shelf, 3″x6″ Subway Tile, and Window – Setting Subway Tile On Plumbing Wall
- VIM Curbless Shower with Glass Shelf, 3″x6″ Subway Tile, and Window – Setting Subway Tile on Last Wall with Glass Corner Shelf
- VIM Curbless Shower with Glass Shelf, 3″x6″ Subway Tile, and Window – Grout Shower Walls with Permacolor Select
- VIM Curbless Shower with Glass Shelf, 3″x6″ Subway Tile, and Window – Seal Shower Pan Marble Floor
- VIM Curbless Shower with Glass Shelf, 3″x6″ Subway Tile, and Window – Grout Curbless Shower Pan Marble Floor
- VIM Curbless Shower with Glass Shelf, 3″x6″ Subway Tile, and Window – How to Caulk Shower Walls
- Wedi Curbed Shower with Bench and 4″x12″ Subway Tile – Planning Tile Layout
- Wedi Curbed Shower with Bench and 4″x12″ Subway Tile – Tiling Main Wall
- Wedi Curbed Shower with Bench and 4″x12″ Subway Tile – Tiling Shower Bench Wall
- Wedi Curbed Shower with Bench and 4″x12″ Subway Tile – Tiling Plumbing Wall
- Wedi Curbed Shower with Bench and 4″x12″ Subway Tile – Tiling Ceiling Pencil Trim
- Wedi Curbed Shower with Bench and 4″x12″ Subway Tile – Tiling the Curb
- Wedi Curbed Shower with Bench and 4″x12″ Subway Tile – Grout Shower Pan with Spectralock Epoxy Grout
- Wedi Curbed Shower with Bench and 4″x12″ Subway Tile – Grout Shower Walls with Spectralock Epoxy Grout
- Wedi Curbed Shower with Bench and 4″x12″ Subway Tile – Caulking Ceiling and Tile Transition
- Wedi Curbed Shower with Bench and 4″x12″ Subway Tile – Caulking Corners with Silicone
- Wedi Curbless Shower with 4″x13″ Subway Tile – How to Layout and Start First Rows
- Wedi Curbless Shower with 4″x13″ Subway Tile – Tips for Tiling Around a Bench
- Wedi Curbless Shower with 4″x13″ Subway Tile – Tiling Around the Custom Niche
- Wedi Curbless Shower with 4″x13″ Subway Tile – Tiling the Shower Niche with Glass Mosaics and Marble Shelves
- Wedi Curbless Shower with 4″x13″ Subway Tile – Add a Corner Floating Glass Shelf
tile schluter curbless showers (Linear Drain)
See start to finish how to tile a Schluter curbless shower with a linear drain. Learn how to tile the pan, drain grate, full-length niche, and shower walls while getting professional results.
- Setting Hexagon Tile Over Heated Schluter Curbless Shower Pan NEW
- Setting Tile Over Tileable Linear Drain Grate NEW
- Setting Hexagon Tile Over DITRA-HEAT Bathroom Floor NEW
- Tile Wall Layout and Planning with 3″x12″ Porcelain NEW
- Setting the First Rows NEW
- Starting the Plumbing Wall NEW
- Starring the Second Side Wall NEW
- Tiling Main Wall Up to Niche NEW
- Tiling Side Walls to Niche and Rough-In Valve NEW
- Tiling Shower Niche Sill NEW
- Tiling Shower Niche Back Wall NEW
- Tiling Above Shower Niche NEW
- Setting Tile Next to DECO-SG Profile NEW
- Niche LED Light Installation NEW
- Setting Tile to Ceiling NEW
Shower Doors
Learn how to plan, template, and install custom frameless glass shower doors or sliding glass doors. See the proper way to handle these expensive installations and avoid costly mistakes.
- Frameless Glass Shower Door Installation in VIM Curbless Shower NEW
- Frameless Glass Shower Door Planning in Wedi Curbed Shower with Bench NEW
- Frameless Glass Shower Door Installation in Wedi Curbed Shower with Bench NEW
- Semi-Frameless Glass Shower Door Installation NEW