Bathroom Repair Tutor’s detailed step-by-step videos and one-on-one support make DIY bathroom remodeling a lot easier. You’ll save thousands of dollars, avoid costly mistakes, and learn tons of great tips.
Even if you’re a beginner we can help. Plus, if you have questions we’ll answer them via email or in our Private Facebook Group.
Jeff Patterson and Steve White Co-Founded Bathroom Repair Tutor in 2015 for homeowners starting a DIY Bathroom Remodel.


Steve’s been a professional bathroom remodeler in Pittsburgh for over 18 years.
We share a passion for teaching and enjoy helping homeowners become empowered by learning skills they can use forever.
We believe anyone can learn bathroom remodeling and get professional results.
Why should you follow our advice? And what makes Bathroom Repair Tutor different from YouTube?
First, we do our best to follow the rules of the TCNA (Tile Council of North America) and share techniques that will help you build a solid bathroom that’ll last a lifetime.
Second, we care. That might sound funny, but it’s true. The world needs more people who actually care about each other. We take great pride in helping our members make their homes a better place for themselves and their families.
Finally, we provide one-on-one customer support for members. Instead of searching the web for the answer you can get one from us.
We’ve made over 100 videos for Bathroom Repair Tutor. And they’re all in one spot. We’re proud of our students who’ve gotten amazing results, saved thousands of dollars and transformed their old bathrooms into amazing spaces. Check out Becky’s before and after photos!!

And Rob’s new bathroom
If you’re starting a DIY bathroom remodel you’ll love BRT!!
Check out the details below, join, and begin your journey today.
Jeff Patterson
Co-Founder, Bathroom Repair Tutor
Set a solid foundation for your remodel’s success.
The cornerstone of any successful bathroom remodel is a complete demo. You must inspect your electrical, framing, and plumbing in order to start properly. What’s the #1 thing to do before beginning…don’t learn the hard way. Get the lowdown on
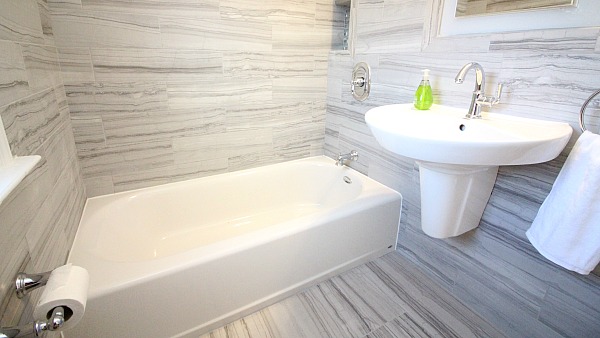
Create a relaxing bathtub experience…and one that doesn’t leak!
It’s vital that before you spend tons of money on a beautiful bathtub you know how to install it properly, by that, we mean NO leaks–so that you can have a relaxing bathing experience. Learn why it’s vital to use 100% silicone for certain fittings, see how to
Design a bathtub or shower surround that’s 100% waterproof.
Once your bathtub or shower is framed and in place, it’s time to add value by installing tiles. BUT the first step is to add building panels that can make your walls 100% waterproof. Don’t make the classic mistake of believing cement board is waterproof…it’s NOT. Learn how to
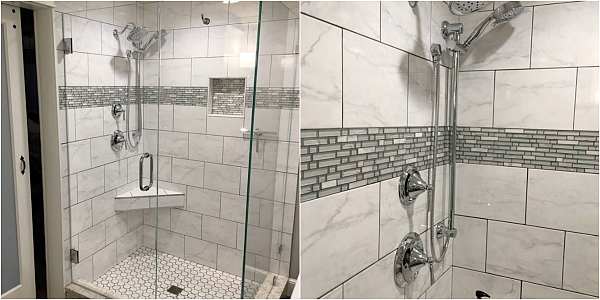
How to strategically and intelligently tile your shower.
Get the biggest WOW factor from your remodel by tiling your shower. You can do this the smart, intelligent and methodical way and follow the advice of a seasoned tile setter. There’s no better way to increase the perceived value or your remodel by having a stunning shower with beautiful tile. See how to
Create a safe, seamless, and reliable walk-in shower that will last the test of time.
The best shower in the world is useless if you can’t use it when you reach the golden years. From start to finish you’ll see every step necessary to build a lasting walk-in shower. Plus get the scoop on one of the easiest waterproofing methods out there today that allows you to tile the same day! You’ll learn how to
Perfect the process of tiling floors with trade secrets even some pros don’t know.
Timeless…tile floors have been around for centuries and there’s a good reason. See how to prevent your tile from cracking via Schluter’s DITRA then learn how to install a tile floor from beginning to end with all the juicy details included. When it comes to tiling you’ll want to understand how to plan your layout, get perfect grout joints, and have a level floor–don’t worry, we’ve got you covered and share trade secrets that are rarely seen in books. You’ll see how to
Take the guesswork out of toilet installation.
Is there anything worse than a toilet leak? Learn how to remove your old toilet without spilling a single drop of dirty water. Then replace your toilet with a shiny new one with our step-by-step tutorial. Learn how to
Add a new dimension to your remodel with amazing hardware.
The sink and vanity can make or break the first impression of your bathroom. Especially if they’re the first thing people see when they walk into your new space. Set yourself up for success by learning how to
Let your electrical inclinations shine (literally).
No doubt most homeowners are a bit apprehensive to tackle electrical in a bathroom. View these videos to see basic installation of a
Learn how to completely drywall a new bathroom.
We show you how to
Are there monthly or annual fees?
No, there are no extra monthly or annual fees.
Lifetime Memberships are a one-time payment of $249 with no monthly or annual fees.
There’s no need to cancel a Lifetime Membership as it’s yours for life.
How do I get the videos?
When you join you’ll get a username and password.
Login to Bathroom Repair Tutor from a smartphone, tablet or computer.
Watch the videos from our website on any of those devices.
Why should I buy your course? The internet has tons of great videos.
We love the internet.
But do you really know if the person you’re watching knows what they’re doing.
NO.
We have several videos with Steve White who’s a professional bathroom remodeler.
Plus, you get access to our Private Facebook Group where Steve and Jeff (The Founders of Bathroom Repair Tutor) answer questions.
You can post pictures of your bathroom project and get feedback.
I'm scared to start my bathroom renovation? Can you guide me?
We totally understand your fear and don’t want your project to snowball out of control.
So yes, we’ll be here to guide you through your remodel.
You can get in touch with us 2 different ways
Even if you just want to say hi, we’ll say hi back.
We’re nice guys!